
Have you’ve done the Foam Shaving Cream Technique? Today I have three cards made with Whisper White card stock I’ve colored using ink re-fills and foam shaving cream, then heat embossed with Clear Embossing powder for a shiny look.
What is the Foam Shaving Cream Technique?
Here is what I did:
- Add Foam Shaving cream in a layer about 1″ thick on a paper plate
- Add multiple drops of re-inker to the shaving cream in various colors in an area a little larger than your piece of card stock you plan to use (mine for this example are 2¾” x 4¼”)
- Randomly swirl together the drops with a toothpick
- Press the Whisper White paper into the shaving cream, pressing lightly
- Lift out the paper and using a plastic ruler/card scrap off the shaving cream
- Repeat steps 4 & 5 if needed to fill in any areas
- Allow card stock to dry completely before using on project
- Paper will curl slight, you may need to use more adhesive than you normally do.
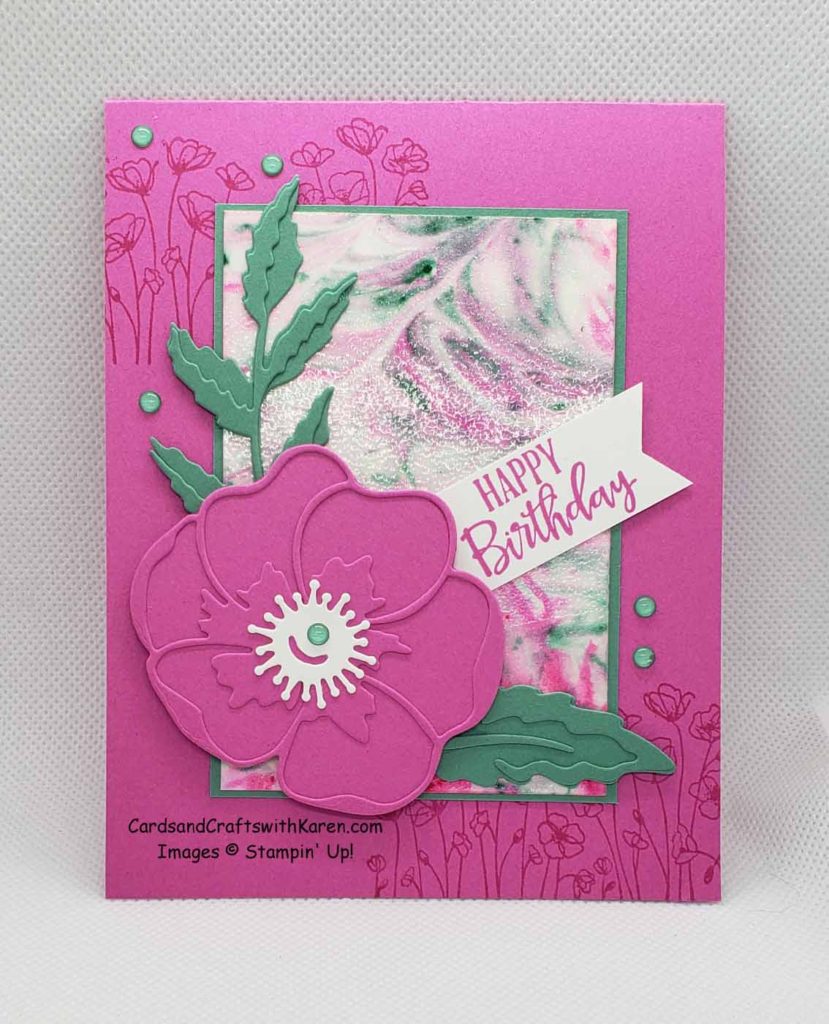
Here is the first card where I matted the card stock I’ve dipped with Just Jade card stock and adhered directly to a Magenta Madness card front with images stamped (full strength ink) in the top left/bottom right corners. 2020-2021 In-Color Enamel Dots in Just Jade finish the look.
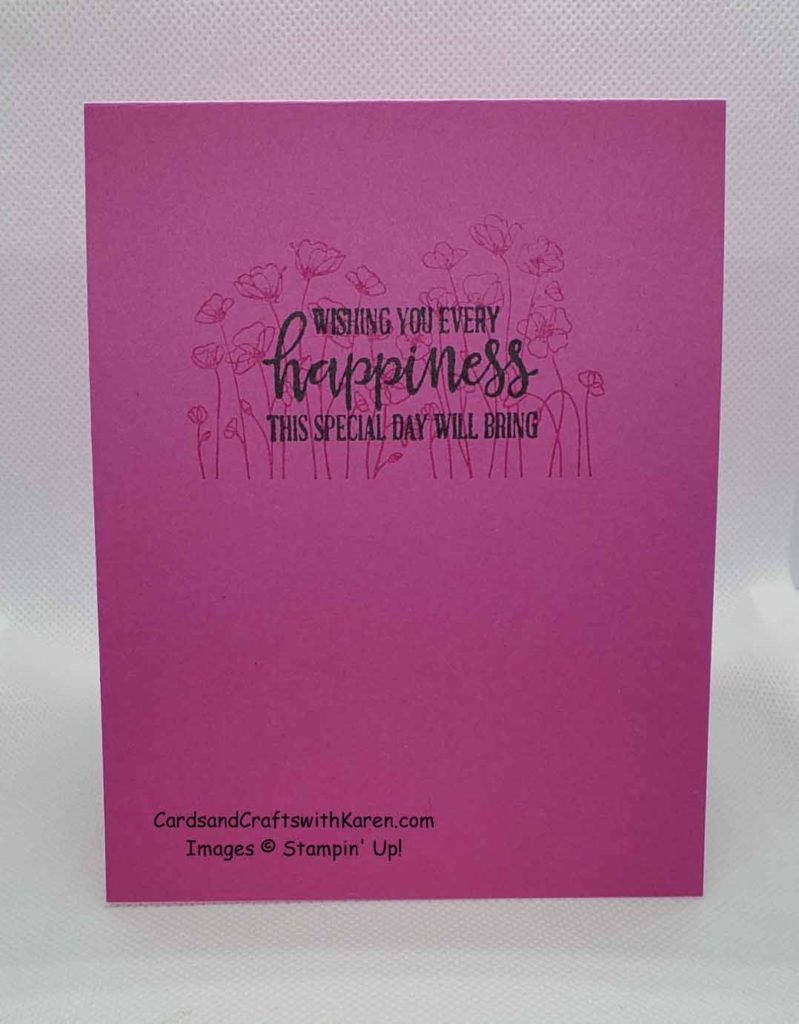
Here is the inside, were the poppy image was inked, stamped off on scrap paper – then inside the card. Sentiment in stamped with Just Jade ink to coordinate back to the front colors.
For the next two examples I started with two pieces of Whisper White card stock that were dipped – one with Seaside Spray and Misty Moonlight ink re-fills and a second were I added Rocco Rose and Bumblebee ink drops. Next the pieces were cut into strips and matted on Misty Moonlight card stock.
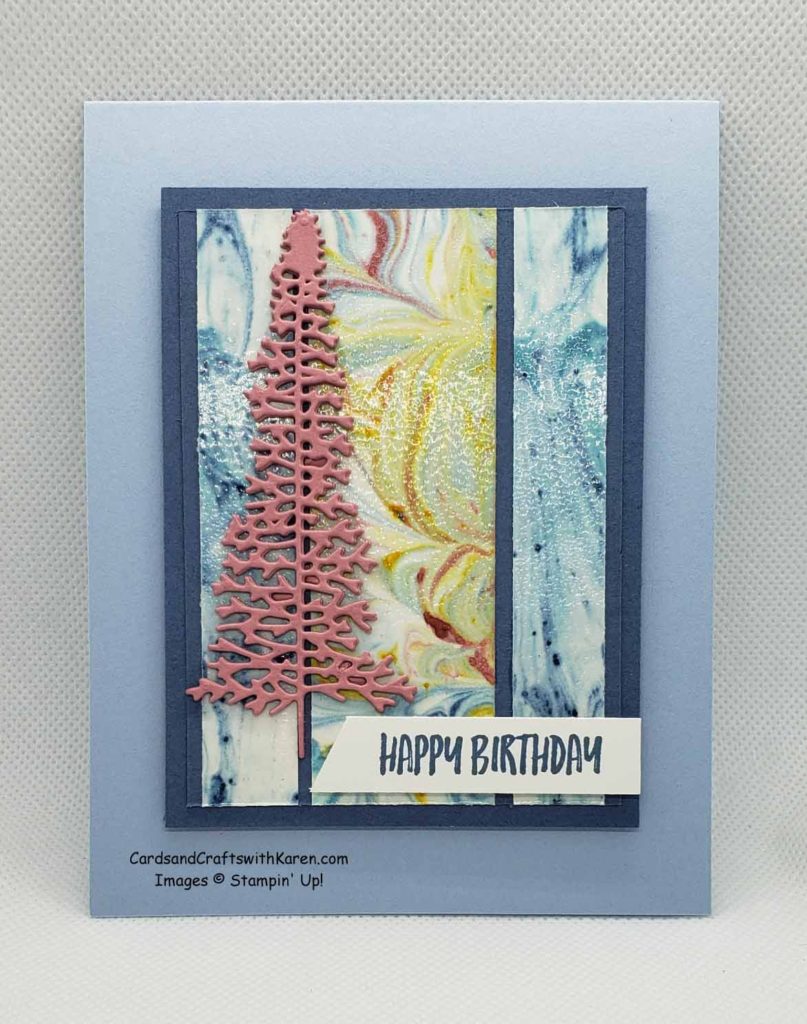
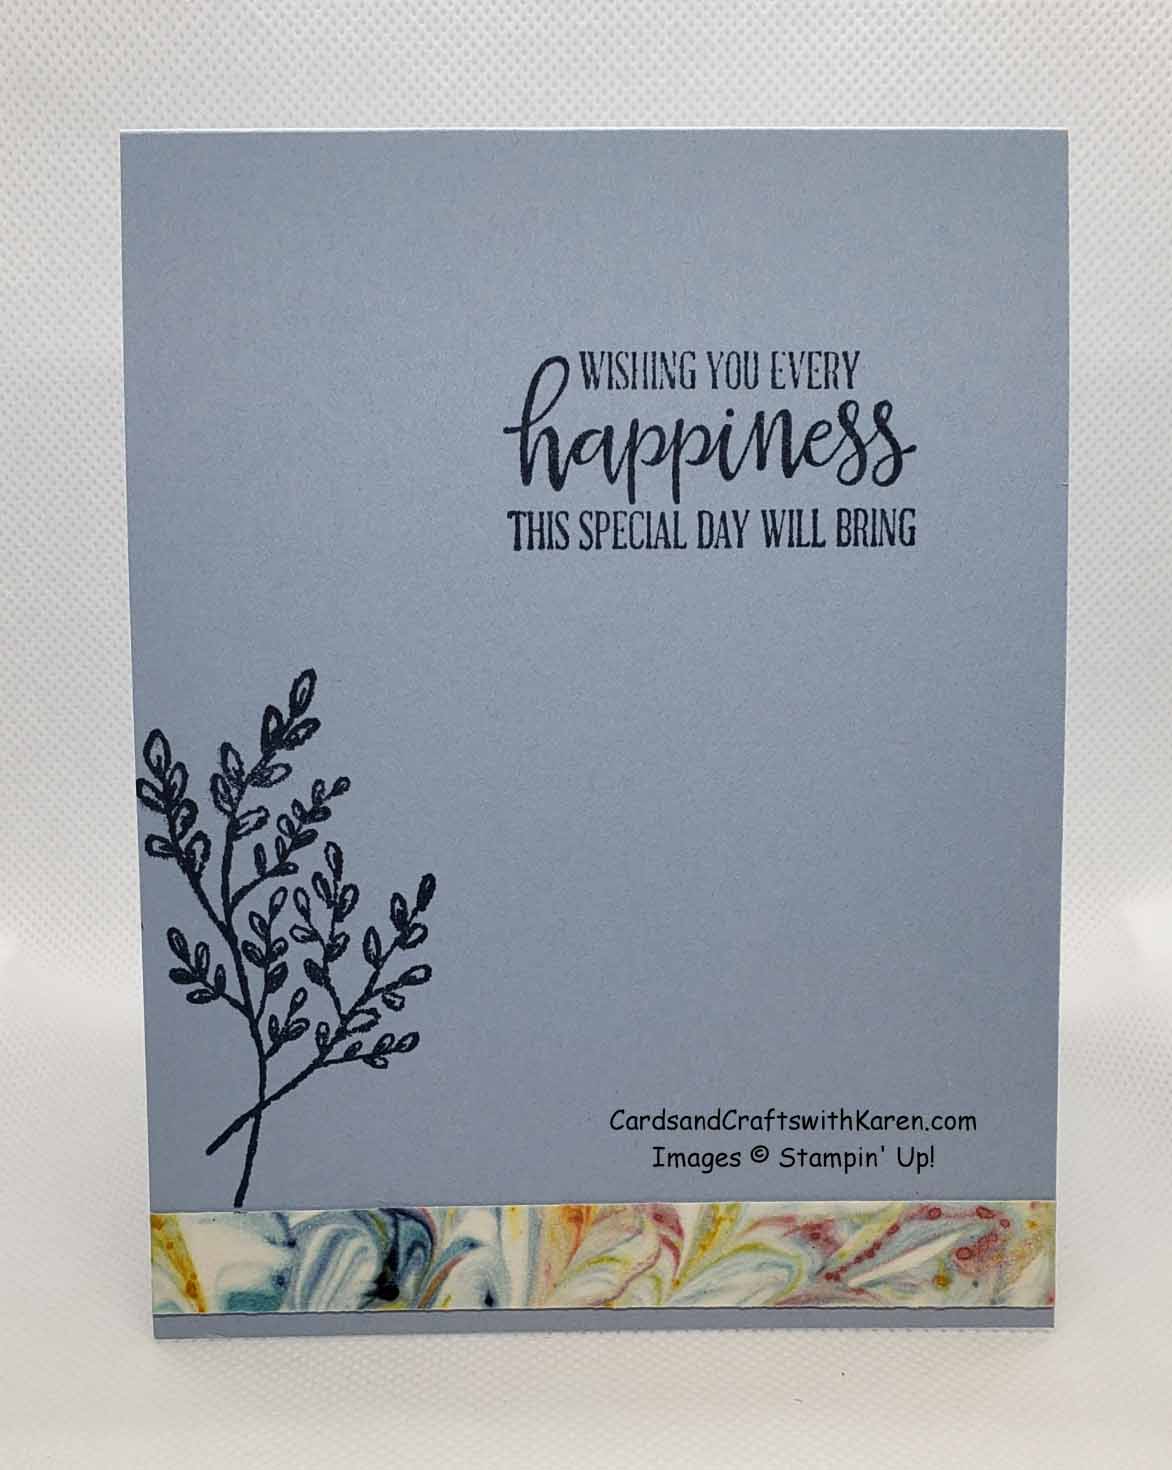
Here is my final example where I’ve used images from the Tasteful Touches stamp set for the background on the card front and inside. Sentiment from Peaceful Moments stamp set. The matted piece was adhered to the card front with Stampin’ Dimensionals, same with the sentiment.
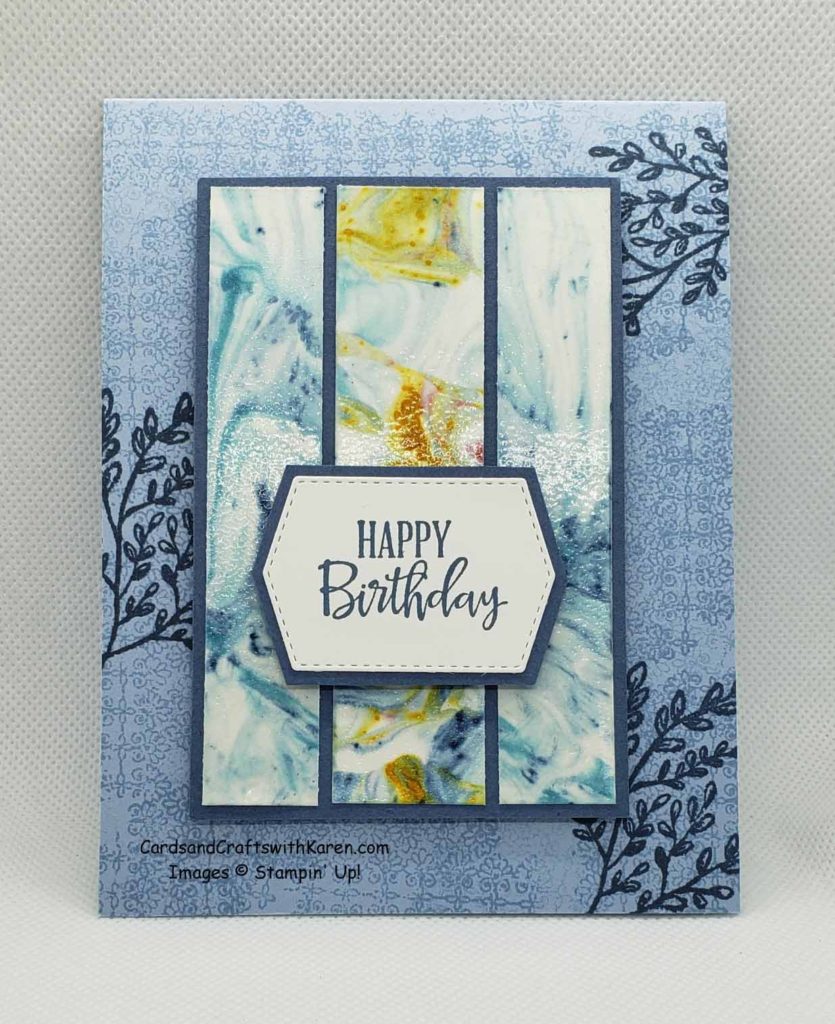
For the inside I’ve added a small strip of the colored card stock along with stamped images and a sentiment.
Thank you for taking the time to stop by today, hope this project has inspired you to try paper crafting. Have a great day – Craft On!
Follow me on Instagram @cqueen309 and on Facebook at “Cards and Crafts with Karen”.
Click on any of the images below for more product information and to order directly from my on-line store.
When shopping check demonstrator contact, then I can happily send you a re-useable thank you card. For orders is over $150, please use all of the Host Rewards you’ve earned.
Current shopping code: TCHZQZZ9
Happy Shopping!
