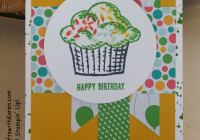
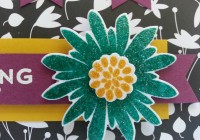
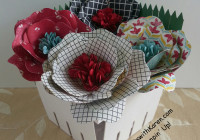
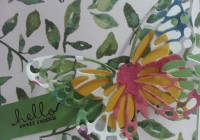
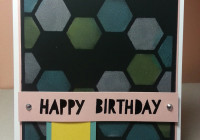
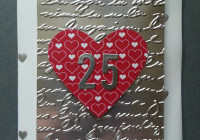
Monthly Archives: May 2015

FMS188

Welcome to the weekend, any exciting plans? Last night we met friends for a night out to listen to the band No-Bad-Ju-Ju, it was a nice mix of old and new music. While sitting there waiting for the band to start we noticed the ladies beside us and a rather large drink one of them had, it’s a special 32oz. drink called the “Tropical Lifesaver”, it’s made with Coconut Rum, Orange Vodka, Dekuyper Melon, Pineapple Juice and Sprite, you know what happened next, had to have one. Here’s a picture of Theresa and I, we enjoyed the drink and night out with friends!

Drink with Theresa at Jergels

Today’s card is for the weekly Freshly Made Sketches challenge, don’t forget to check out their blog.

FMS Final 188-001

The card starts with a base of Crumb Cake with the Hardwood stamped image on the front, heat embossed with Clear Stampin Emboss Powder for a wooden door look. The wreath is from the Christmas set Wonderous Wreath (which will be in the new catalog available June 2nd) and has a matching framelit set. The wreath is two-three step processing depending on if the berries are used (I did not use them) and easy to line up due to a tab at the top of the stamp you can use to make sure the images are stamped in the same direction. For the flowers I used the new 2015-2017 In-Color Watermelon Wonder (available June 2nd) and highlighted the centers with rhinestones. Finished the card off with Happy Birthday from Endless Birthday Wishes and a rhinestone dotting the i.

Freshly made large

Thank you for stopping by, hope you enjoyed the card. For more information on any of the products and to place an order, click on any of the images below. Have a great day, Craft On!

Built for Free Using: My Stampin Blog

MOJO399

Don’t know about you, but I surely had my days mixed up this week, thinking Wednesday was Tuesday and Thursday was Wednesday – guess these short work weeks have a tendency to do that to you. One think I know for sure is that today is Friday, woohoo !!! After work we are meeting friends for happy hour – I can hear that bourbon & coke calling my name….

Today’s card is for the Mojo Monday challenge, a tall & skinny card designed by Julee Tilman. Please make sure to check out their blog.

zzMojo399

For my card, I started with a base of Whisper White, 3.5″ wide x 11″ long, folded at 5.5″. The background is stamped in Cucumber Crush using a stamp from Gorgeous Grunge (who would of thought these stamps have so many uses, it’s a must have stamp set). Next is a mat of Crushed Curry with paper from the Cherry On Top Designer Series Paper Stack with image and greeting both from the Sprinkles of Life stamp set available June 2nd. Dazzling Details adds sparkle to the cupcake icing.

MojoMOnday large

Thank you for stopping by, hope you enjoyed the card. For more detailed product information or to place an on-line order, click on any of the images below. Have a great day, Craft On!

Built for Free Using: My Stampin Blog

Congratulations Erika!

Todays card is one I completed for the Splitcoast Stampin Up Creative Crew project for June 2015 – Holiday Focus – June is the time for graduations and Father’s Day, make a fun fold card that is for a grad or dad in your life.

For my choice, I picked a ‘Building Block’ card made for my cousin Shari to give her daughter Erika for her graduation from Wittenberg University. Here is a picture of Shari & Erika. It’s been a whirl wind of excitement for Erika, within a few weeks, she graduated, bought a car, puppy, accepted and left for a new job in Tennessee. I wish her all the best!

11112772_10207083557195864_1517978038628760134_n

Shari saw a card I pinned on Pinterest and asked if I could make something like that for Erika, so of course I said YES. After she saw the finished card, I ended up making a few more for fellow graduates and even a couple to use as invitations. The president of the university, loved it, see below. Sometime we just must brag a little.

11262487_10207107387311602_7123880858340967011_n (2)

To go with the card, I used the envelope punch board and retired SAB Irresistibly Yours Specialty Designer Series Paper for a box style envelope. The card front panel looks like a gown, with cap including tassel and diploma. I used embroidery floss for the tassel & to wrap the diploma. Inside of  the card the “blocks” have layered squares (1¼” & 1″) with WITT die cut from the Stampin Up Little Letters Thinlits and the 2015 is from Simple Numbers Dies by Simon Says Stamps. The congratulations on the front is from the stamp set Guy Greetings and the ‘So Proud of You’ is from Crazy about You stamp set. I prefer Photopolymer stamps so that I can see exactly were I am stamping.

WITT Card

Thank you for stopping by, hope you enjoyed the card. For more product information, click on any of the images below. Have a great day, Craft On!

Built for Free Using: My Stampin Blog

CYCI#71- Retiring In-Colors

Did you survive the Memorial weekend? Hope you had a great time know matter what you did. Here the weather started in the low 70’s on Saturday and by Monday ended up with temperatures in the mid 80’s with in/out sun and some humidity. The weather combination Monday was perfect to take that first dip in the pool. The water was rather chilly, or shall I say down right cold, but once you go use to it, it felt rather nice. I managed to stay in about an hour. This made by husband happy since he made a point to have it ready for me!  ♥

Today’s post is for the CanYouCaseIt weekly challenge. This week is a Color Challenge, saying goodbye to the retiring In-Colors, with some gold included.  I would like to say thank you to CanYouCaseIt Design Team Member Audrey for choosing my basket of flowers as her pick last week. You can see that post by clicking here. Don’t forget to check out the blog as well.

CYCI71-300x230

For my card I choose to go old & new.  I could not decide what two In-Colors to use, so I used all five. For the new, I used the stamp set ‘You’ve Got This’, from the demonstrators catalog preorder, for the image and Teeny Tiny Wishes for the sentiment – Happy Retirement, since we are saying goodbye.  For the background of the card I used with swoosh from Work of Art and stamped the colors exact as the order above, left to right – top to bottom. The image was stamped with Versamark and embossed with Gold Stampin Emboss Powder, as was the sentiment. The card base is Whisper White with a piece of gold foil sheet cut and adhered to the front. All pieces are glued together.

Can you case it card #71


Thank you for stopping by, hope you enjoyed the card. Craft On!

Built for Free Using: My Stampin Blog

Memorial Day 2015

Happy Memorial Day 2015!
In memory of many, in honor of all.
thank you to those who gave all, so that we can have all.
God bless the U.S.A.

Memorial day card

Made with the new Sprinkles of Life Photopolymer stamp set with matching Tree Builder punch available June 2nd.

Sprinkles of Life is the new Ronald McDonald House Charities stamp set this year of which $3 of every stamp set sold is donated to RMHC.

Thank you for stopping by, have a great day,  Craft On!

Built for Free Using: My Stampin Blog

Happy Birthday Jake

Happy Birthday to my favorite nephew Jake, he turns 17 today!  I stayed up late Friday night until just after midnight so that I could send him a Happy Birthday text!

Here is a picture of Jake, rather handsome devil, isn’t he. He seems to be taller each time I see him. I hear he now wears size 12 shoes and is about 6′ tall. Next week he will be taking his driving test, cross your fingers he passes. That will surely make life easier for my brother & sister-in-law as they will have someone to run errands for them and take his sister places, just like I did for baby brother!  Funny how I can just see Jake’s face turning fifty shades of red as his sister Maya shows him this post.

Jake for birthday blog May 23

Here is a picture of the present and card I sent him this week.

Jake with bows

Both the idea for the card and gift are from posts by fellow demonstrator Dawn Griffith. While Dawn’s can was nicely decorated, my husband said I should not decorate it and let Jake think we sent a can of pineapples. To open the can you use one of the ‘safety openers’ where the edges don’t end up being sharp to open the bottom (not the pop top side), empty and clean the can well, fill with treats (or birthday money), glue the bottom back on, then decorate.

Here is a close up of the inside of the card, Dawn called it a ‘Double Gate Fold Double Peek-a-Boo Card’.

Jake birthday card inside

Thank you for stopping by today, hope you liked the card. Have a great day, Craft On!


PCCCS145

Ready for the weekend, I know I sure am. Unfortunately the weather will not be warm enough for swimming, but we will be grilling out and having some homemade macaroni salad, hamburgers, hot dogs and ribs and hanging out with some friends. A great way to spend the weekend.

Today’s post is for this week’s Paper Craft Crew Card Sketch challenge.

PCCCS106-160-014-300x300

For my design, I used the retiring Lullaby Designer Series Paper on the card and to make a coordinating envelope for my 5″ x 5″ card. The card base is Whisper White. First I started with a mat of Pistachio Pudding the complete size I needed for the front of the card and adhered designer paper to roughly the bottom third, but only on the bottom and sides. Next, I die cut the circle & rectangle, embossed the rectangle of Hello Honey with the Strips Textured Embossing Folder and tucked them in behind the designer paper. Wrapped a ribbon around and adhered the sentiment from the Something to Say stamp set. Inside the card is the other half of the sentiment – ‘for your cute little someone’ and a few hearts. The upper right of the rectangle has a little banner and star, popped with a dimensional. The bow, sequins and pearls finish off the card. Great to use for a baby shower or new baby gift.

PCCCS 145 large edit

Thank you for stopping  by hope you enjoyed the card. For more detailed product information or to place an on-line order, click on any of the images below. Have a great day, Craft On!

Built for Free Using: My Stampin Blog

MOJO398

Well it’s over the hump day, only two more days until the weekend. Anything special planned? The weather here has taken a turn, it’s much cooler than the humid days earlier in the week. They say the beginning of the weekend should be in the 70’s and sunny, with rain Sunday night. Doesn’t sound to bad to me, just maybe not pool weather. I’m hoping for clear skies and cool evening temperatures so that I might sleep out in the sun porch and watch the stars in the sky as I fall asleep. Keep your fingers crossed.

Today I have a card for this week’s Mojo Monday sketch . . .

Mojo398

I’ve been going through my stash of designer series paper and decided that sheets of the ‘Back to Black’ paper would make a great background and envelope for my card. Next a decided on the accent colors of Crushed Curry and Rich Razzleberry, I knew I needed a third color and liked the way the Bermuda Bay looked embossed with Iridescent Ice Stampin’ Emboss Powder. To get the desired look for my card,  I first stamped the image, dabbed on Versamark Ink directly using the stamp pad, sprinkled with the emboss powder, heat set – – then die cut (easier than die cut then heat emboss – especially for the fingers). All the flowers and sentiment are from the Flower Patch Photopolymer Stamp Set that has matching Flower Fair Framelits. This can be purchased separately or as a bundle at a 15% savings. Both the Bermuda Bay & Crushed Curry images are stamped then embossed.

Here is the card with matching envelope, ready for that special someone’s birthday!


MOJO398 card and envelope

Thank you for stopping by today, hope you liked my card for the MOJO Monday sketch challenge. For more detailed product information or to place an order, click on any of the images below. Have a great day, Craft On!

Built for Free Using: My Stampin Blog


CYCI#70 = May Flowers!

Happy Monday, hope you had a nice weekend!

Today’s post is for the “canyoucaseit” weekly challenge. It’s a Designer’s Choice Challenge – “May Flowers – Edition”. Check out the blog for other projects by clicking here.  The minute I saw what the challenge was for I knew I wanted to make a basket of flowers.

CYCI70-300x217

To get started I used the Berry Basket Bigz L Die and Coaster Board to create a basket to put flowers in. Used the Handheld Stapler to put the basket together.  Next came making the four flowers using the Bouquet Bigz L Die and Flashback Designer Series Paper. The inside of the flowers are 6 center rolled up and hot glued in the center.


Flower box bigger


Stampin Up video below shows you how to make the flowers with the die.

mqdefault

Thank you for stopping by today, hope you liked my project. For more detailed product information or to place an order click on any of the images below.  Have a great day, Craft On!

Built for Free Using: My Stampin Blog

FMS186

Well the weekend is finally here. I sure had hoped to sleep a little longer this morning, after getting to bed at 2:30am,  but the boys (Bandit & Baron) had other plans. So while I sit here having my first cup of coffee thought it was the perfect time to write and post a blog entry. You may be asking, why did you get to bed so late, well let me tell you. Last night my husband and I went to the Darius Rucker concert. You may be familiar with Darius as a member of the band Hootie & the Blowfish. Here is a photo of Darius from the concert. I just love his voice!

dr1


Today’s card is for the Freshly Made Sketches card challenge. Check their blog out by clicking here.

FMS Final 186-001

To make my card, I started with a piece of Painted Petals Designer Series Paper (DSP) matted on a piece of Wild Wasabi cardstock.  Next using the Butterflies Thinlits, I die cut a small one with a piece of Crushed Curry card stock and a middle size one out of the same designer series paper. Taking the DSP Butterfly, I patted half the butterfly with Versamark ink, poured Clear Stampin Emboss Powder over and heat set and repeated two more times then changed sides.  With the butterflies matted with cut dimensionals between. Next, once I had the sentiment picked, took the banner (cut longer than the card) placed it on the matted DSP piece, deciding were the butterflies would lie and stamped the sentiment with Blackberry Bliss on the banner. I adhered the banner, cut off the ends that were over hanging and adhered the piece to the card based. Finished by adding the butterflies with dimensionals.


FMS186 large

Thank you for stopping by, hope you liked the card. For more detailed product information or to place an on-line order, click any of the images below. Have a great day, Craft On!

Built for Free Using: My Stampin Blog


CYCI#69

So how’s your week going?  Today my husband is opening our above ground pool. We are switching the type of chorine we use  and the pool guy says it can take about a week, sure hope its good to go by Memorial Day and that the weather cooperates. Nothing better than swimming and cook-outs for the holiday!

Today’s card is for the CanYouCaseIt weekly challenge, you can check out their blog by clicking here:

CYCI69-232x300

For my card, I decided to use both Chalkboard paper and Ink, items from the Occasions catalog.  I started with a Hexagon Hive Die Cut image and used Washi tape to adhere to a piece of Chalkboard paper. Next, using a sponge dauber I colored in all the open spaces with the different colors of chalk ink. Once done, peeled off the die, let the paper dry and cut to size. The chalkboard paper is matted on Blushing Bride on a Whisper White card base. The banners are Lost Lagoon & Daffodil Delight. Sentiment is from Age Awareness (a photopolymer stamp set), for easy placement and black heat embossed.  Rhinestone embellishments add the bling!   Only hard part of a Chalkboard card is getting a good photo.

cyci69 card

Thank you for stopping by today, hope you enjoyed the card. Click on any of the images below for more detailed product information or to place an on-line order. Have a great day, Craft On!

Built for Free Using: My Stampin Blog

Happy 25th Anniversary Mike & Diane

Today’s card was made special for my wonderful brother Michael and sister-in-law Diane who are celebrating their 25th wedding anniversary today!

Mike Diane


To make their card I started with a card base of Whisper White and adhered a piece of Silver Fancy Foil Vellum Designer Series Paper over the front portion. The next layer is a piece of a Silver Foil sheet that was run through the Big Shot with the Pretty Print embossing folder, which is retired.  The heart was made from a piece of paper from the Stacked with Love Paper stack and die cut with a heart from the Hearts Collection Framelits.  The numbers are stickers from the craft store. The sentiment is from Teeny Tiny Wishes (a must have stamp set in my opinion), stamped in Real Red on a Whisper White strip, cut to a banner using the Hexagon Punch.


anniversary card

Thank you for stopping by, hope you liked the card. For more product information or to place an on-line order, click on any of the images below. Have a great day, Craft On!

Built for Free Using: My Stampin Blog

FMS185 – Satin Ribbon Twist

First let start by saying Happy Mother’s Day to all the mothers out there, hope you all have a great day.

Today’s card is for the Freshly Made Sketches challenge created by Cindy. Make sure to take a minute to stop over to their blog and see other great card designs, just click here.

FMS Final 185-001

ln making my card, I put a slight twist on the design and instead of the banners sticking out on both sides, I added a third banner and they all peak out of the left side. There are times a nice clean and simple design is great and this one uses one of the sentiments from the Fabulous Four stamp set, actually any of the sentiments work with this card. The color combo for this card is using the 2014-2016 In-Colors: Tangelo Twist, Hello Honey and Blackberry Bliss.

FMS185 large

Thank you for stopping by, hope you liked the card. For more product information or to place an on-line order click on any of the images below.  Have a great day, Craft On!

Built for Free Using: My Stampin Blog

Bokeh Birthday

For this card, tried a new technique “Bokeh” and used the stamp set, Balloon Bash, that’s been sitting awhile on my desk.

“Bokeh” is often most visible around small background highlights, such as specular reflections and light sources, which is why it is often associated with such areas. However, bokeh is not limited to highlights; blur occurs in all out-of-focus regions of the image

The card started with a piece of Watercolor Paper that I spritzed with water and using an Aqua Painter colored the paper. Once dry, using a template made of circles punched out of scrap cardstock and a sponge dipped in White Craft Ink, I created faint circles over the watercolor, in various degrees of white to add depth and a faint image. After this step, knowing I wanted to heat emboss, I made sure the watercolor paper was nice and dry and ran over it with an embossing buddy. I then stamped the sentiment in Versamark and embossed with Black. Next, I created a 2nd of the banner ‘just for you’ in black emboss on Wisteria Wonder, cut and adhered with dimensionals for depth. All layers of the card are adhered with liquid glue. Card base is Wisteria Wonder with a mat of Rich Razzleberry.

bohek technique card

Thank you for stopping by, hope you liked the card. For more product information or to place an order, click on any of the imges. Have a great day, Craft On!

Built for Free Using: My Stampin Blog


CYCI#68

How’s your week going? Weather here is warm and slightly humid, not bad for the beginning of May. In the evenings we’ve been getting the patio furniture cleaned and repainted for the new seat cushions. We even needed to put the air conditioner on at night to make sleeping easier. I sleep much better in cool temperature than warm temperatures 🙂

Today’s card is for the” Can You Case It” challenge, click here to check out their blog.

CYCI68-232x300

Not only did I make a card based on the sketch, I added an envelope with a liner. The liner give that plain white envelope that little added ‘something something’.  For my card I started with a mat of Birthday Bash Designer Series Paper on a Crushed Curry card base. Once I die cut some feathers using the Feathers Framelits, I positioned them on the Night of Navy rectangle to determine exactly were to place the sentiment from the Feels Good stamp set, stamped the greeting with Versamark and heat embossed with White Stampin Emboss powder. The feathers were grouped together and adhered with glue dots & dimensionals, a gold bow finishes it off!


CYCI 68 large

Thank you for stopping by, hope you liked the card. Have a great day, Craft On!

Click on any of the images below for more product information or to place an on-line order.

Built for Free Using: My Stampin Blog

Sneak Peek & Weekly Deals

Today its a quick to post to give you a sneak peek of the new In-Colors, available June 2nd with the new Catalog and let you know the new weekly deals just announced.  Really looking forward to see Watermelon Wonder & Mint Macaron in person!

Sneak Peek of the new In-Colors for 2015-2017

16InColorSamples-520x293


Weekly Deals from May 5 – 11th

To see a post with a sample of a box made with the Gift Box Punch Board, click here.


Built for Free Using: My Stampin Blog

Thank you for stopping by, have a great day!  Craft On!

April showers = May flowers!

When you are a demonstrator for Stampin Up, a day like today is a fun one, you get to place a pre-order a variety of items from the new 2015-2016 catalog, I just placed mine! Now the wait begins for when the man in brown makes that crafty delivery. Once I have the products and time to play with them, look a sneak peak of what’s coming.

They say April showers bring May flowers.  For today’s card, I used the flower punch from the Itty Bitty Accent Punch Pack to create three spring flowers. Colors of the little ‘petals’ are Crisp Cantaloupe, Wisteria Wonder and Strawberry Slush with a dot of Dazzling Details in the center for a little bling.  The ‘petals’ are layered and adhered with liquid glue or small cut pieces of dimensionals. The stems and sentiment are from the Too Kind stamp set (retiring at month end). Sentiment was stamped in Old Olive, punched out with the Large Oval punch, then matted on an Old Olive Decorative Label punched piece.  Using a piece of organza ribbon, I mixed drop or two of each petal re-inker color with a little water and using an aqua painter tie dyed the ribbon to match. Just make sure you wait a few minutes until the ribbon is dry before you adhere, run it through a paper towel between your fingers, it helps.  Here is the card:

flower card


Thank you for stopping by, hope you liked the card, have a great day. Craft On!

Click on any of the images below for more product information and to place an on-line order.

Built for Free Using: My Stampin Blog

PCCCS142

How’s the weekend going for you? Weather was great here yesterday, hope if the weather was nice were you are you enjoying it as well. Today is run errands day, when you open our refrigerator there is a cool breeze, sign that I need to fill it up with some good stuff!

Today’s card is for the Paper Craft Crew card sketch challenge. Don’t forget to stop over to their blog and see the designs by their team and other wonderful crafters like us!

PCCCS106-160-013


For my card, I decided to go with a 5″ x 5″ square card and made a matching envelope from designer series paper, something nice to do when the card is an unusual size. By making the envelope when making the card, its ready when you need to drop in the mail or hand deliver to the special recipient. My card features a few of the different patterns of paper in the Flashback Designer Series Paper pack. This card features chalkboard paper (black) and chalk ink, Yellow Citrus, (even on the designer series paper). I used a Starburst framelit to die cut the chalkboard,  created all the accent pieces and placed them were I wanted them, only then did I stamp the sentiment from Perfect Pennants to make sure it was exactly were I wanted it. Gorgeous Grunge and chalk ink was used on the designer series paper used us the mat on the card, I used three different stamps from the set. The triangles are using the Petite Pennants builder punch and the arrow paperclip comes from the Everyday Occasions Card Making kit.


PCCCS142 card envelope

Close up of the sentiment on the card:

PCCCS142 close up

Thank you for stopping by, hope you liked the card with matching envelope. Have a great day, Craft On!

Click on any of the images below for more product information and to place an on-line order.

Built for Free Using: My Stampin Blog

FMS184

Hope all is well with you today and the that the weather is nice were you are today. They say it’s gonna be 70 degrees here today and sunny!  Anything special planned for the weekend? Visiting some friends this evening and hope to do a little crafting, that’s always a nice way for me to relax.

Today’s card is for the Freshly Made Sketches challenge. This week Kim is challenging us to “go over the edge”, something hanging off the edge of the card. FMS Final 184-001

For me, I decided to start with a Whisper White card base that is 4″ x 11″, folded at 5 ½”, knowing my tag would hang off the edge by ¼”.  There is a mat of Real Red cardstock with a strip from the Back to Black Designer Series Paper. The tag is made with the Ornate Tag Topper Punch and the image is from the Balloon Bash Photopolymer stamp set. I used dimensionals behind the tag for a little depth and finished the card with a double bow using Basic Black Bakers Twine.


FMS184 large

Thank you for stopping by, hope you liked the card, have a great day. Craft On!

Click on any of the images below for more product information and to place an on-line order.

Built for Free Using: My Stampin Blog


Flower & Butterflies Box

Where does the time go, April is over and it’s May 1st, hopefully the April showers will bring May flowers.

Speaking of flowers, today I thought I would share a gift box I made using the Gift Box Punch Board & Bouquet Bigz L die. The box is made out of a piece of Park Lane Designer Series Paper using the Gift Box Punch Board. I picked a 4″x4″x4″ box which is made with a piece of 12″x12″ paper.  The flower & leaves are from the Bouquet Bigz die.

For the flower I used the following number of petals and used a hot glue gun to put them together:

  • largest petal – 5 each, 2 layers (Blackberry Bliss & Hello Honey tipped)
  • next smallest – 4 each 2 layers (Blackberry Bliss & Hello Honey tipped)
  • next smallest – 4 each 2 layers (Blackberry Bliss & Hello Honey tipped)
  • smallest – 4 each (Blackberry Bliss tipped)
  • Center is Hello Honey using another portion of the die

Butterflies were stamped and die cut or punched out and added to the sides and inside the flower.

Flower box 1

Close up of the flower:

flower close up inside


Stampin’ Up video on how to use the Bouquet Bigz L Die:

Stampin’Up video on how to use the Gift Box Punch Board:


Thanks for stopping by, hope you enjoyed seeing the flower & gift box. Enjoy the day, Craft On!

For more product information or to place an order, click on any of the images below.

Built for Free Using: My Stampin Blog