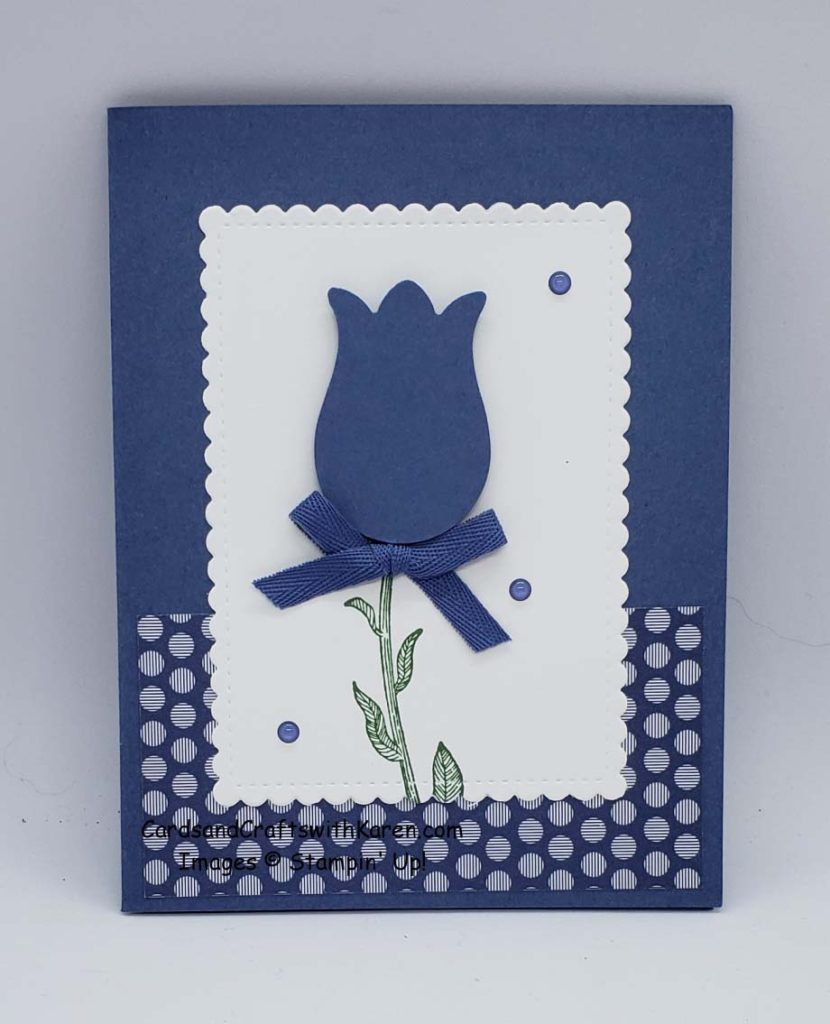
Monthly Archives: June 2020

Are you a Hallmark Movie Fan?

If you are a Hallmark Movie Fan you know what today, Monday June 29th is – it’s the first day of Christmas movies as part of Christmas in July!

Starting at 5pm EST on Hallmark Movies & Mysteries are Christmas movies, starting with The Mistletoe Inn for Christmas in July.

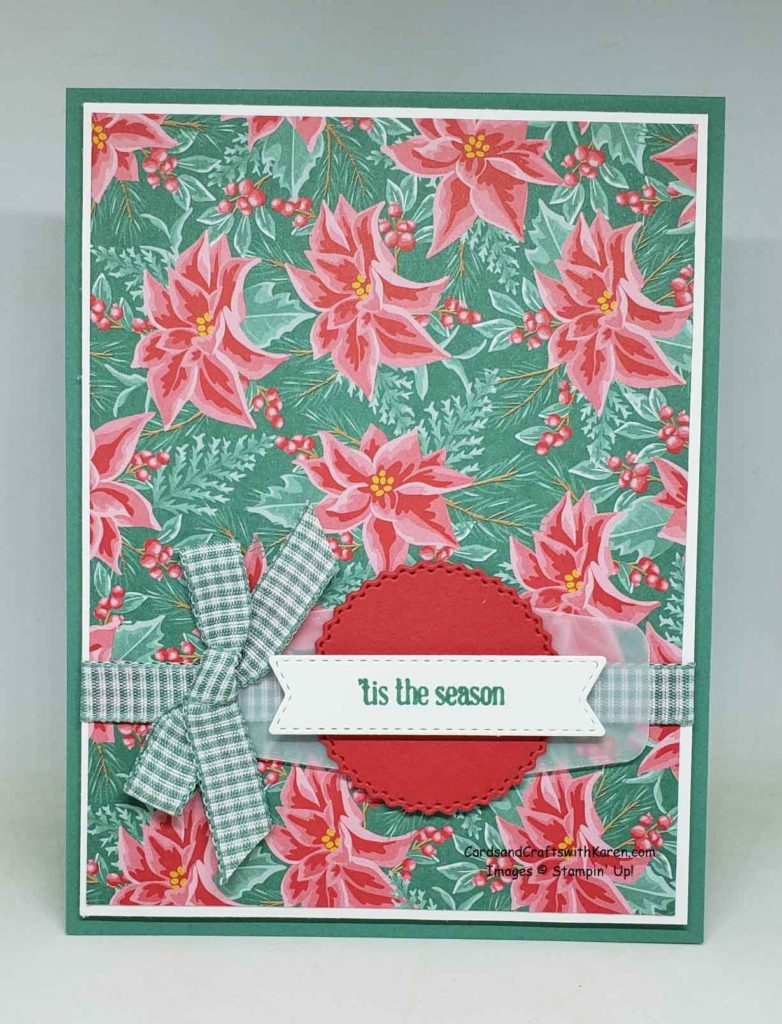
So today’s card features one of the holiday prints from the Flowers for Every Season 6″ x 6″ Designer Series Paper.

Here’s the basics for the card:

  • Just Jade card stock card base 4.25″ x 11″, scored at 5.5″ for top folding card
  • Whisper White card stock mat 4″ x 5.25″
  • Designer Series Paper – 3 7/8″ x 5 1/8″
  • Before adhering mat/designer paper to card base, piece of Just Jade Gingham ribbon from the Flowers for Every Season Ribbon Combo Pack
  •  Tasteful Labels Dies used for the following and add some Stampin’ Dimensionals between the layers!
    • Vellum label
    • Poppy Parade card stock circle
    • Banner for greeting, from Itty Bitty Greetings
  • Bow is a separate piece added with a Mini Glue Dot

This card is just a hint of things to come with new Stampin’ Up Mini Catalog 2020 – December 2020 addition. There is a new suite coming with Poinsettia’s which I’ll preview July 25th – 6 months to Christmas!

Thank you for taking the time to stop by today, hope this project has inspired you to try paper crafting. Have a great day – Craft On!

Follow me on Instagram @cqueen309 and on Facebook at “Cards and Crafts with Karen”.

Click on any of the images below for more product information and to order directly from my on-line store.

When shopping check demonstrator contact, then I can happily send you a re-useable thank you card. For orders is over $150, please use all of the Host Rewards you’ve earned.  Otherwise, I’d love for you to add your order to the Current Code 6HPQRSME.

Happy Shopping!


June Celebrations!

The month of June has two celebrations, my favorite (and only) niece Maya graduates from Scotch Plains Fanwood High School in New Jersey and my sister-in-law Diane has a birthday.

Today I’m sharing with you the cards I sent to them.

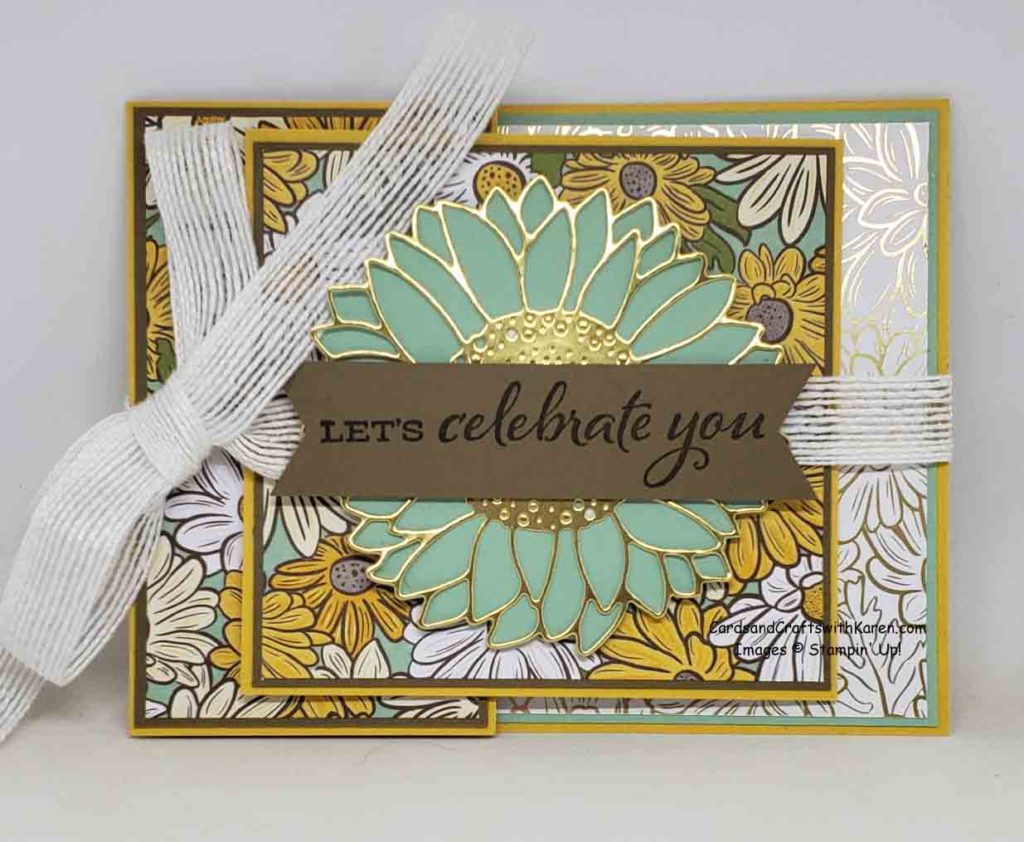
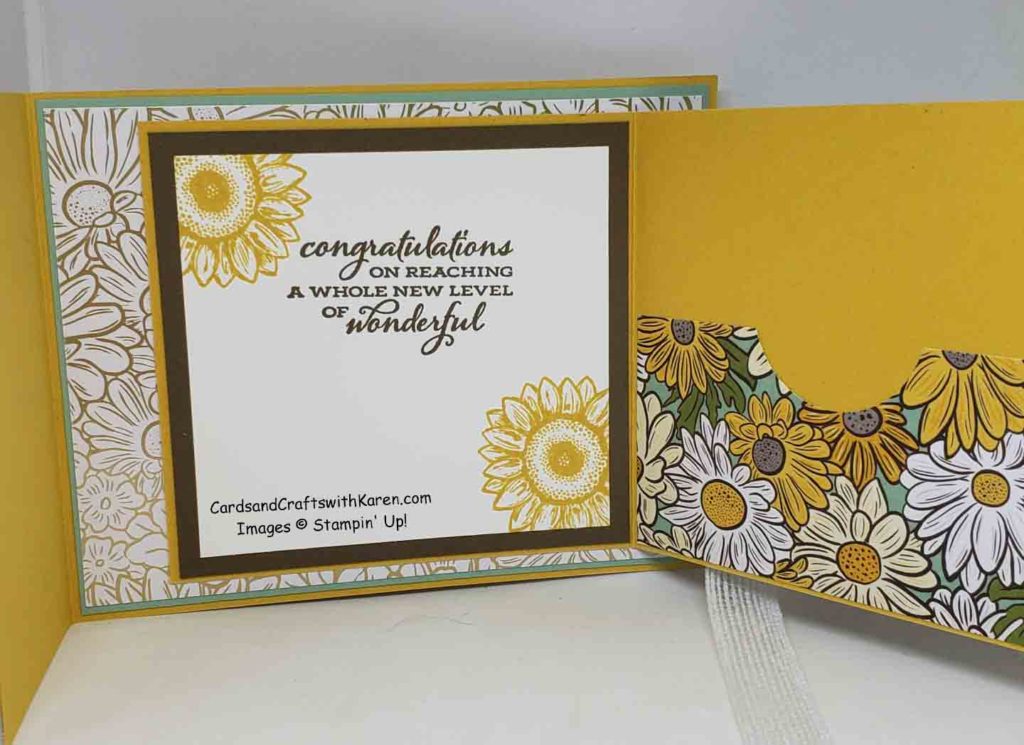
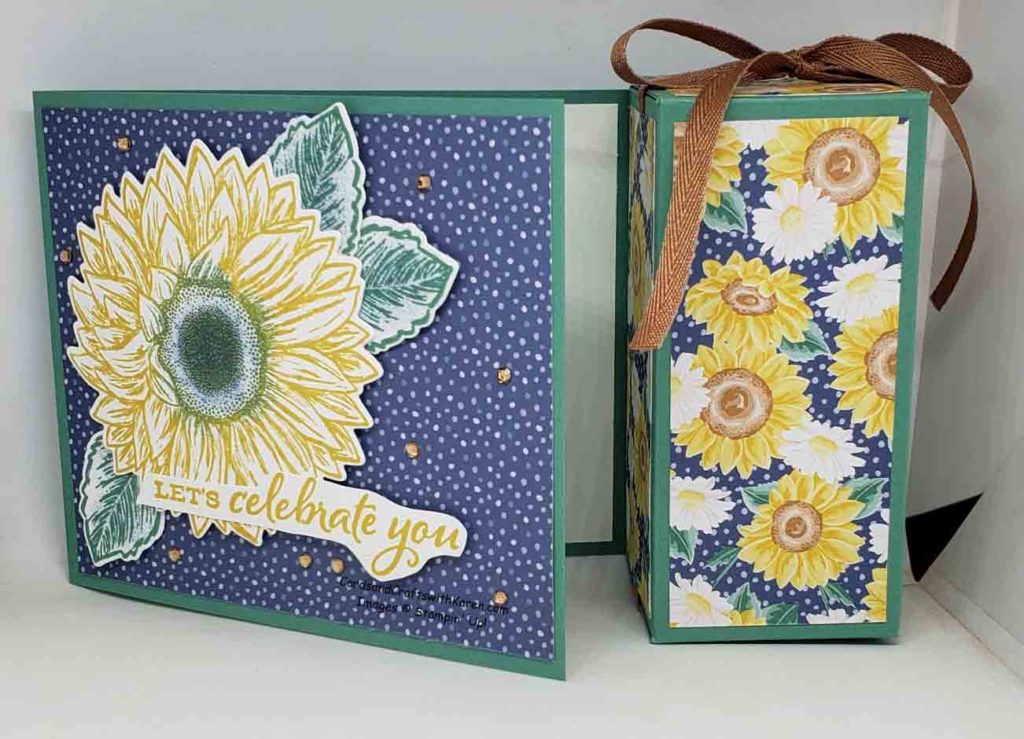
First up is the graduation card for Maya, featuring the Celebrate Sunflower Bundle teamed up with the Ornate Garden Specialty Designer Series Paper.  This card is actually two cards in one, a small card layered on a card base that has a flap on the left side and as I type this decided I need to make one that has the flap on the right and opens opposite this one!

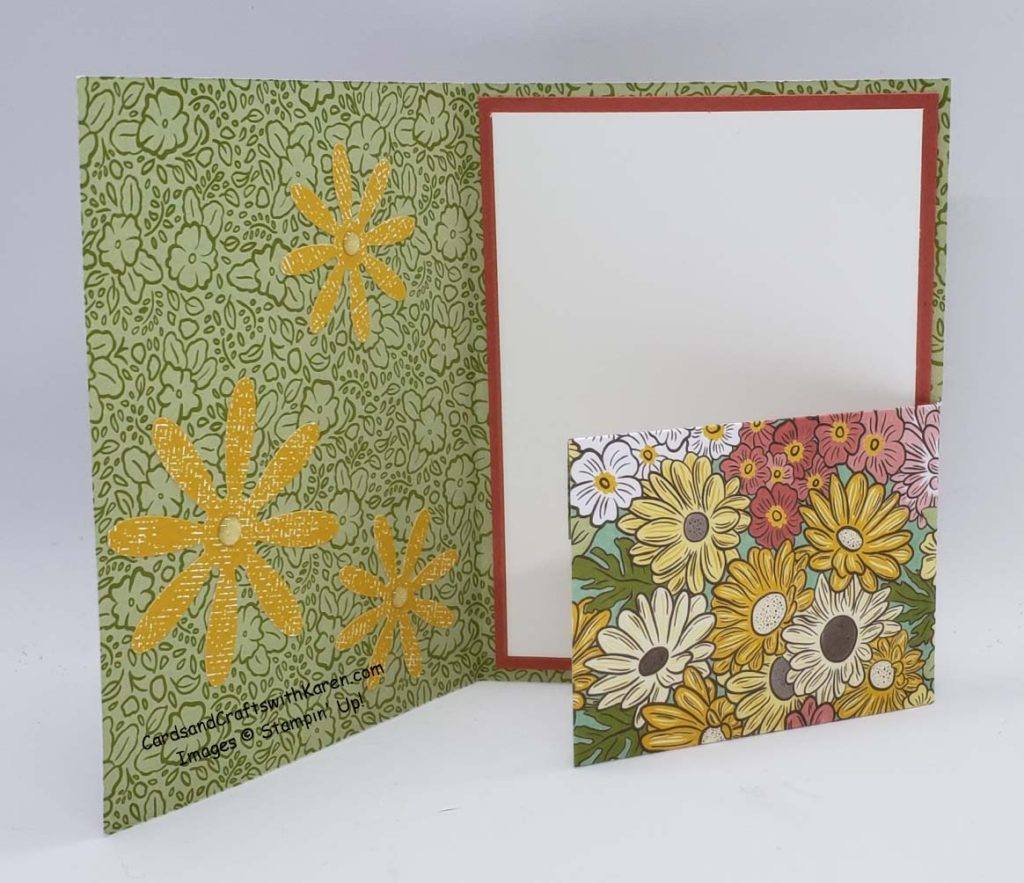
Here is the inside of the card, I’ve added a notched out slip pocket that can be used for a gift card, check or money.

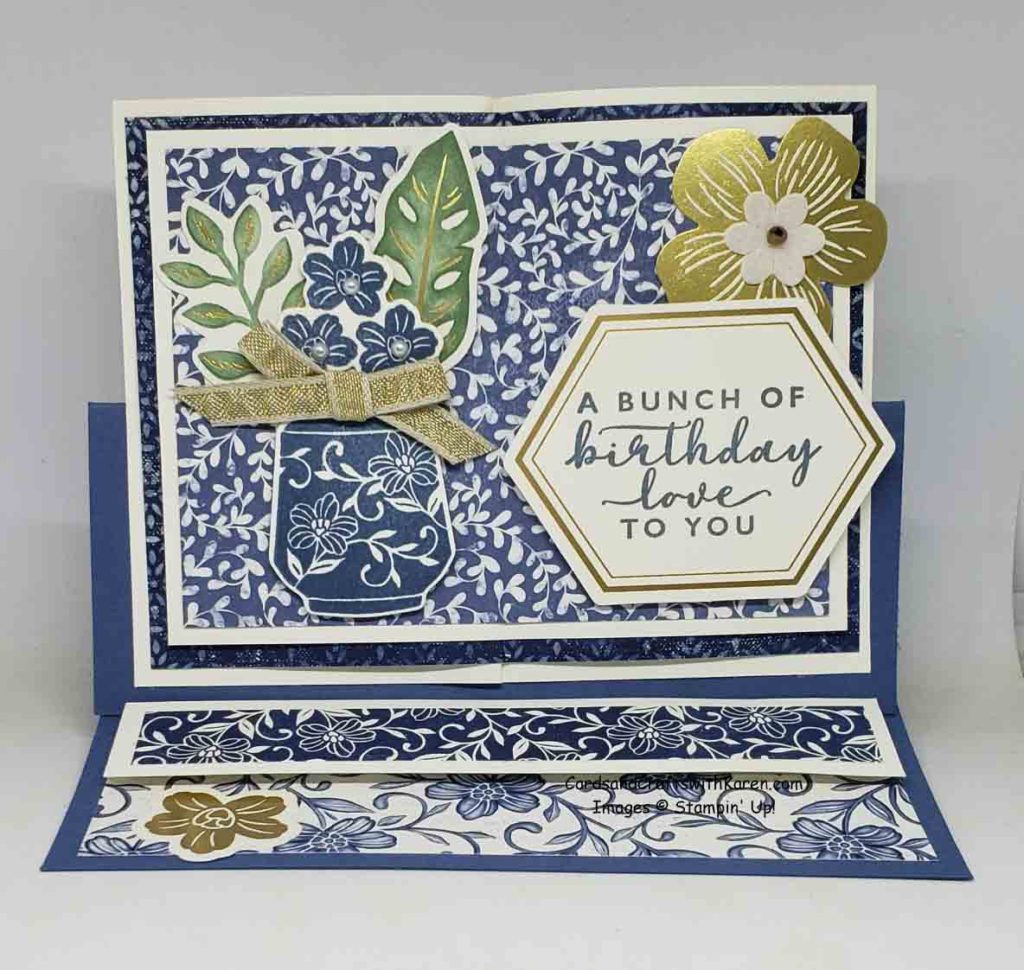
Here is the front view of the card I sent Diane for her birthday, it’s a “book” card, with two layers that actually remind you of pages of a book.

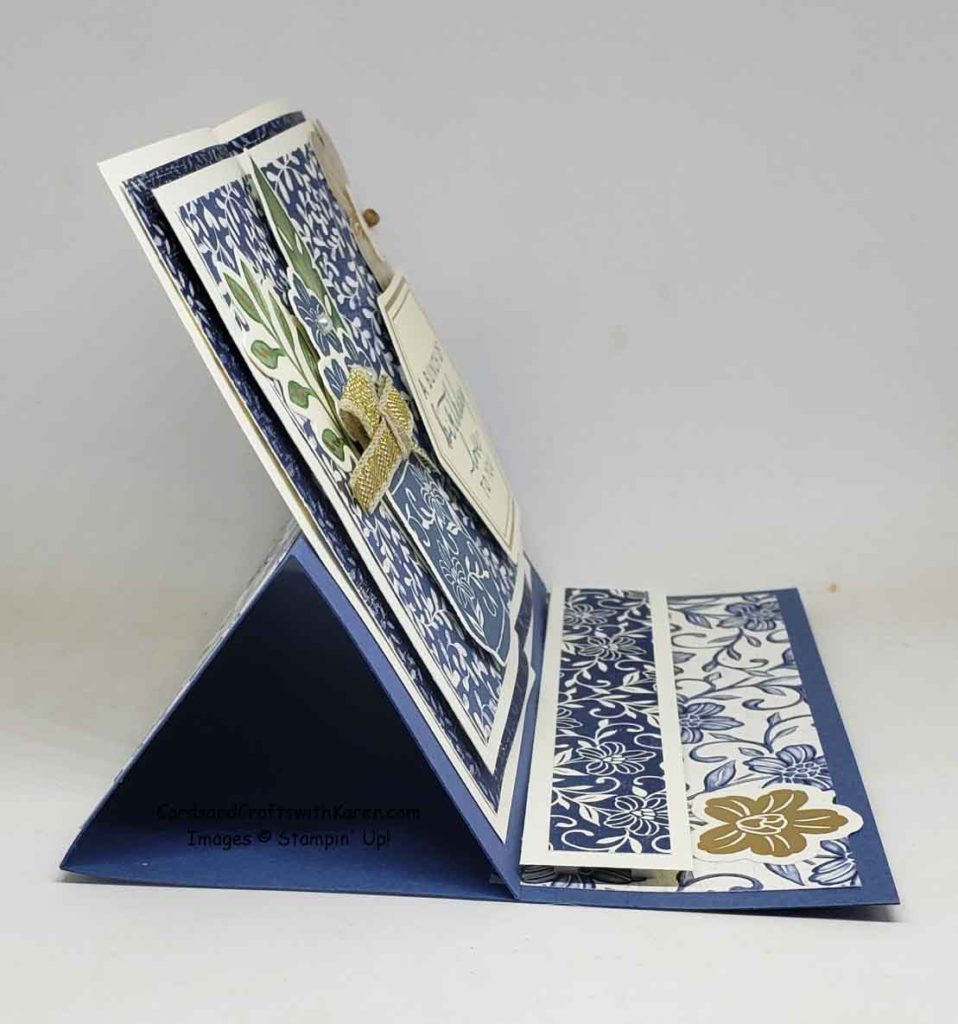
Here is the side view of the card. The use of Mini Glue Dots, Tear & Tape and Mini Stampin’ Dimensionals helps give you the look of two pages of a book!

Stop back Sunday July 19th for a downloadable project sheet on how to make Diane’s card, my Sunday Stampers will be making one!

Thank you for taking the time to stop by today, hope this project has inspired you to try paper crafting. Have a great day – Craft On!

Follow me on Instagram @cqueen309 and on Facebook at “Cards and Crafts with Karen”.

Click on any of the images below for more product information and to order directly from my on-line store.

When shopping check demonstrator contact, then I can happily send you a re-useable thank you card. For orders is over $150, please use all of the Host Rewards you’ve earned.  Otherwise, I’d love for you to add your order to the Current Code 6HPQRSME.

Happy Shopping!
 

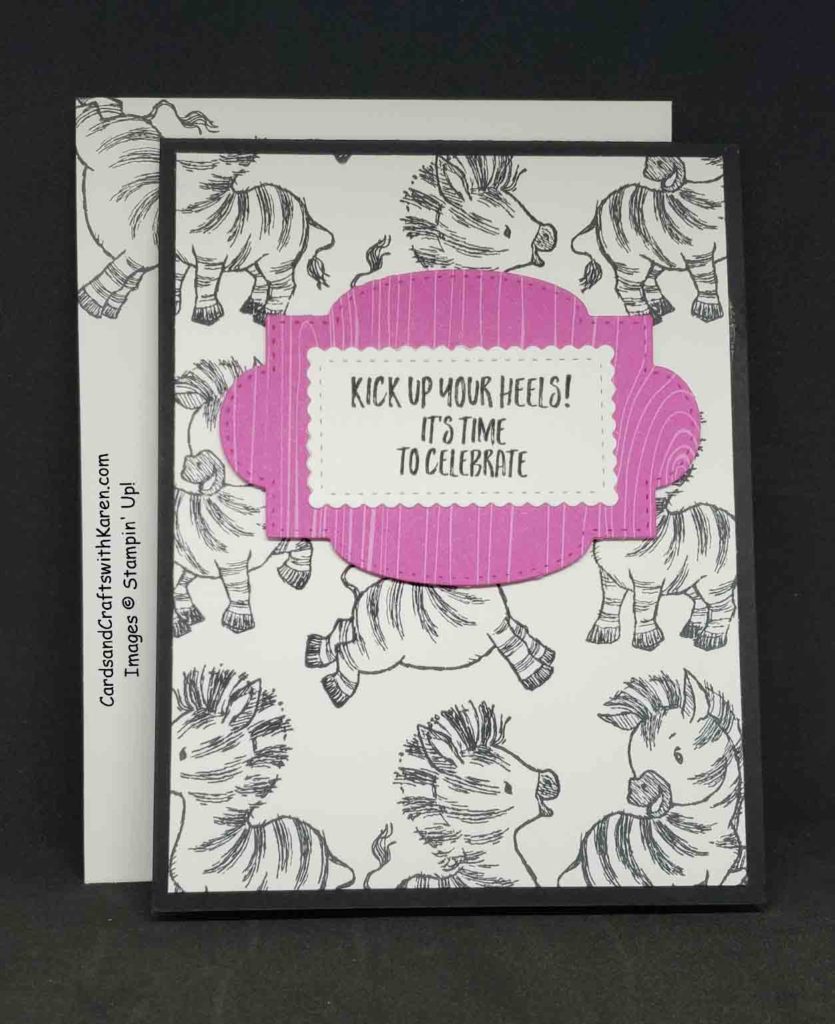
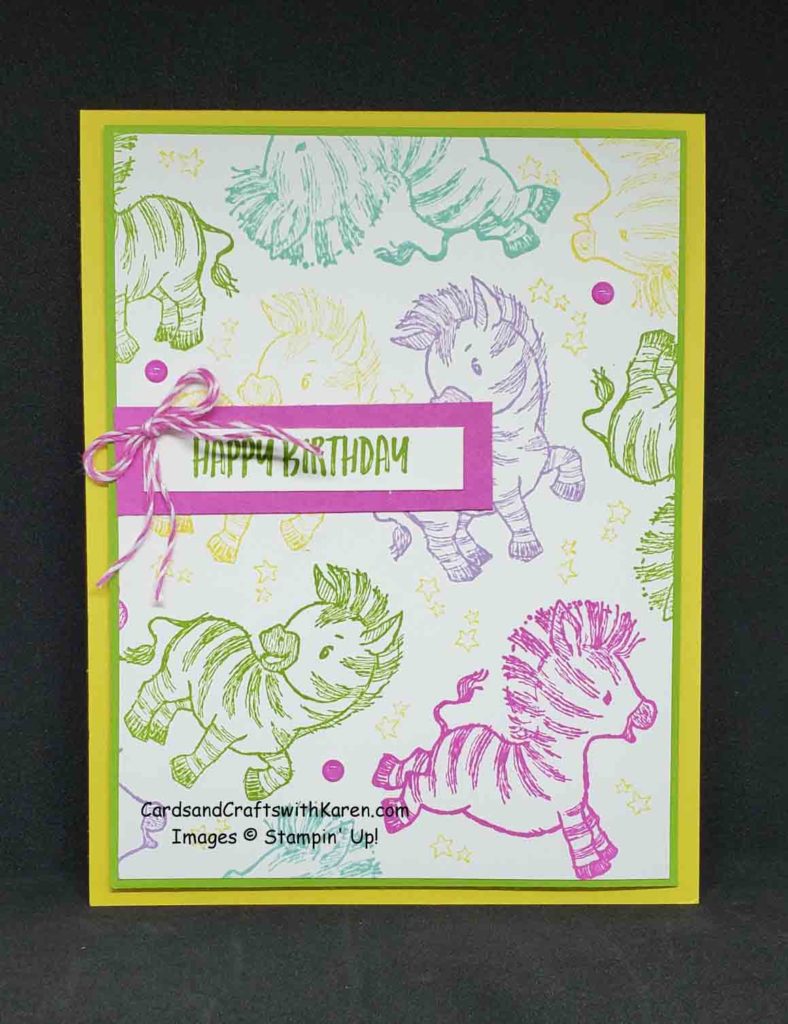
Zany Zebras ! ! !

How about some fun and cheerful cards for kids of any age from 1 to 100!

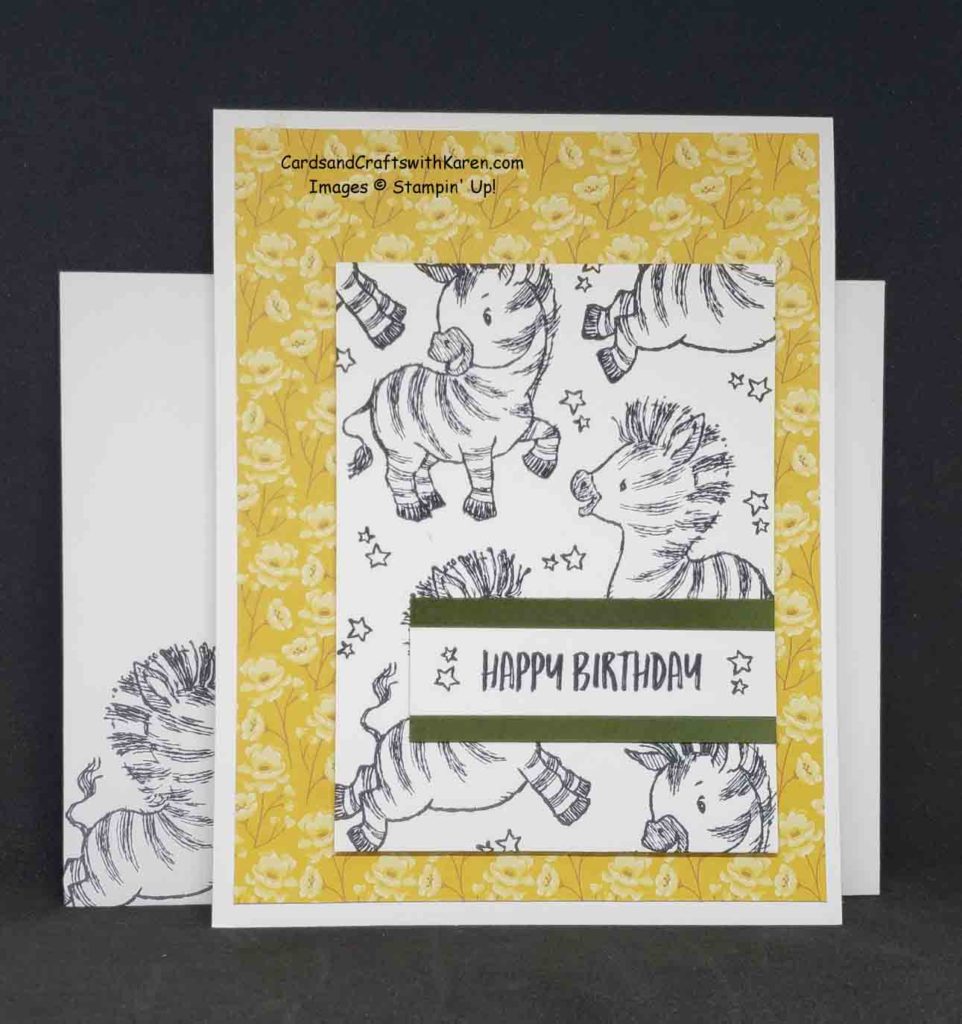
Today I’m show casing the stamp set “Zany Zebras” – Adorable zebras and brush script greetings come together in the Zany Zebras Stamp Set. It’s all you need for birthday cards and more! There are 11 cling stamps in the set.

My first card for you has a piece of Flowers for Every Season Designer Series Paper for the background, Whisper White for stamping of the Zebras which is adhered with Stampin’ Dimensionals. Add a stamped greeting and your done, Simple & easy!

For the second card I kept it simple – Basic Black with a pop of my new fav “Magenta Madness”. Labels are from Stitched So Sweetly Die Set using the 2020-2020 In-Color Designer Series Paper and greetings from the stamp set on Whisper White.

Here’s a bright and cheerful Zebra card using some fun colors for the images: Daffodil Delight, Granny Apple Green, Bermuda Bay, Highland Heather and Magenta Madness. A few 2020-2022 In-Color Enamel Dots and twine from the May Paper Pumpkin kit finish it off!

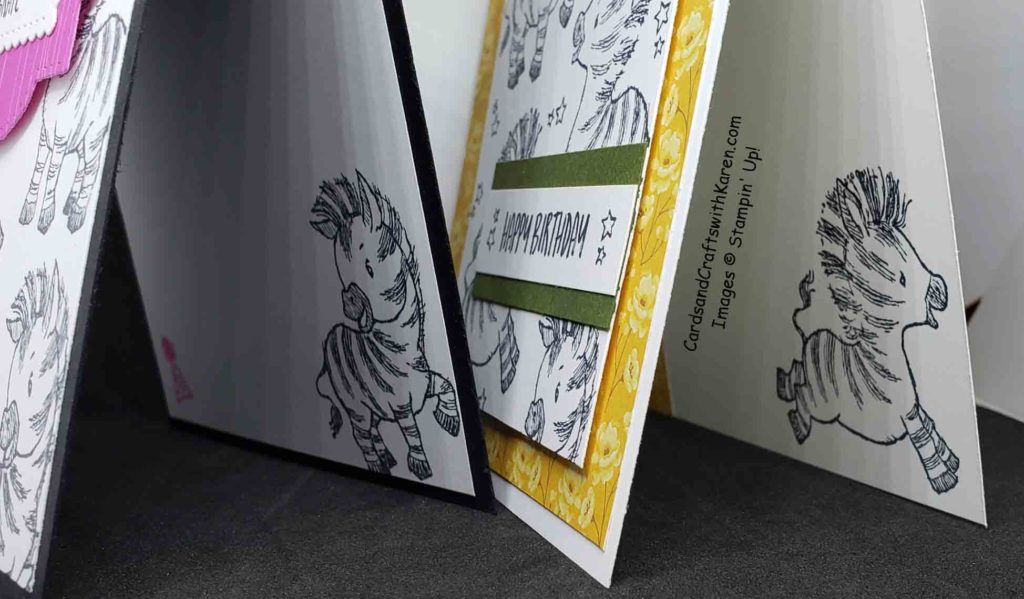
Don’t forget the insides, I’ve stamped some zebra’s and added a strip of designer series paper on the inside.

The Stampin’ Up! inventory we are waiting for delivery on of black ink pads are stuck in a warehouse (thanks virus), so use your favorite black ink on your cards right now, I’ll let you know when Memento Black Ink pads & refills are available again.

Thank you for taking the time to stop by today, hope this project has inspired you to try paper crafting. Have a great day – Craft On!

Follow me on Instagram @cqueen309 and on Facebook at “Cards and Crafts with Karen”.

Click on any of the images below for more product information and to order directly from my on-line store.

When shopping check demonstrator contact, then I can happily send you a re-useable thank you card. For orders is over $150, please use all of the Host Rewards you’ve earned.  Otherwise, I’d love for you to add your order to the Current Code 6HPQRSME.

Happy Shopping!


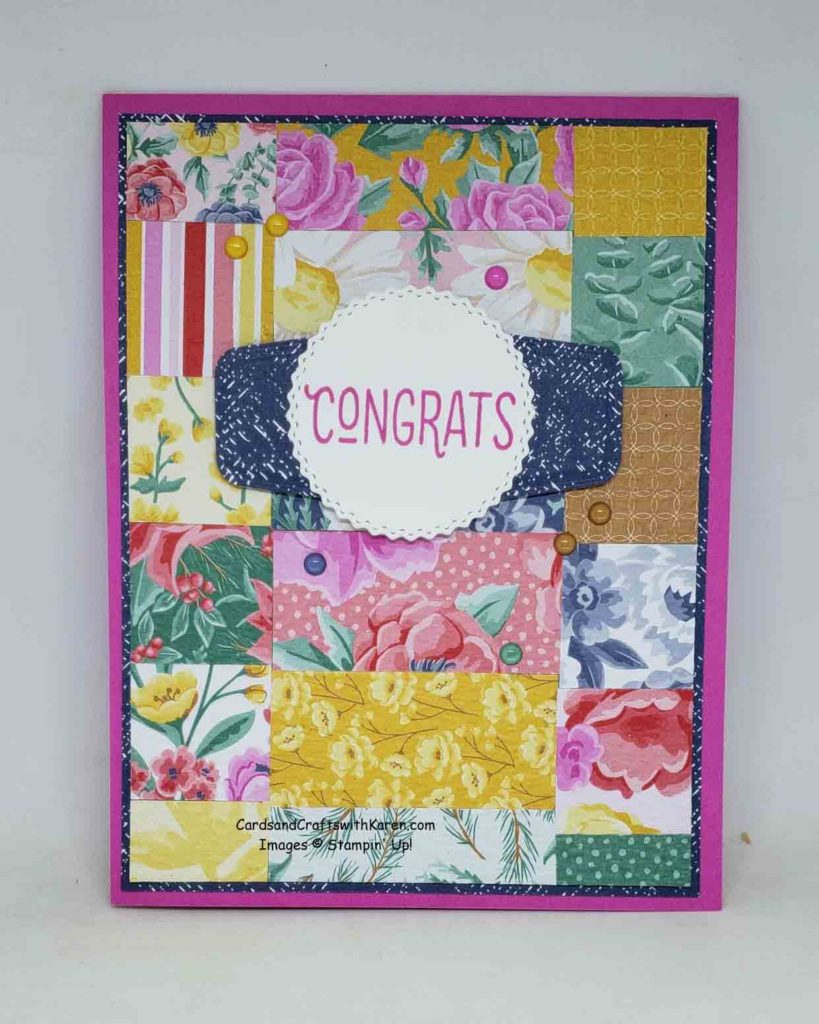
Perfect card for quilt lovers!

Today I have a fun card for you I put together after staring at some 2″ squares of designer series paper from the Flowers for Every Season pack.

Here’s what I did:

  1. Cut the 2″ squares in half, to 1″ x 2″ strips
  2. Adhere strips of designer paper to a 4¼” x 5½” piece of coordinating card stock (just in case any peaks through)
  3. Cut down to 3 7/8″ x 5 1/8″
  4. Run through your embossing machine using the new Tasteful Textile 3D Embossing Folder
  5. Mat on piece of Misty Moonlight Designer Series Paper 4″ x 5¼”
  6. Adhere to Magenta Madness card base cut to 4¼” x 11″, scored at 5½” for a top folding card
  7. Used the Tasteful Labels dies for the Misty Moonlight Designer Series Paper  label
  8. Whisper White card stock and another Tasteful Label due for greeting
  9. Greeting is from Many Mates stamped with Magenta Madness ink
  10. Finish by adding some 2020-2022 In-Color Enamel Dots

So what embossing folders do you have that could be used for a card like this?  If none, order one today from me!

Thank you for taking the time to stop by today, hope this project has inspired you to try paper crafting. Have a great day – Craft On!

Follow me on Instagram @cqueen309 and on Facebook at “Cards and Crafts with Karen”.

Click on any of the images below for more product information and to order directly from my on-line store.

When shopping check demonstrator contact, then I can happily send you a re-useable thank you card. For orders is over $150, please use all of the Host Rewards you’ve earned.  Otherwise, I’d love for you to add your order to the Current Code 6HPQRSME.

Happy Shopping!
Ever hear of a Box Card combo?

Ever hear of or see a Box Card – well that’s what I have for you today, it’s card with a box attached.

I’ve seen other people create this project and their card was 5.5″ tall, mine is 4.25″ tall and the card portion is 4.25″x 5″ and made from a piece of 4.25″ x 12″ x 12″ card stock and the box is the standard 2″-4″-6″-8″ box. While the card does not fit in an envelope, it goes perfectly in a gift bag or basket –  just fill the box with treats!

My card uses products from the new Flowers for Every Season 6″ x 6″ Designer Series Paper and the new 2020-2022 In-Color Just Jade.


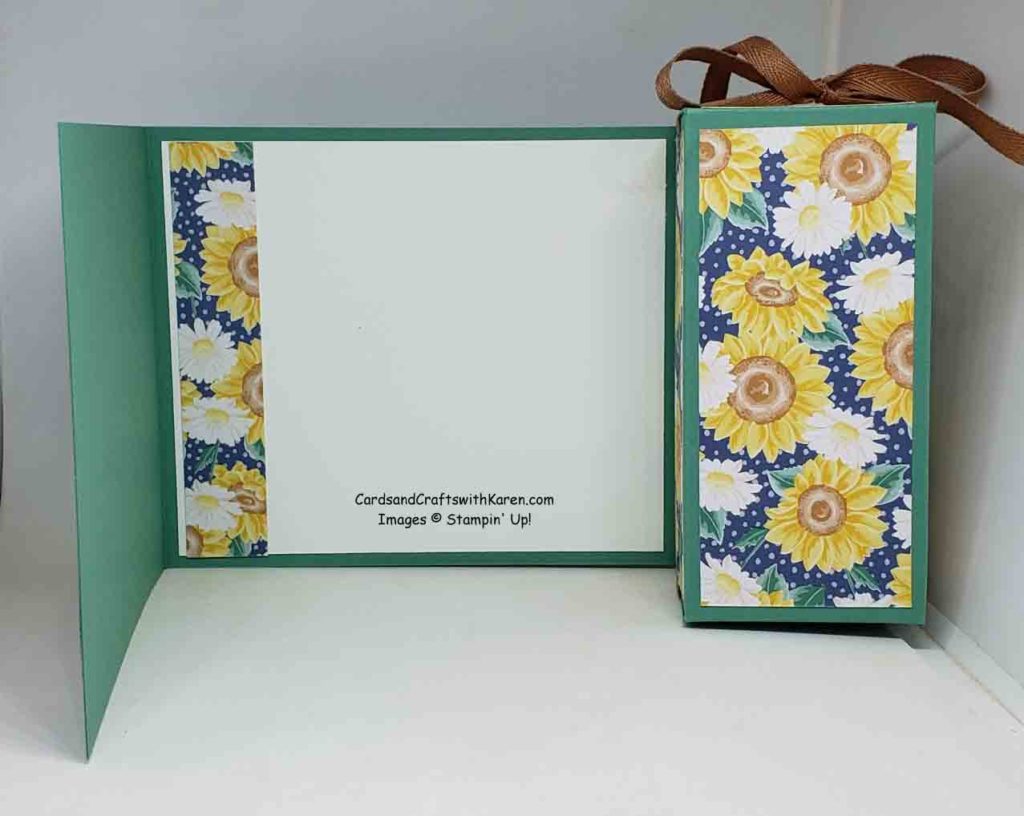
Here is an inside view, I’ve added a piece of Whisper White card stock with a strip of matching designer paper. I’ll add the inside greeting once I know the occasion for the card.

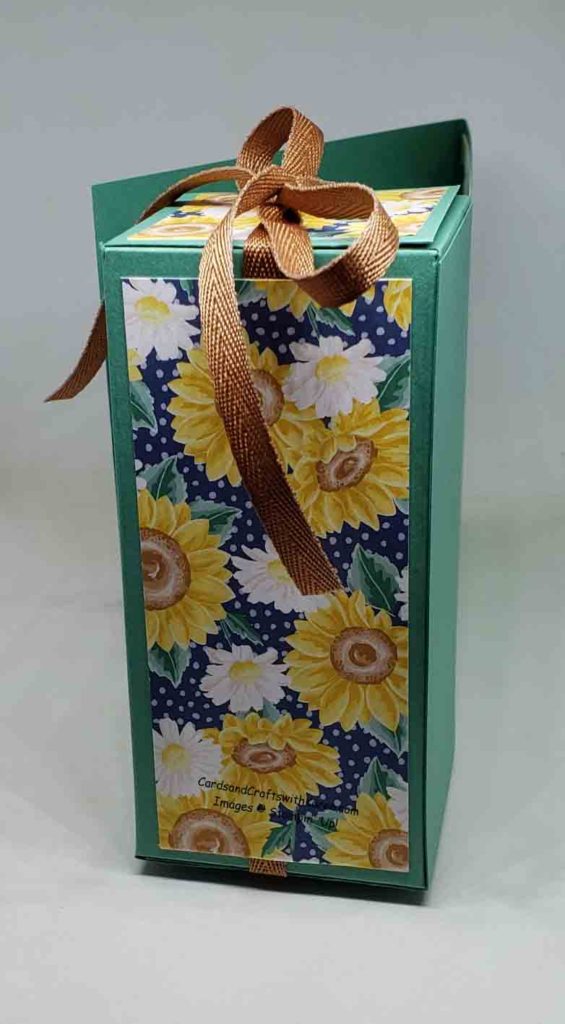
Here is a side view of the box once attached to the card, as you can see the ribbon is adhered before the designer series paper. To adhere the ribbon put a small amount of Tear & Tape or Stampin’ Seal on the box, also it’s easier to add the designer paper before putting the box together.


If you like this card with a box, here is a downloadable project sheet to use to make your own: Card with Box – CardsandCraftswithKaren Jun20

Thank you for taking the time to stop by today, hope this project has inspired you to try paper crafting. Have a great day – Craft On!

Follow me on Instagram @cqueen309 and on Facebook at “Cards and Crafts with Karen”.

Click on any of the images below for more product information and to order directly from my on-line store.

When shopping check demonstrator contact, then I can happily send you a re-useable thank you card. For orders is over $150, please use all of the Host Rewards you’ve earned.  Otherwise, I’d love for you to add your order to the Current Code 6HPQRSME.

Happy Shopping!
 

“Water” Technique with Forever Fern

Today I’m featuring two more cards made with the Forever Fern Stamp set using a technique I’m calling simply the “Water Technique”.
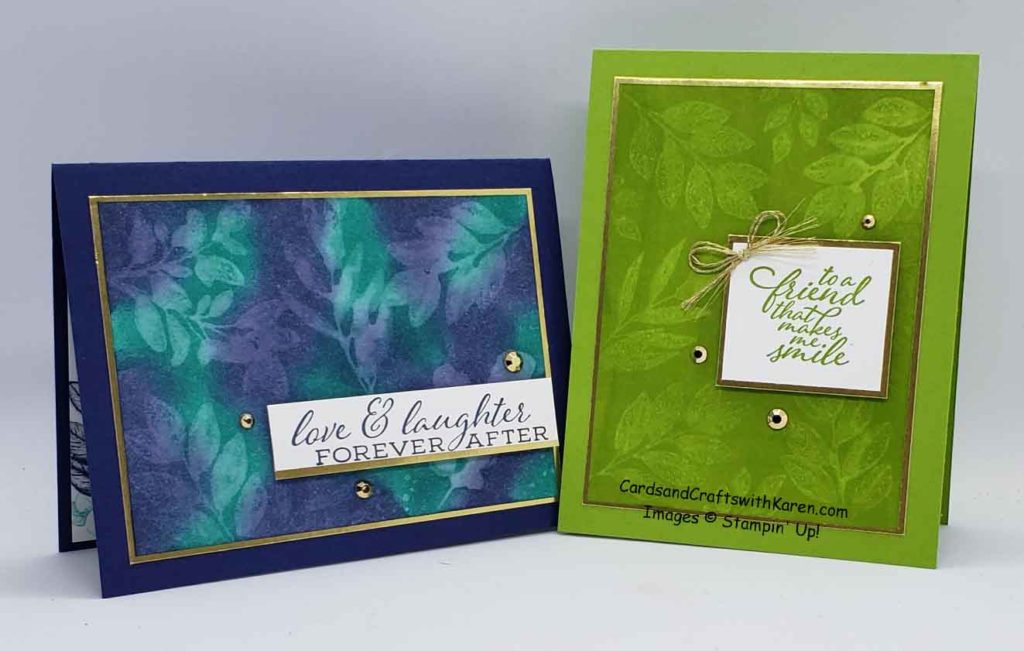
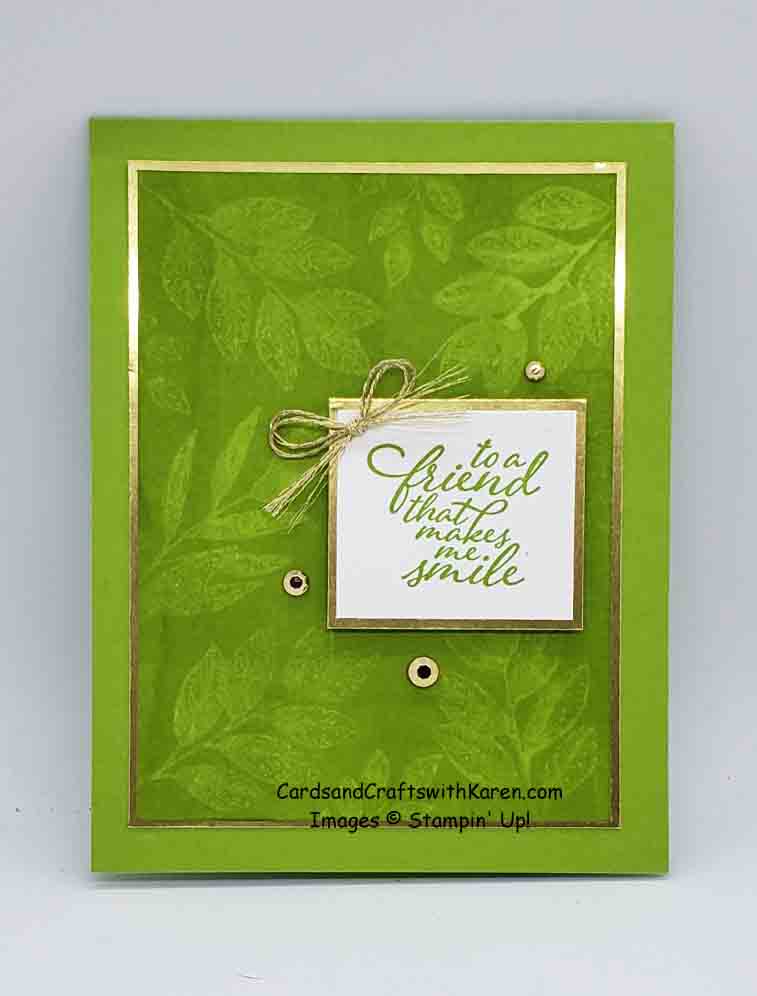
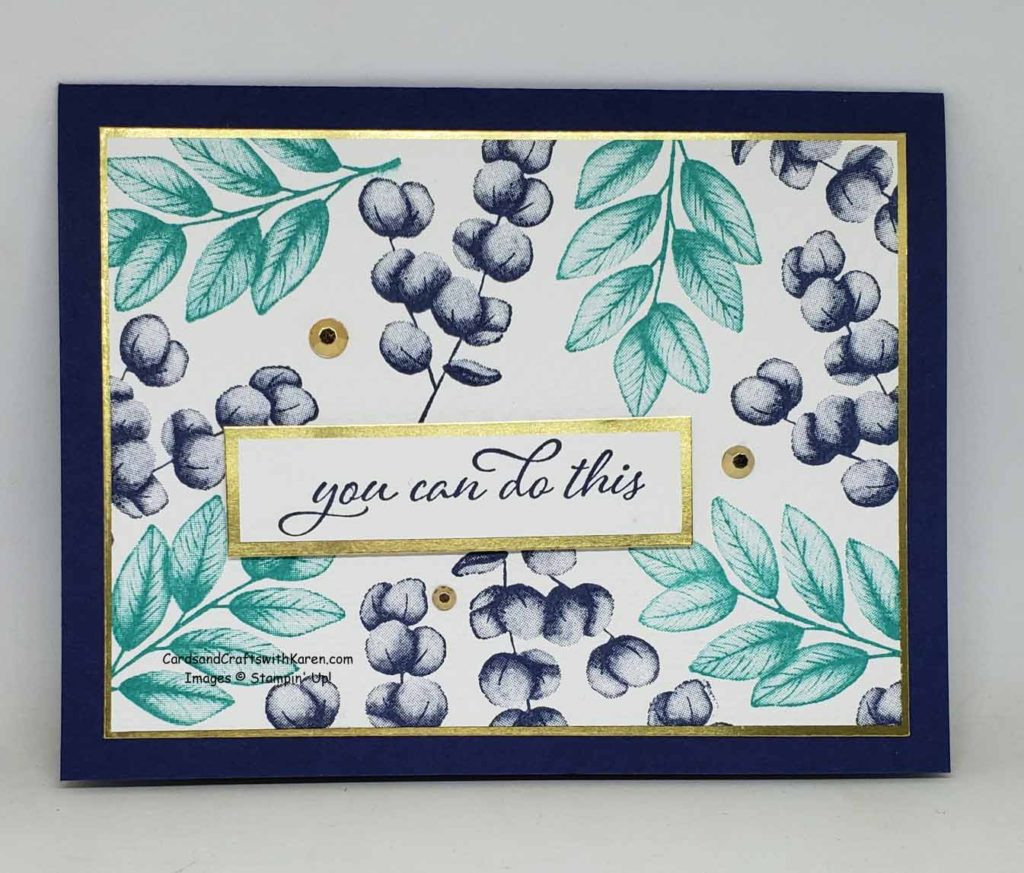
Here are the first two cards I’ve made using this technique, one is in Night of Navy with Bermuda Bay and the other is Granny Apple Green, both are matted on Gold Foil with Gold Foil accenting the greetings.
What is the “Water Technique” you ask?  It’s stamping with water on freshly colored card stock, letting it dry and as it dry’s the image lightly appears!
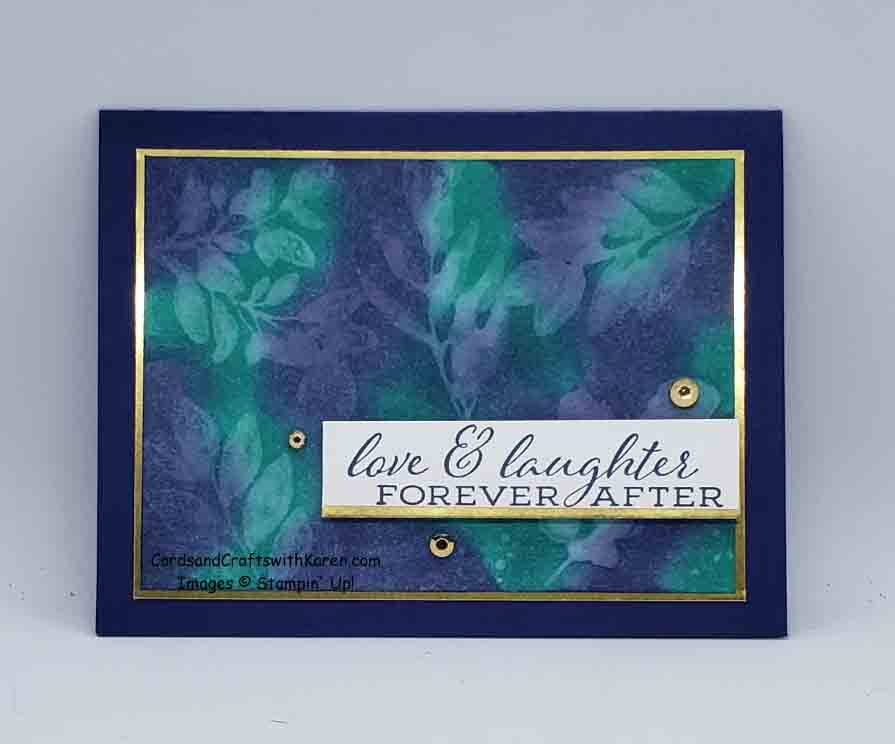
The first card uses Sponge Daubers to color the Whisper White card stock in Night of Navy and Bermuda Bay ink before spritzing the stamp image lightly with water, stamp once on the freshly colored card stock, clean and dry the stamp, repeating until happy with the stamping.  Let the card stock dry naturally, using a Heat Tool does not make the image dry properly, before matting on Gold Foil. Gilded Gems where added for embellishments.
For the card below, inside of using sponge daubers to color the Whisper White card stock, I drug the ink pad across the card stock until I liked the color and there are no streaks.  Next I spritzed the image, stamped, cleaned and repeated until I was happy with the stamping, then let the card stock dry completely before matting and adding the greeting and embellishments.

Through trial and error I’ve found deeper colors work better with this technique than light colors, you may want to do a test image on scrap paper before your good project, just to be safe.

Thank you for taking the time to stop by today, hope this project has inspired you to try paper crafting. Have a great day – Craft On!

Follow me on Instagram @cqueen309 and on Facebook at “Cards and Crafts with Karen”.

Click on any of the images below for more product information and to order directly from my on-line store.

When shopping check demonstrator contact, then I can happily send you a re-useable thank you card. For orders is over $150, please use all of the Host Rewards you’ve earned.  Otherwise, I’d love for you to add your order to the Current Code 6HPQRSME.

Happy Shopping!
Forever Greenery Suite

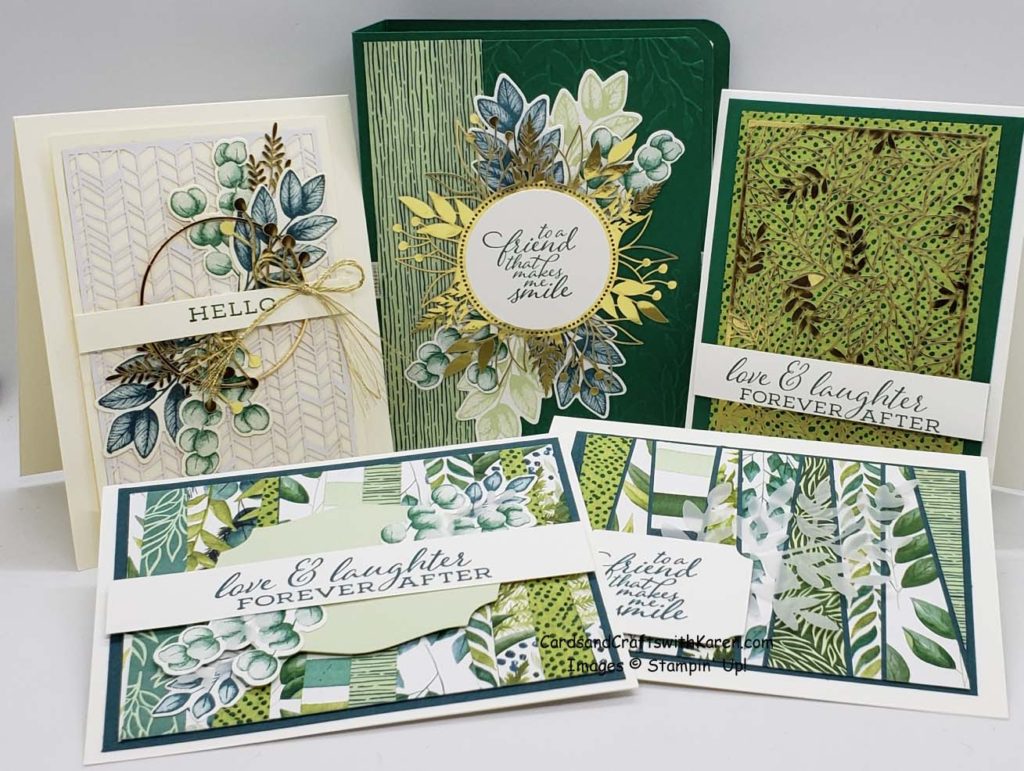
This past weekend when my Sunday Stampers met we used products from the Forever Greenery Suite to make two of our cards, the Forever Fern Bundle was very popular with the ladies. The images, which are “distinktive” are so detailed and beautiful, teamed up with the coordinating dies – it’s a must have!

Below I thought I would share some of the cards I’ve made so far using products from the suite, which include:

  • Forever Fern Bundle
  • Forever Gold Laser-Cut Specialty Paper (one side gold foil, the other is white)
  • Gold Hoop Embellishments
  • Forever Greenery Trim Combo Pack
  • Forever Greenery Designer Series Paper
  • Greenery Embossing Folders (2 folders about 3″ wide each)

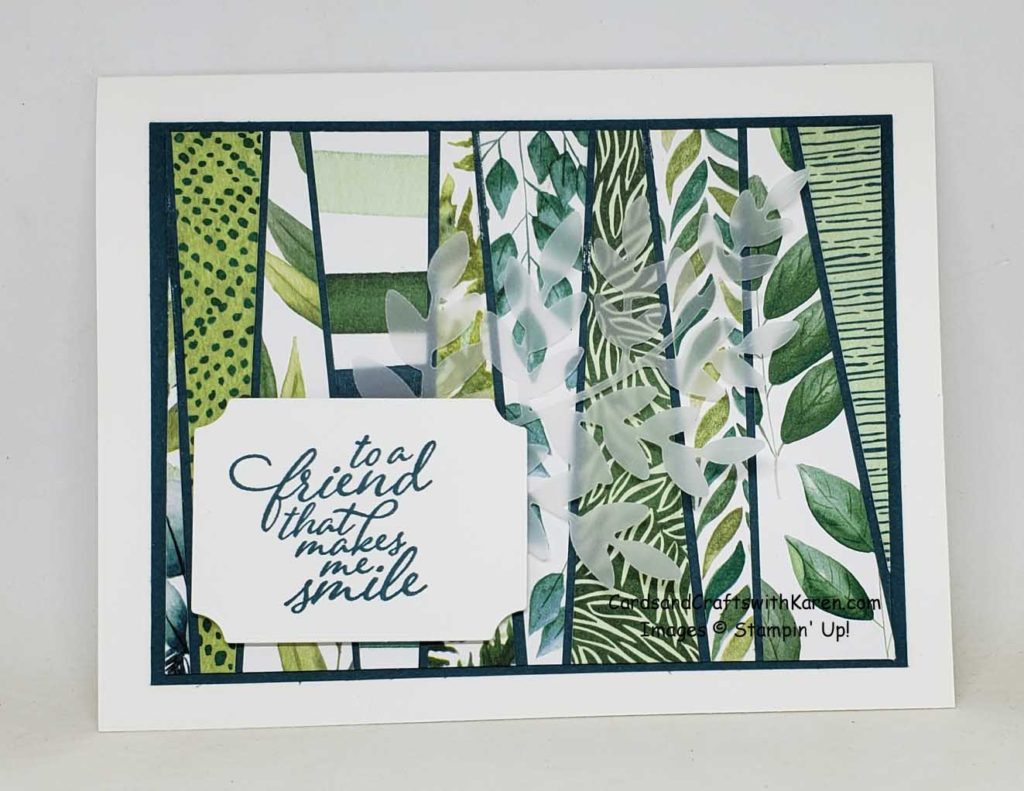
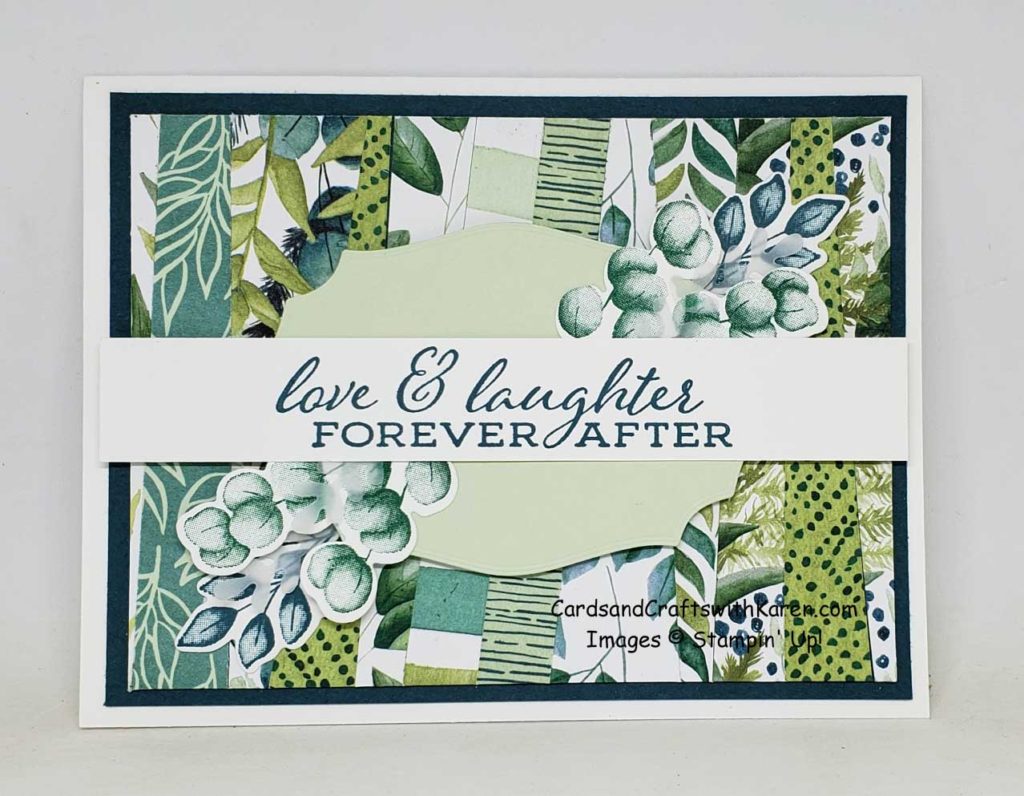
The first card features strips of all the designer series paper images, matted in Pretty Peacock card stock, on a Whisper White card base.

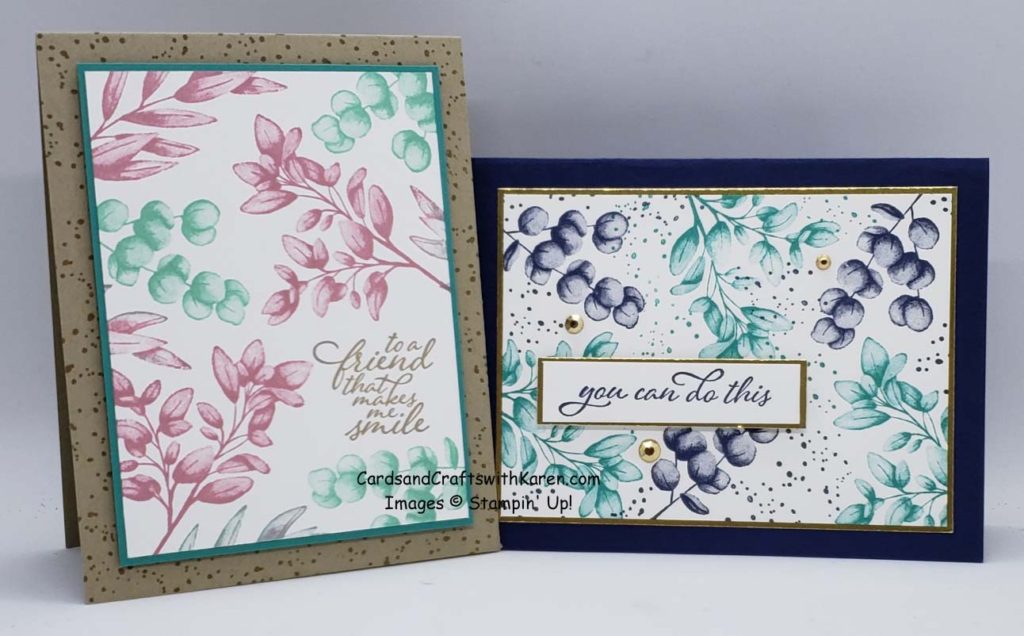
These two card, one of which we made Sunday, the other using Coastal Cabana and Rococo Rose ink along with a Crumb Cake card base with the speckled image stamped around the edges.  For the stamped image, I first stamped the greeting, then all the images.

The final card today is similar to the first, just that each piece of designer series paper is laid side by side.

Thank you for taking the time to stop by today, hope this project has inspired you to try paper crafting. Have a great day – Craft On!

Follow me on Instagram @cqueen309 and on Facebook at “Cards and Crafts with Karen”.

Click on any of the images below for more product information and to order directly from my on-line store.

When shopping check demonstrator contact, then I can happily send you a re-useable thank you card. For orders is over $150, please use all of the Host Rewards you’ve earned.  Otherwise, I’d love for you to add your order to the Current Code 6HPQRSME.

Happy Shopping!
Summer Nights by Paper Pumpkin

Celebrate the magic of summer nights with the Summer Nights Paper Pumpkin Kit! In this exclusive fun-filled kit, you’ll unbox enough supplies to create nine postcard-style cards, coordinating envelopes, and die-cut tealight bags. What’s even more spectacular about July’s kit is the add-on you can purchase along with it! The Summer Nights Add-On includes 24 card bases and envelopes in coordinating Summer Nights designs. This add-on is perfect for expanding the Summer Nights creative experience beyond the Paper Pumpkin kit. Between the add-on and the leftover supplies from your Summer Nights kit, you will be crafting a summer night worth celebrating all month long!


Don’t miss out on the fireworks, fireflies, and fun! Subscribe now to the Summer Nights Paper Pumpkin Kit between now and July10t and order the Summer Nights Add-On starting  July 1st; while supplies last.

Here is some information about the Summer Nights Kit:

Kit contains enough supplies to create nine postcards and coordinating envelopes, as well as nine die-cut tealight bags.

  • Card size: 4” x 5-1/4” (10.2 x 13.3 cm)
  • Envelope size: 4-1/2” x 5-3/4” (11.4 x 14.6 cm)

Coordinating Colors: Blackberry Bliss, Calypso Coral, Costal Cabana, Night of Navy

The Paper Pumpkin kit does not require the add-on to create completed projects.

Summer Nights Add-On Information:

Contains 24 preprinted card bases and coordinating envelopes.

  • Card size: 4-1/4″ x 5-1/2″
  • Envelope size: 4-1/2″ x 5-3/4″
  • Item 154973 | $10.00 USD – Available July 1, 2020

The Summer Nights Add-On is not required to complete the Paper Pumpkin kit projects.

Subscription Information:

Subscribe to the July 2020 Paper Pumpkin Kit by July 10th – click here

Note: Supplies may be limited toward the end of the subscription period.

Thank you for taking the time to stop by today. Have a great day – Craft On!

Follow me on Instagram @cqueen309 and on Facebook at “Cards and Crafts with Karen”.

Click on any of the images below for more product information and to order directly from my on-line store.

When shopping check demonstrator contact, then I can happily send you a re-useable thank you card. For orders is over $150, please use all of the Host Rewards you’ve earned.  Otherwise, I’d love for you to add your order to the Current Code 6HPQRSME.

Happy Shopping!
June 2020 Sunday Stampers

Happy Sunday, hope you are doing well.

Today is an exciting day,  some of my Sunday Stampers are getting together this morning with me to make some cards. It’s been 3 months since we where last together and it’s nice knowing we will be together again.  Some ladies are still choosing not to attend and that’s fine as well, we all need to do right now what we are comfortable with, with no judgement.

And here they are, this months cards:

These cards featuring the following new products:

  • Forever Fern Bundle
  • Forever Gold Laser-Cut Specialty Paper
  • Forever Greenery Designer Series Paper
  • In Good Taste Designer Series Paper
  • Tasteful Touches Bunde

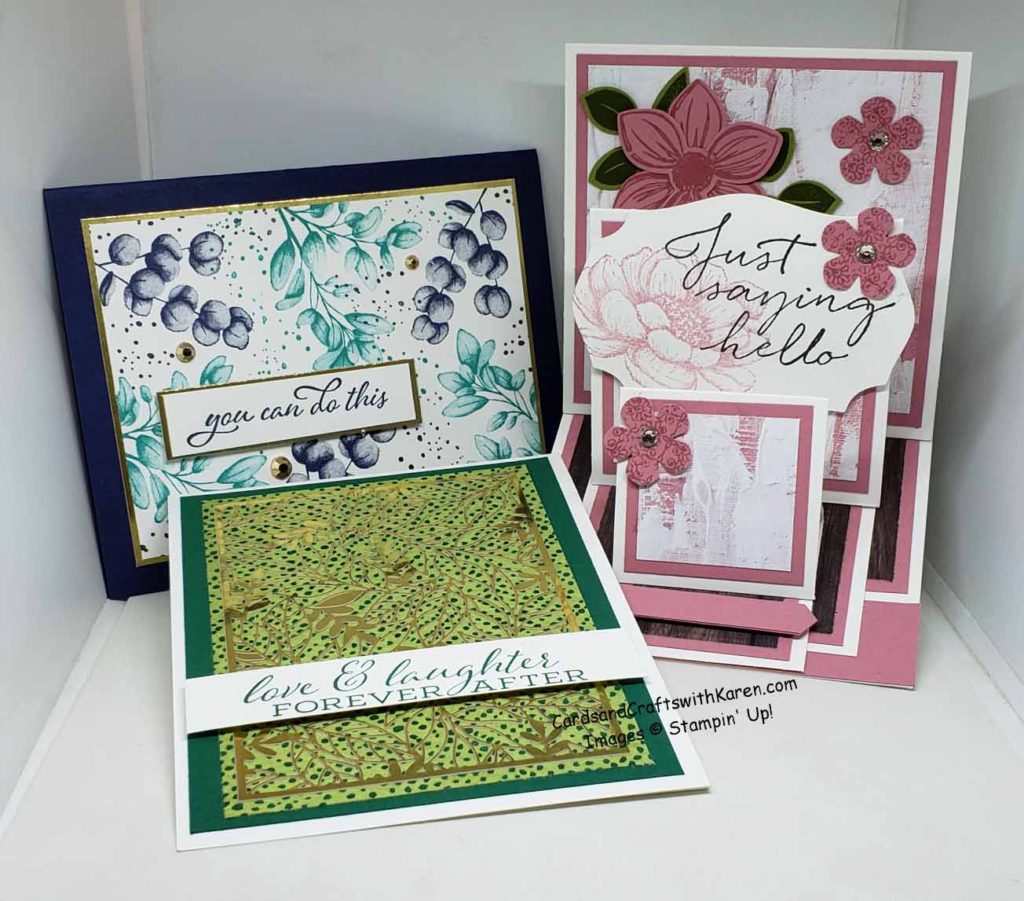
The first card features images from the Forever Fern Bundle, this is a “Distinktive” Stamp set and the images are stunning!

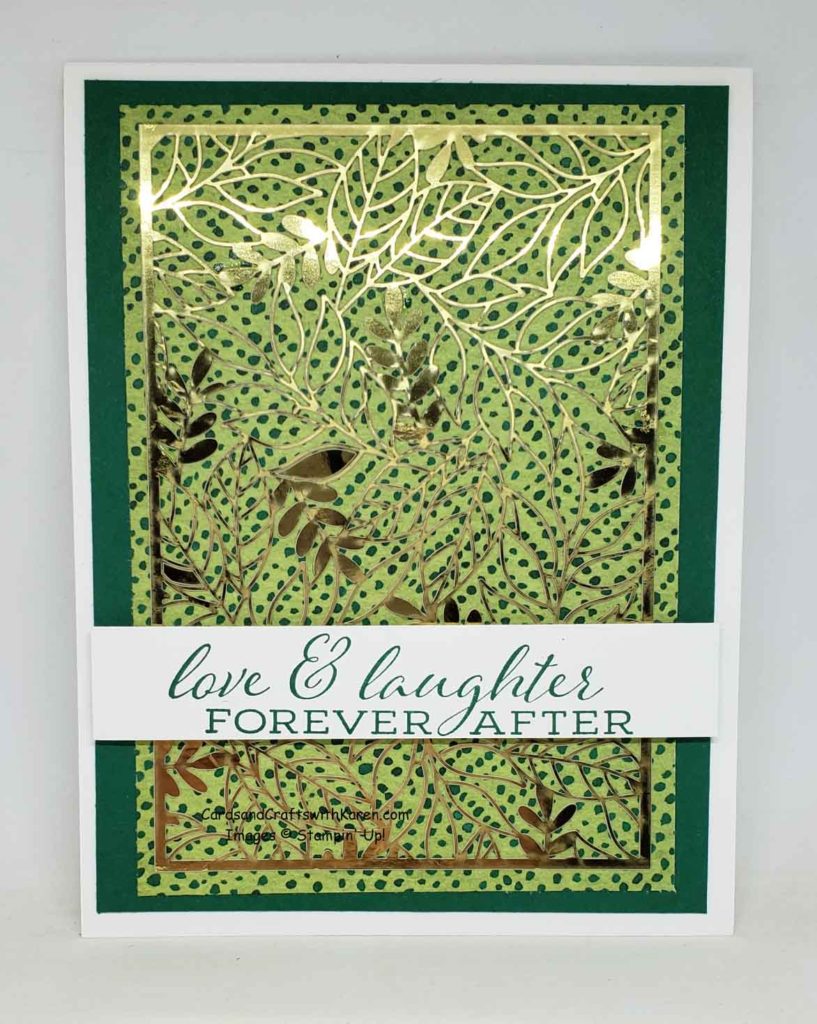
Second we have a clean and simple card featuring the Forever Gold Laser-Cut Specialty Paper. The Gold Laser-Cut paper is beautiful and you get 6 sheets, 3 of each design and they are double sided – gold foil & white.

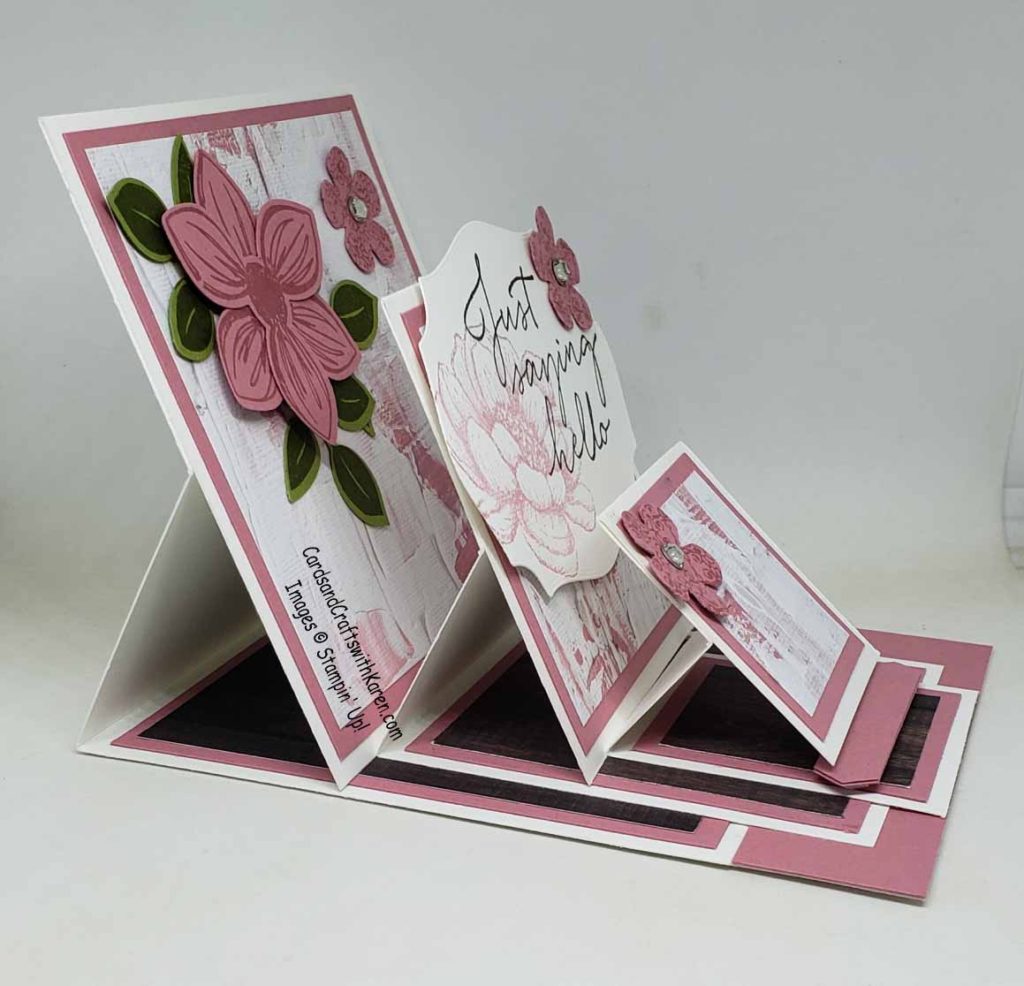
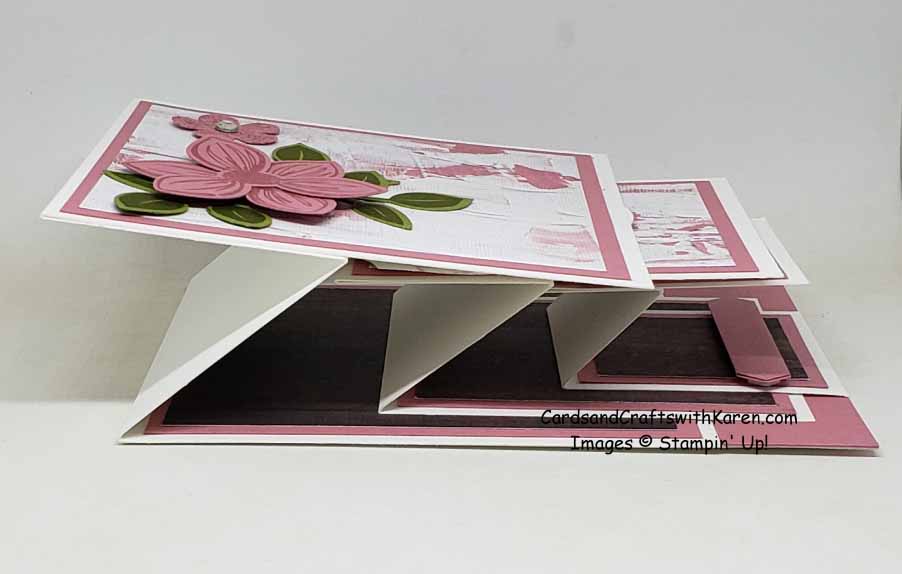
Finally we have a Triple Easel Card featuring the products from the In Good Taste Suite – the bundle and designer paper.


And yes, the card will fold flat for mailing, though it is rather thick depending on how you decorate the card.

For measurement and how to make the cards, please feel free to download the project sheet here:  June 2020 Sunday Stamper Cards

Thank you for taking the time to stop by today, hope this project has inspired you to try paper crafting. Have a great day – Craft On!

Follow me on Instagram @cqueen309 and on Facebook at “Cards and Crafts with Karen”.

Click on any of the images below for more product information and to order directly from my on-line store.

When shopping check demonstrator contact, then I can happily send you a re-useable thank you card. For orders is over $150, please use all of the Host Rewards you’ve earned.  Otherwise, I’d love for you to add your order to the Current Code 6HPQRSME.

Happy Shopping!
 

Dogs & cats, oh my!

Happy Wednesday, hope your week is going well.

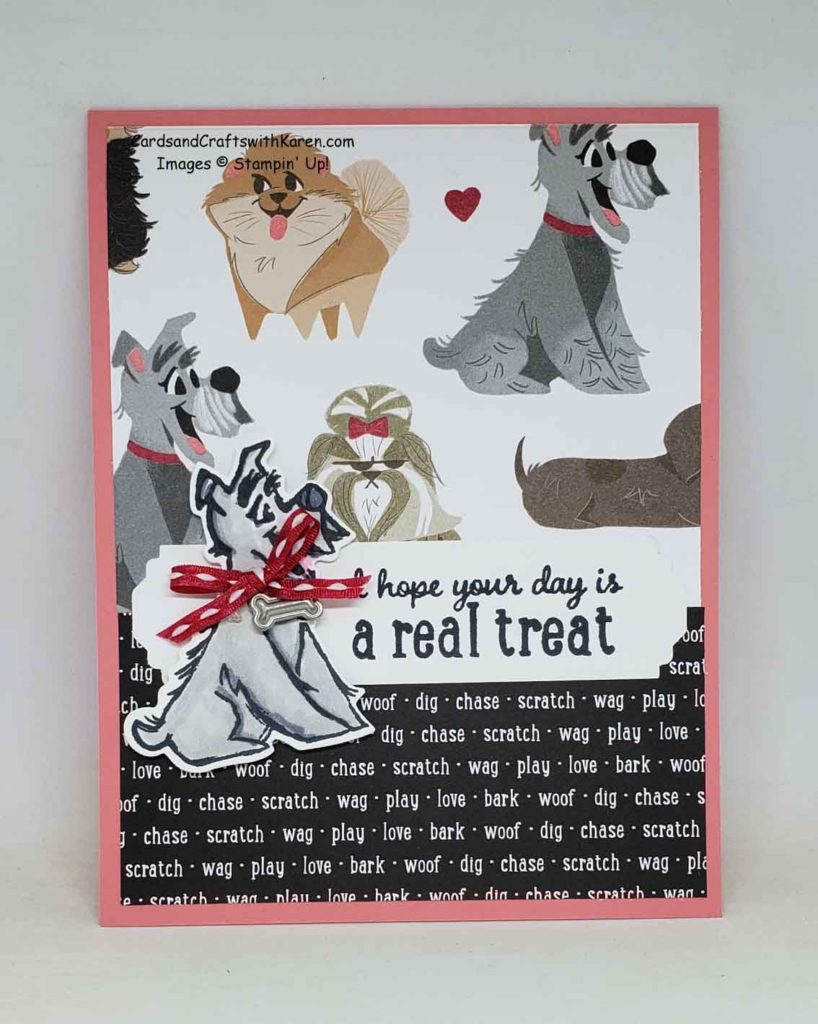
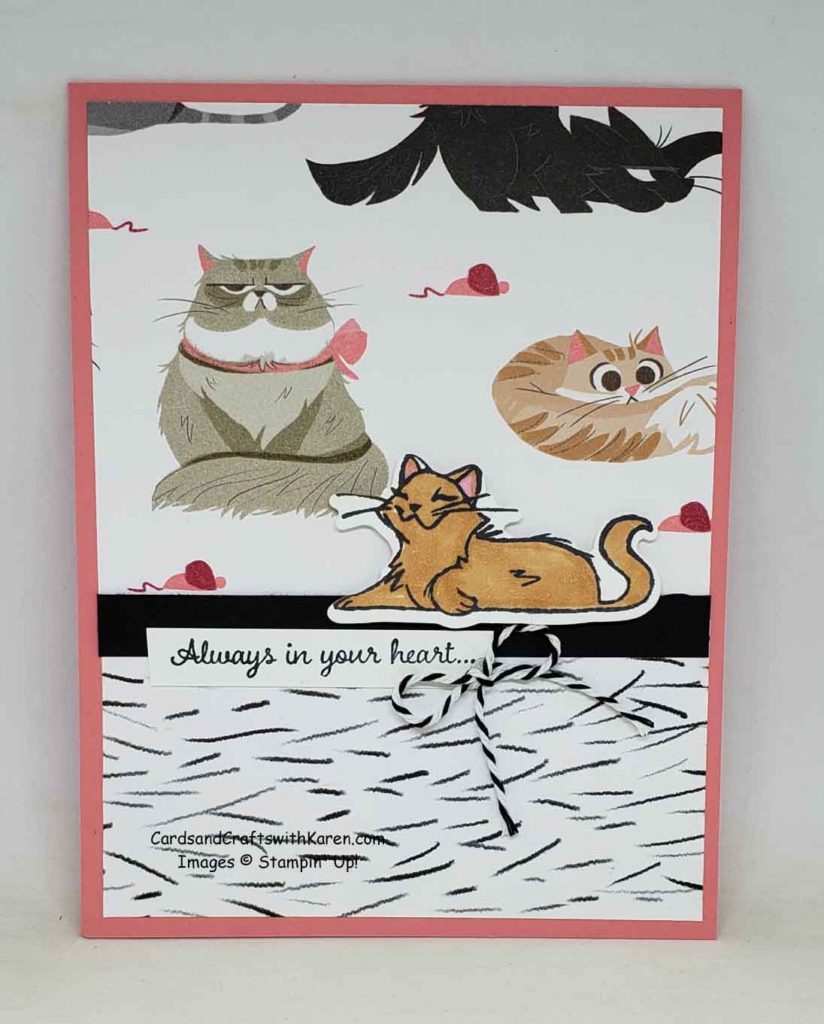
Today I have two cards to share with you featuring products from the Playful Pets Suite which features both cats & dogs!  The Pampered Pets Bundle features the Pampered Pets Stamp Sets, 11 cling stamps that are whimsical cats and dogs along with the Pets Dies, 5 – two dogs and two cats some of which match the Playful Pets Designer Series Paper.

Both cards have the same basic layout:

  • Flirty Flamingo card base – 4 1/4″ x 11″, scored at 5 1/2″
  • Designer Series Paper 4″ x 5 1/4″, cut on the long side at 3 1/4″

For the dog card below, the Lovely Labels Pick a Punch was used to create the Whisper White banner the greeting was stamped on.  The dog was stamped with Memento Black ink , colored with light and dark Smoky Slate Stampin’ Blend markers along with Rocco Rose for his cute little tongue and die cut with matching die. The Real Red bow is with ribbon from the Playful Pets Trim Combo Pack with a Silver bone trinket added with a Mini Glue Dot.


Here is the cat card, the image was die cut and colored with the Light Cinnamon Cider Stampin’ Blend marker.  The sentiment is only the top portion of one of the stamps inked and stamped then trimmed to a thin strip. Finishing touch is a tiny bow.

Thank you for taking the time to stop by today, hope this project has inspired you to try paper crafting. Have a great day – Craft On!

Follow me on Instagram @cqueen309 and on Facebook at “Cards and Crafts with Karen”.

Click on any of the images below for more product information and to order directly from my on-line store.

When shopping check demonstrator contact, then I can happily send you a re-useable thank you card. For orders is over $150, please use all of the Host Rewards you’ve earned.  Otherwise, I’d love for you to add your order to the Current Code 6HPQRSME.

Happy Shopping!
 

Stampin’ Up! Video’s

Today I thought I would share with you some of the Stampin’ Up! video’s featuring some of the new products in the 2020-2021 Annual Catalog.

2020 – 2021 Annual Catalog:


New Seal & Seal+ Adhesive:


Artistry Blooms Suite:


Peony Garden Suite:


World of Good Suite:


Thank you for taking the time to stop by today, hope this project has inspired you to try paper crafting. Have a great day – Craft On!

Follow me on Instagram @cqueen309 and on Facebook at “Cards and Crafts with Karen”.

Click on any of the images below for more product information and to order directly from my on-line store.

When shopping check demonstrator contact, then I can happily send you a re-useable thank you card. For orders is over $150, please use all of the Host Rewards you’ve earned.  Otherwise, I’d love for you to add your order to the Current Code 6HPQRSME.

Happy Shopping!
 

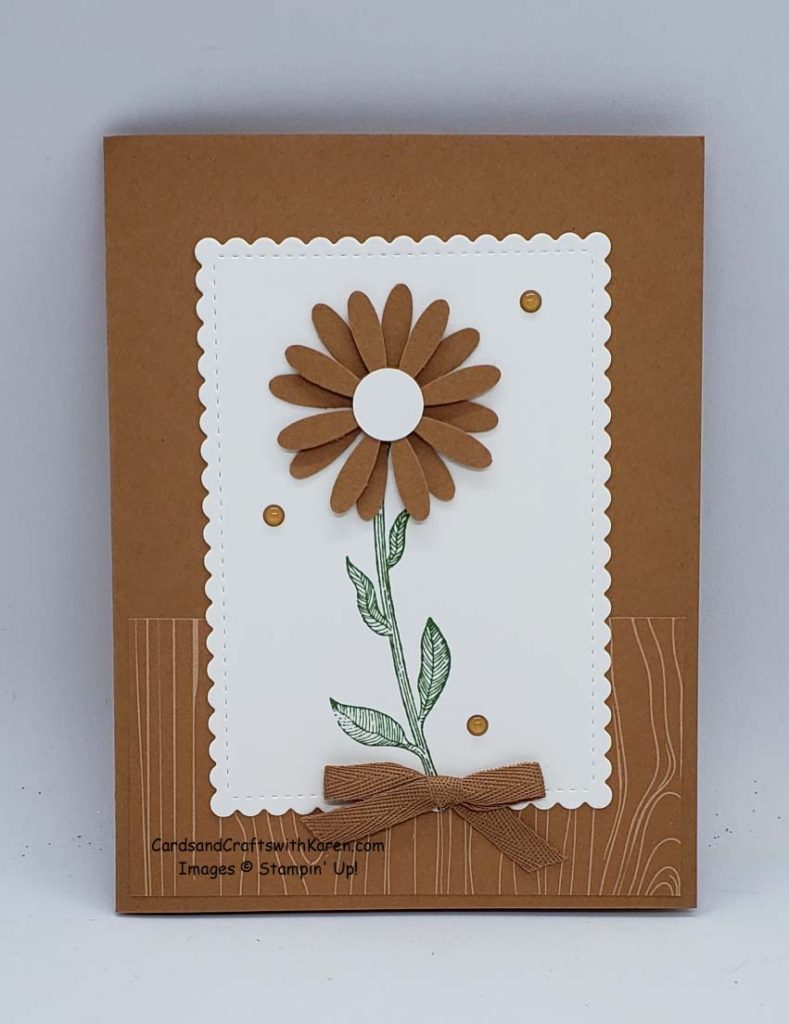
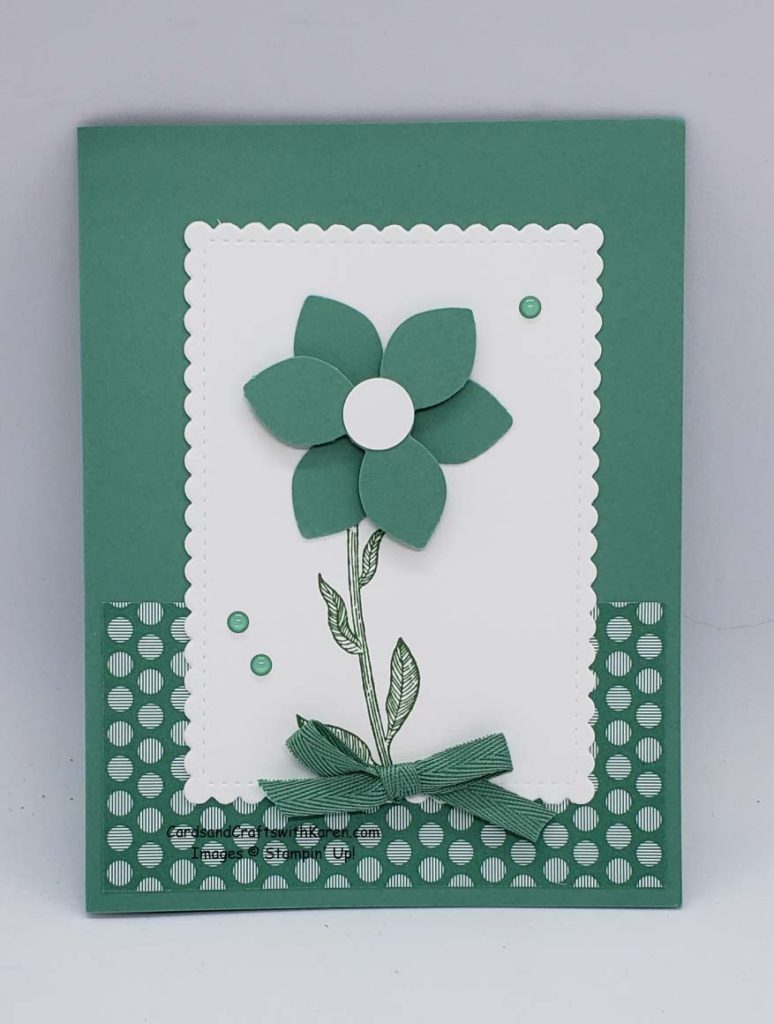
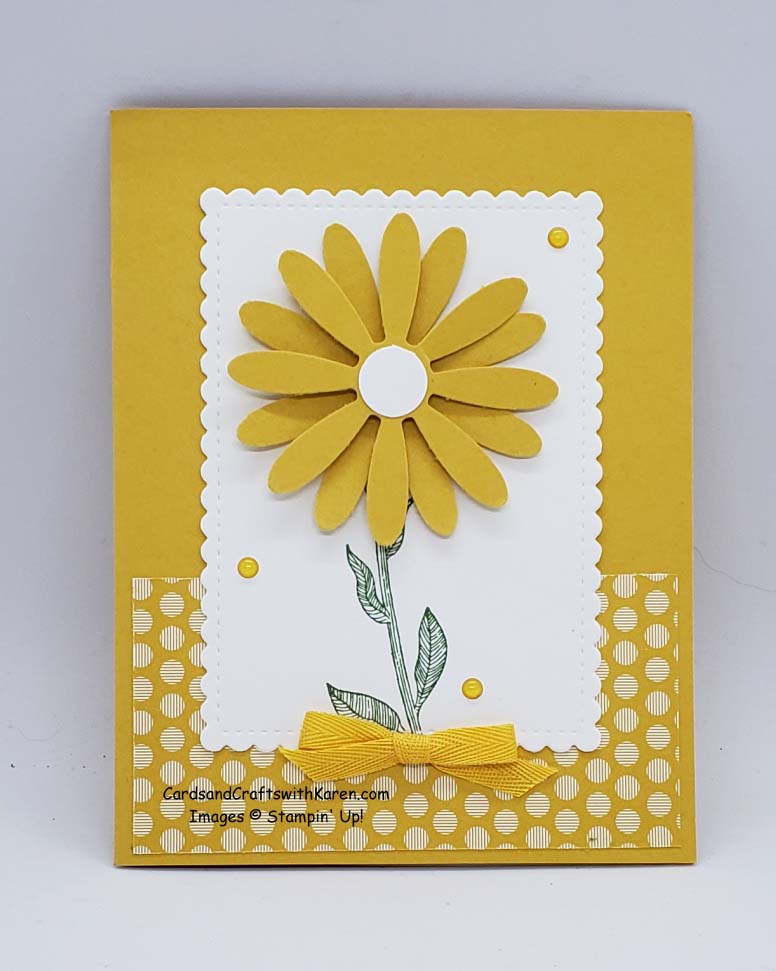
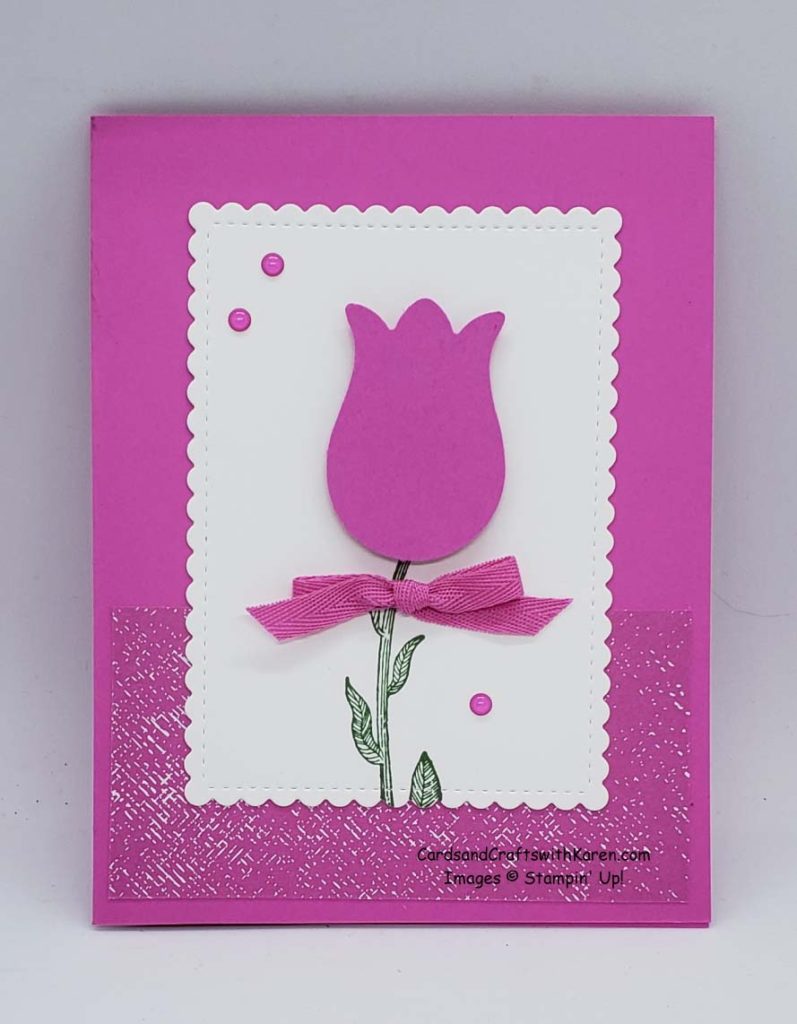
Welcome to the 2020 – 2022 In-Colors

Let me introduce you to the new 2020-2022 In-Colors.

Cinnamon Cider:

Just Jade:

Bumblebee:

Magenta Madness:

Misty Moonlight:

These colors come in the following coordinating products:

  • 8½” x 11″ Card stock packages (individual & variety)
  • 12″ x 12″ Variety card stock package
  • Classic Stampin’ Ink Stamp Pad
  • Classic Stampin’ Ink Refill
  • Designer Series Paper Combo Pack
  • 2020-2022 In-Color Enamel Dots
  • 2020-2022 In-Color 1/4″ Ribbon

The following colors also come in Stampin’ Blends Combo Packs (light & dark):

  • Cinnamon Cider
  • Just Jade
  • Magenta Madness
  • Misty Moonlight

Thank you for taking the time to stop by today, hope this project has inspired you to try paper crafting. Have a great day – Craft On!

Follow me on Instagram @cqueen309 and on Facebook at “Cards and Crafts with Karen”.

Click on any of the images below for more product information and to order directly from my on-line store.

When shopping check demonstrator contact, then I can happily send you a re-useable thank you card. For orders is over $150, please use all of the Host Rewards you’ve earned.  Otherwise, I’d love for you to add your order to the Current Code 6HPQRSME.

Happy Shopping!
It’s Here !

Today is the day!  The new Stampin’ Up! Annual Catalog is live!


The launch of a new catalog is always exciting, but what it ever better is amazing promotions!  Between June 3 – 30, 2020 all orders over $250 USD earn an additional $25 in Stampin’ Rewards. Orders over $150 start to earn a % of total purchase (before shipping & tax) in rewards. Rewards can be used to purchase pre-priced host sets (page 187 new catalog) or any product you choose.

The second promotion is to join the Stampin’ Up! family.

It’s a bundle bash! If you have been thinking about becoming a Stampin’ Up! demonstrator, now’s the perfect time to invite them to join. Not only will they get a Starter Kit—already a great value at $99 USD for $125 USD worth of products—but for a limited time, you can select any stamp/tool bundle (pages 173-179) from the new 2020–2021 Annual Catalog for FREE.

Here is a preview of some of the cards I’ll be sharing over the next few weeks!

Thank you for taking the time to stop by today, hope this project has inspired you to try paper crafting. Have a great day – Craft On!

Follow me on Instagram @cqueen309 and on Facebook at “Cards and Crafts with Karen”.

When shopping check demonstrator contact, then I can happily send you a re-useable thank you card. For orders is over $150, please use all of the Host Rewards you’ve earned.  Otherwise, I’d love for you to add your order to the Current Code 6HPQRSME.

Happy Shopping!
 

Need a card and gift card holder? then I have a project for you!
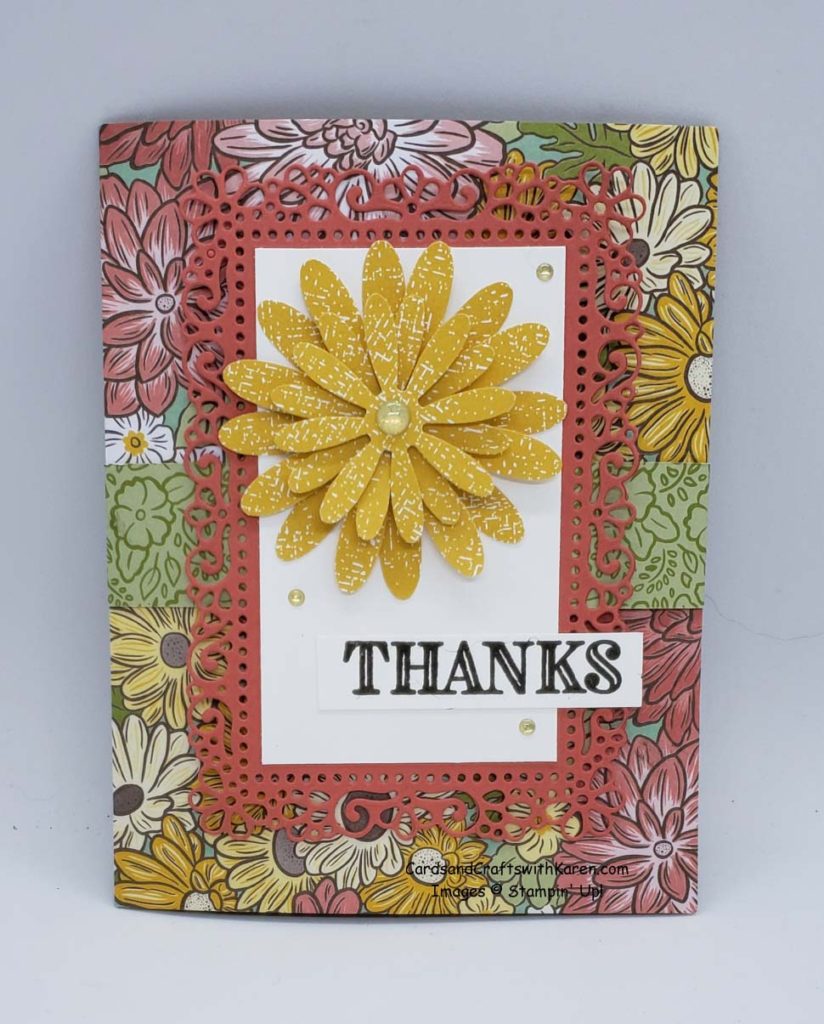
While looking for an idea for my niece’s graduation card this past weekend, I came across a card made with designer series paper that includes an attached gift card holder. Now the gift card holder could hold cash, business card or anything that fits in the opening.

For the card I created I’ve used the Ornate Garden Suite of products including:

  • Ornate Garden Specialty Designer Series Paper
  • Ornate Thanks Bundle
    • Ornate Thanks Photopolymer Stamp Set
    • Ornate Border Dies
  • Ornate Style Bundle
    • Ornate Style Cling Mount Stamp Set
    • Ornate Layers Dies

The Daisy’s on the front and inside of the card have been punched using the Medium Daisy and Daisy Punches using a piece of the new Bumblebee 6″ x 6″ In-Color Designer Series Paper, which is available June 3rd.

The card starts with a piece of designer series paper cut 5.5″ x 12″, which means you get two cards from one piece of designer paper.  For my card, I decided to use a belly band (1″ wide strip) decorated, as the focal image for the front of the card.

On the inside of the card, I’ve punched and added three daisy’s using the remaining Bumblebee In-Color Designer Paper used for the daisy’s on the belly band of the card.  On the right inside is a Terracotta Tile mat 4″ x 5.25″ and Whisper White 3.75″ x 5″ for stamping or writing. Since I’m not sure what I’ll use the card for, I’ve left it blank for now.

For the gift card holder, I created a thumb hole using a retired 1″ circle punch before I used a thin line of glue to adhere the holder together.

Here is a downloadable template that shows measurements, Card with holder template

Thank you for taking the time to stop by today, hope this project has inspired you to try paper crafting. Have a great day – Craft On!

Follow me on Instagram @cqueen309 and on Facebook at “Cards and Crafts with Karen”.

Click on any of the images below for more product information and to order directly from my on-line store.

When shopping check demonstrator contact, then I can happily send you a re-useable thank you card and small gift.

Happy Shopping!