


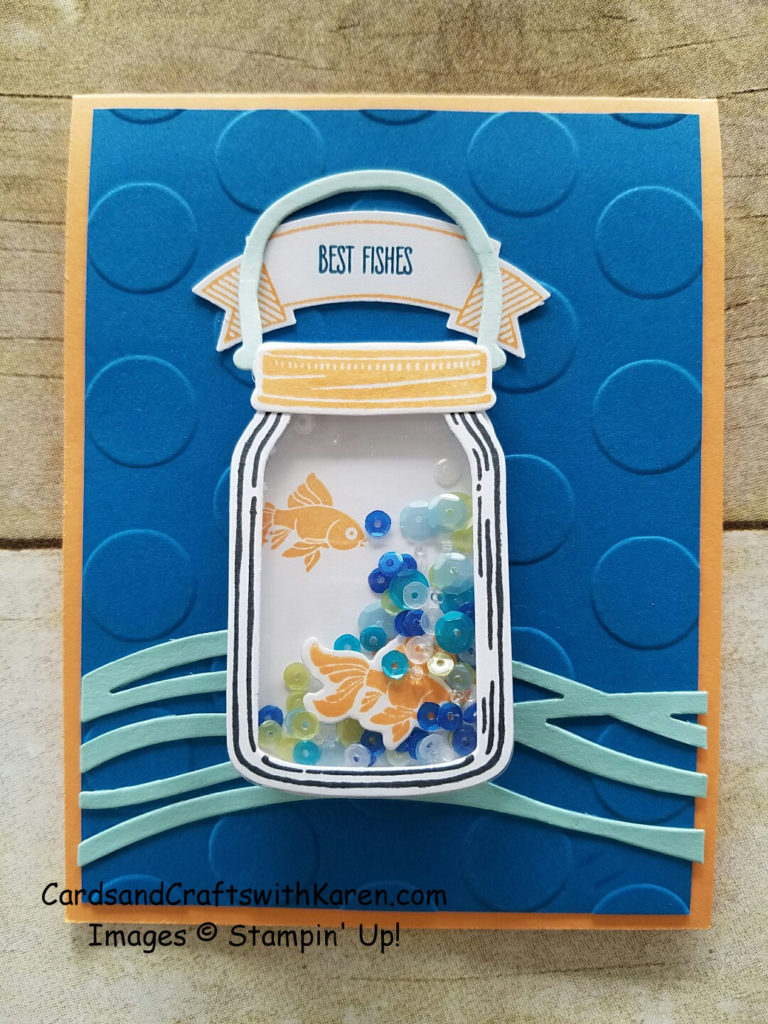
Happy Friday. Earlier this week I told you I would explain how I made the easel portion of my shaker card, well today is the day. I want to again thank fellow demonstrator Connie Stewart for this idea, it’s definitely a cute feature to add when making a shaker card.
The shaker jar of fishes, can be removed from the front of the card and sit on your desk or anywhere you like. You don’t have to make a jar shaker, any shaker shape will work. In fact, you don’t even need to make a card, but why wouldn’t you?
To get started first you need to make the shaker. Mine is using the Jar of Love Bundle, first using Whisper White and a piece of Window Sheet I die cut the jar. On the jar, stamp a few fishes, this creates added dimension in the background. Next I stamped the jar image on Whisper White and using both the jar die and inside portion to cut the opening ran them through the Big Shot. Next stamp I stamped a few fishes and the jar lid and used the matching dies to cut them out. To create the shaker, glue the Window Sheet to the back of the stamped jar image, then taking one of the new foam adhesive strips run it along the window sheet, making sure to match the ends and cut of the access, you can add that piece to the jar lid. Now fill the ‘well’ you just created with a few fishes and some sequins and glitter, my sequins are from Pretty Pink Posh. Pull the backing off the foam adhesive strips, take the Whisper White jar you die cut and stamped a few fishes on and attach, your shaker is now complete. On the front of the jar, glue the handle then add the jar lid with Stampin dimensionals to the top.
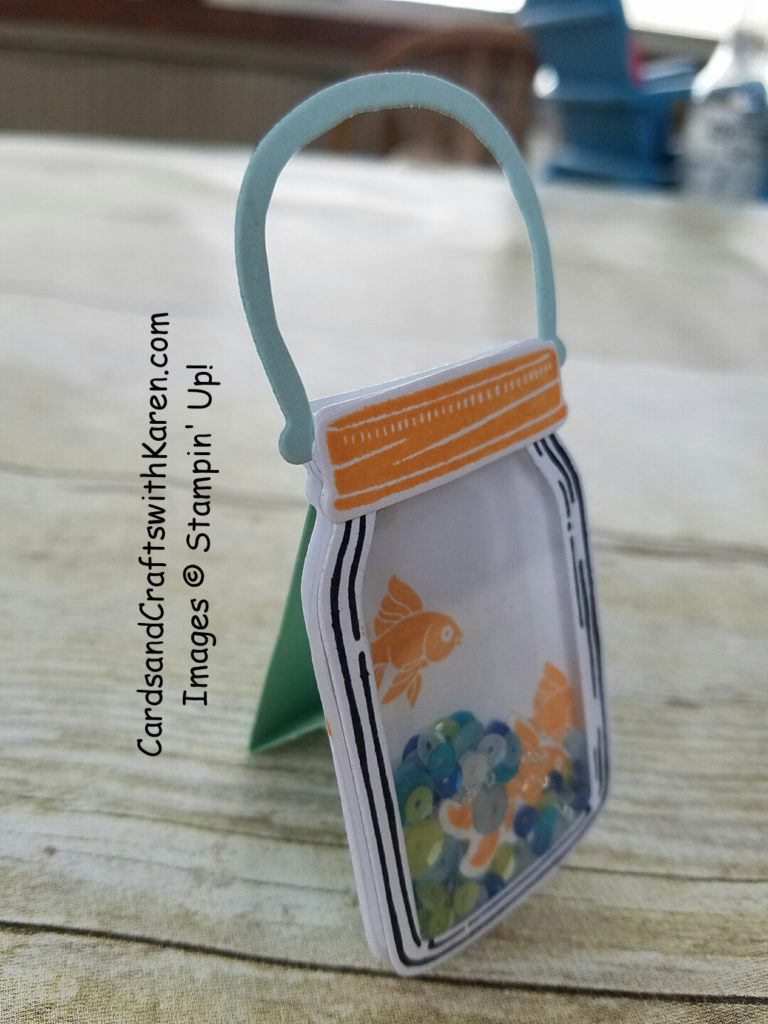
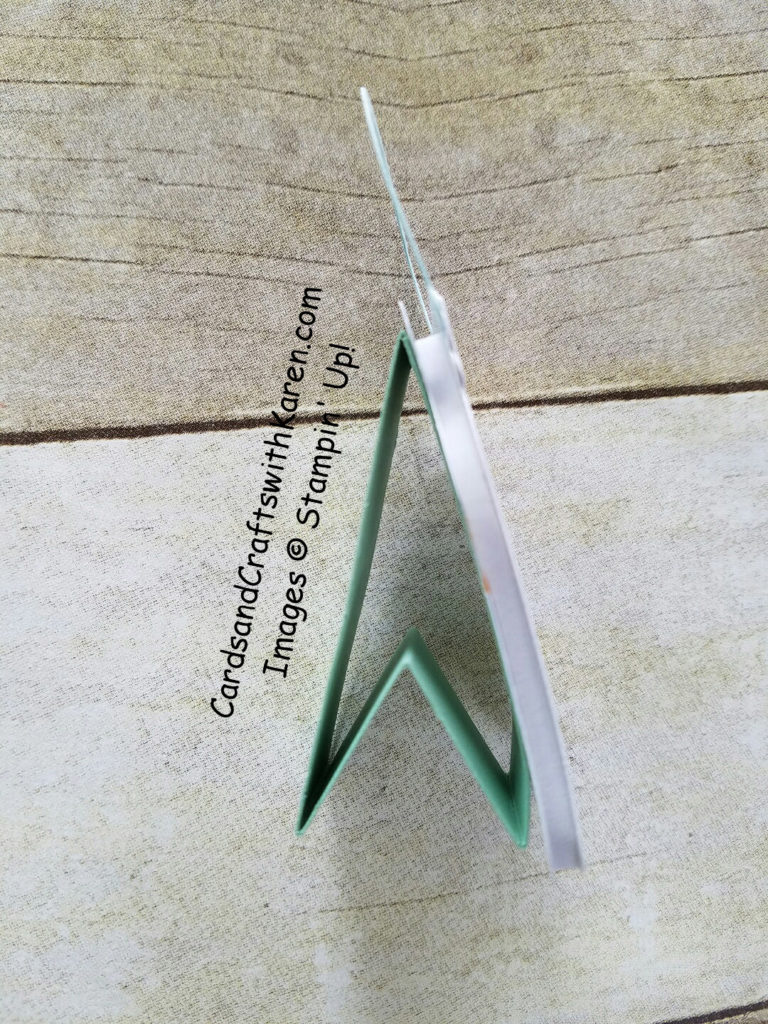
To create the “easel”, use a piece of cardstock that matches one of the colors in your card and cut at 7¾” x 1″ scored at 2½”, 3½”, 4½” and 7″. Fold the score lines and glue the ¾” from one end to the top of the other end, this creates the easel. Glue to the back of the shaker.
To attach to the card, place the jar on the card front to get an idea where you want, use a pencil to make a few markings and cut a 1¼” slit with your Stampin Trimmer. Erase your marks and tuck the shaker in. This is a cute fun project that kids of all ages ( 1 – 100+) will enjoy. Here is the completed card.
Thank you for stopping by, have a great day – Craft On!
Supply list below with link to my online store. Order products to make your own shaker easel card today. Place your order with me and receive a small gift and handmade card in the mail. Happy Shopping.
