
How was your July 4th? It was extremely hot and humid here is PA. At 10am it was 84 degrees and I was in the swimming pool enjoying pool time with the boys (Nitro & Diesel). With the heat we prefer not to have the dogs out to long and morning is always better than mid-day. After a few hours I came back inside and put today’s card together, I thought about it while swimming, I guess water inspires water. It reach 94 degrees, feeling like 106, with a rain storm in the evening. Back to work now . . .
Today’s card is for the Paper Craft Crew Challenge #PCC297, the theme is “By the Sea”. Banner below and check out their blog and play along if you like.
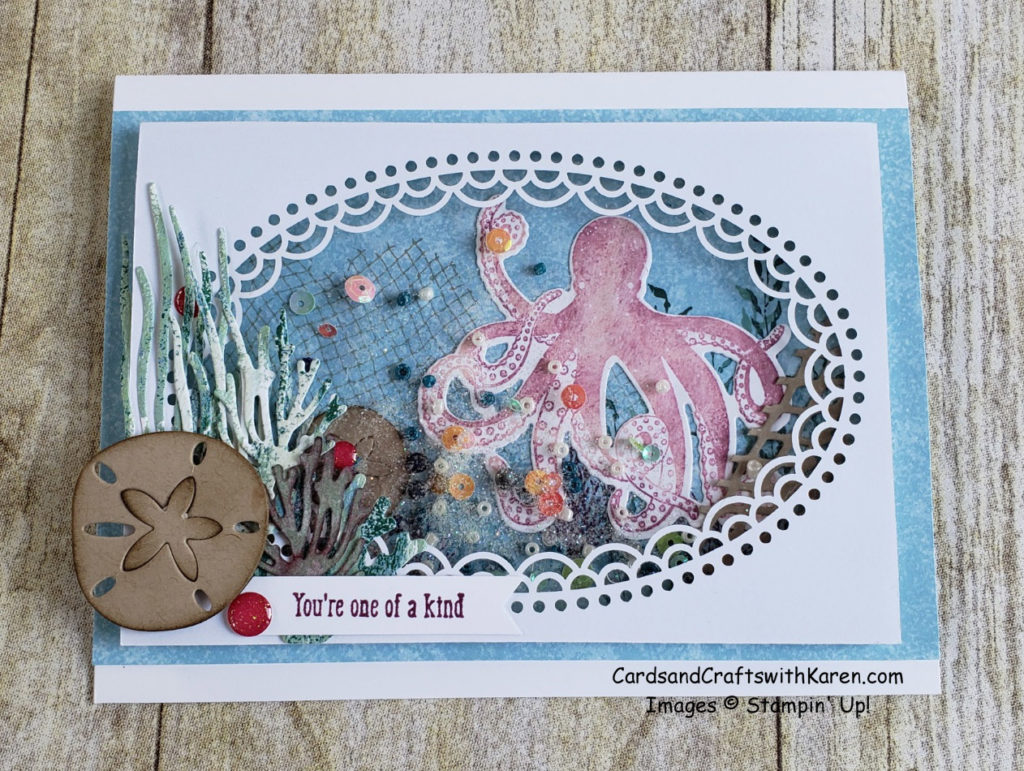
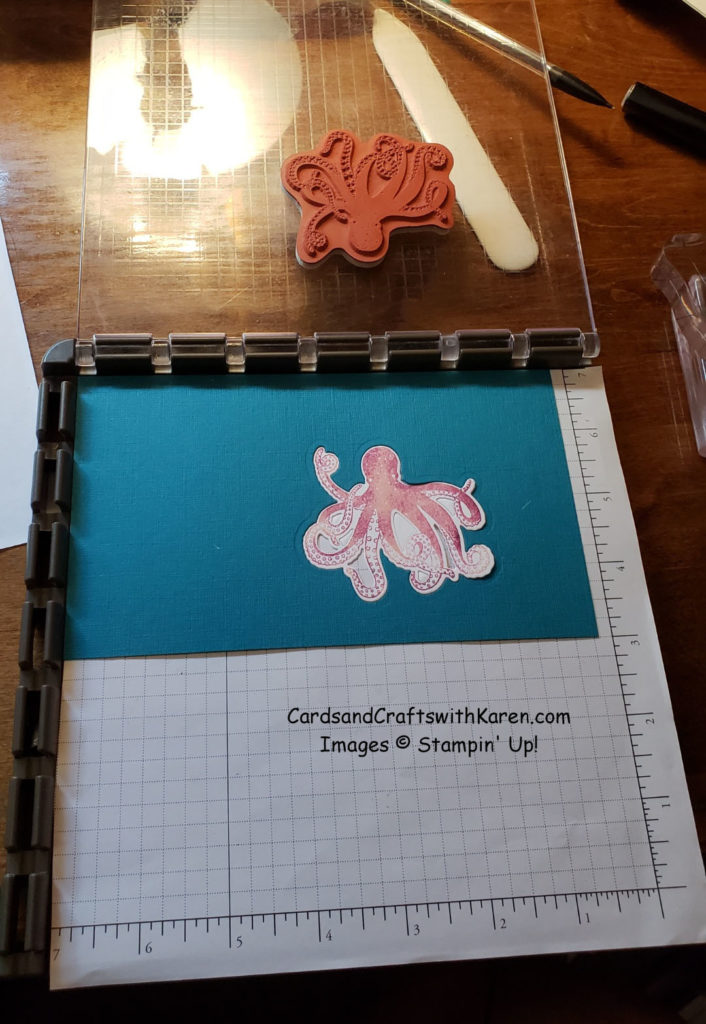
To create my card I started with one of the segments from the Delightfully Detailed Laser Cut Specialty Paper and backed it with a piece of window sheet for the start of a shaker card. Images for both inside and out are from the Sea of Textures stamp set and die cut with the matching Under the Sea Framelit Dies. Some images are die cut directly from the Tranquil Textures Designer Series Paper. For the octopus I used the Stamparatus and first inked the stamp with Powder Pink then daubed around the edges in Rich Razzleberry, once stamped I added some Clear Wink of Stella for sparkle. The Tranquil Textures Sprinkles, Dazzling Diamond Glitter and Iridescent Sequins provided the “shaker” elements. Use the Adhesive Strips for a nice height for a shaker card.
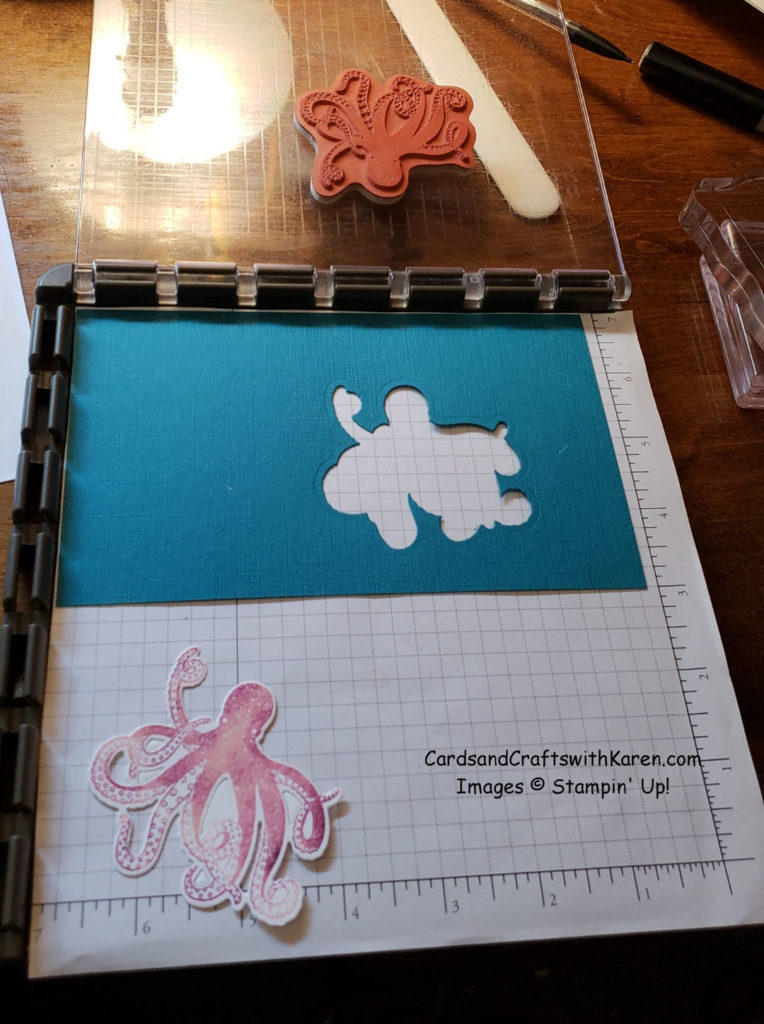
To make stamping the octopus easy, use new Stampin’ Up! tool the Stamparatus. A must have tool for all stampers, the Stamparatus helps you perfectly align stamp images, stamp multiples of the same project quickly and precisely, and get complete ink coverage.
It was created by stampers for stampers, so it has all the features you want:
* Compatible with red rubber and photopolymer stamps
* 2 magnets to hold the paper in place
* Rulers on 2 sides for quick measuring
* 2 open sides so you can use larger paper
* Multiple hinges for more placement options
* 2 reversible plates for 4 sides to work with
* 1 foam mat for use with photopolymer
* 1 base with grid
* Magnet storage areas
Use the simple steps below for 1 or multiple images you need to die cut and stamp.
Stamparatus #1 – create a die cut template of the image you want to stamp:
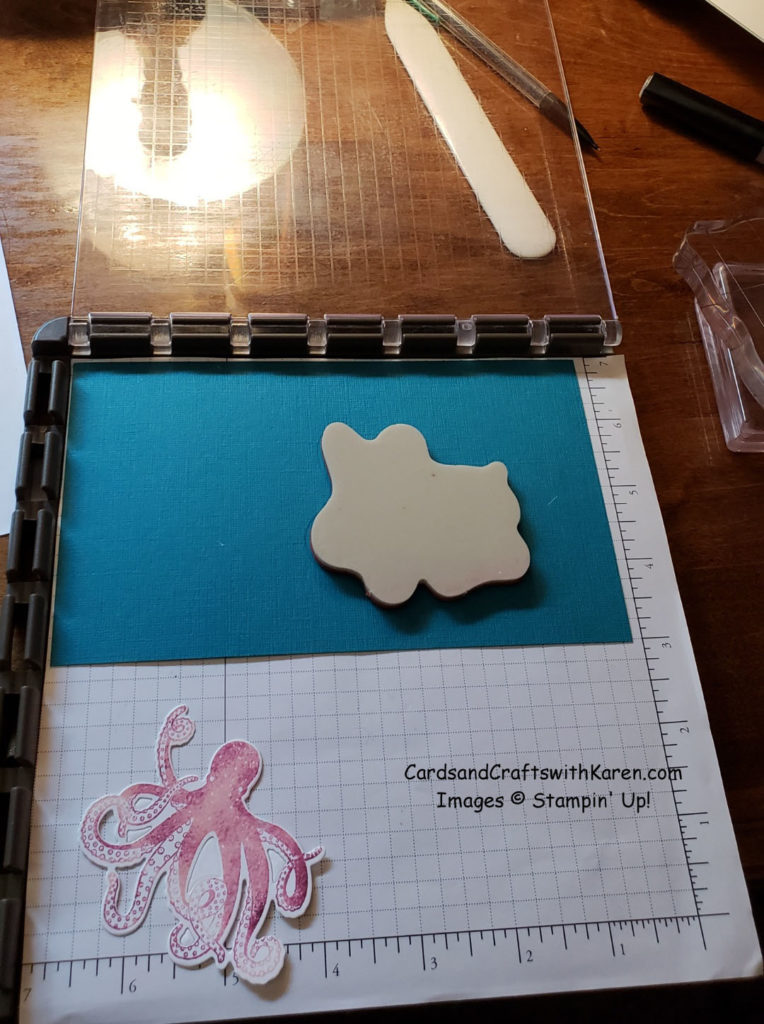
Stamparatus #2 – put the stamp into the were the die cut was made, lay the plate down on the stamp and press to adhere.
Stamparatus #3 – ink image, close plate and press, perfectly stamped image.
Thank you for taking the time to stop by, hope you are inspired to try stamping.
Follow me on Instagram @cqueen309. Have a great day – Craft On!
Click on any of the images below for more product information and to order directly from my on-line store.
Please add your order to the current Host Code 2V6ZFUSB, check demonstrator contact, and I’ll happily send you a re-useable thank you card and free gift. Orders over $50 will receive the Subtle Dynamic Impressions Embossing Folder ($10 value). For orders is over $150, please use all of the Host Rewards you’ve earned. Otherwise, I’d love for you to add your order to the current Host Code 2V6ZFUSB.
Current Promotion for Designer Series Paper, click here.
Happy Shopping!
