
Every November Stampin’ Up! has what is called Onstage (formerly conventions) where demonstrators from all over the world gather for presentations, team building and sharing idea’s with others. I was really looking forward to attend this year as it was in Salt Lake City November 5th – 7th here is the US and not in a different country. Since we’re unable to gather together in person this year, they are offering a virtual event, which I’ll be participating in.
One of the things I really like about Onstage was joining a swap, making and sharing cards with other demonstrators. As a member of a Onstage Facebook group I’m in, I was able to participate in a mail in swap – send 15 cards and get 15 back. Today I’m sharing my card with you for a “Fun Fold Swap”. Later this month I’ll share with you the cards I received.
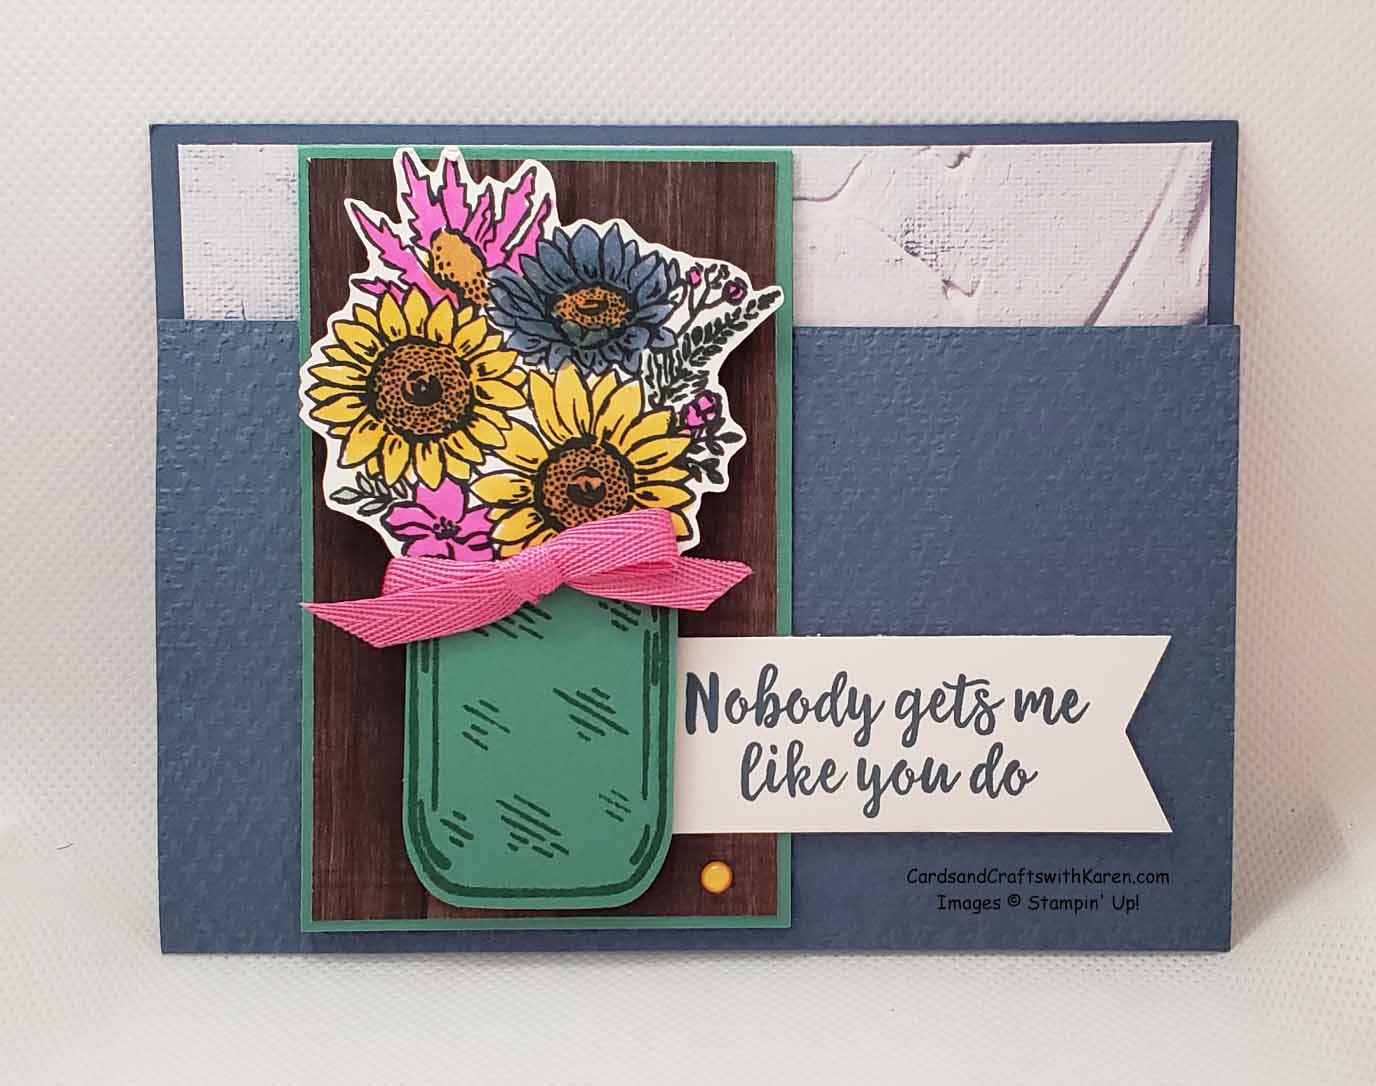
Here are the specifics to make the card:
- Misty Moonlight card base 5.5″ x 8.5″, scored at 4.25″ with 1″ cut off one side
- Run the shorter side through your embossing machine with Tasteful Textile 3D Embossing Folder
- In Good Taste Designer Series Paper 4″ x 5.25″ piece for the inside
- Whisper White card stock die cut with Scallop Rectangle Die from Stitched So Sweetly Dies
- Just Jade card stock 2.5″ x 8″, scored at 4″ and one side adhered to the inside and the other flaps over the front
- In Good Taste Designer Series Paper 2 3/8″ x 3 7/8″ piece for the outside of Just Jade piece
- Stamp and punch Jar (Just Jade ink & card stock) – adhere with Dimensionals
- Using Memento ink – stamp flower image, color with Stampin’ Blend Markers and cut out with Paper Snips, adhere with Dimensionals
- Sentiment banner is 1″ x 4″, flag one end and tuck other end under jar, cut excess paper if needed, make sure to only add adhesive to the portion that is against Just Jade piece so you don’t adhere the card closed
- Add In-Color bow with glue dot and In-Color Enamel dot at the bottom
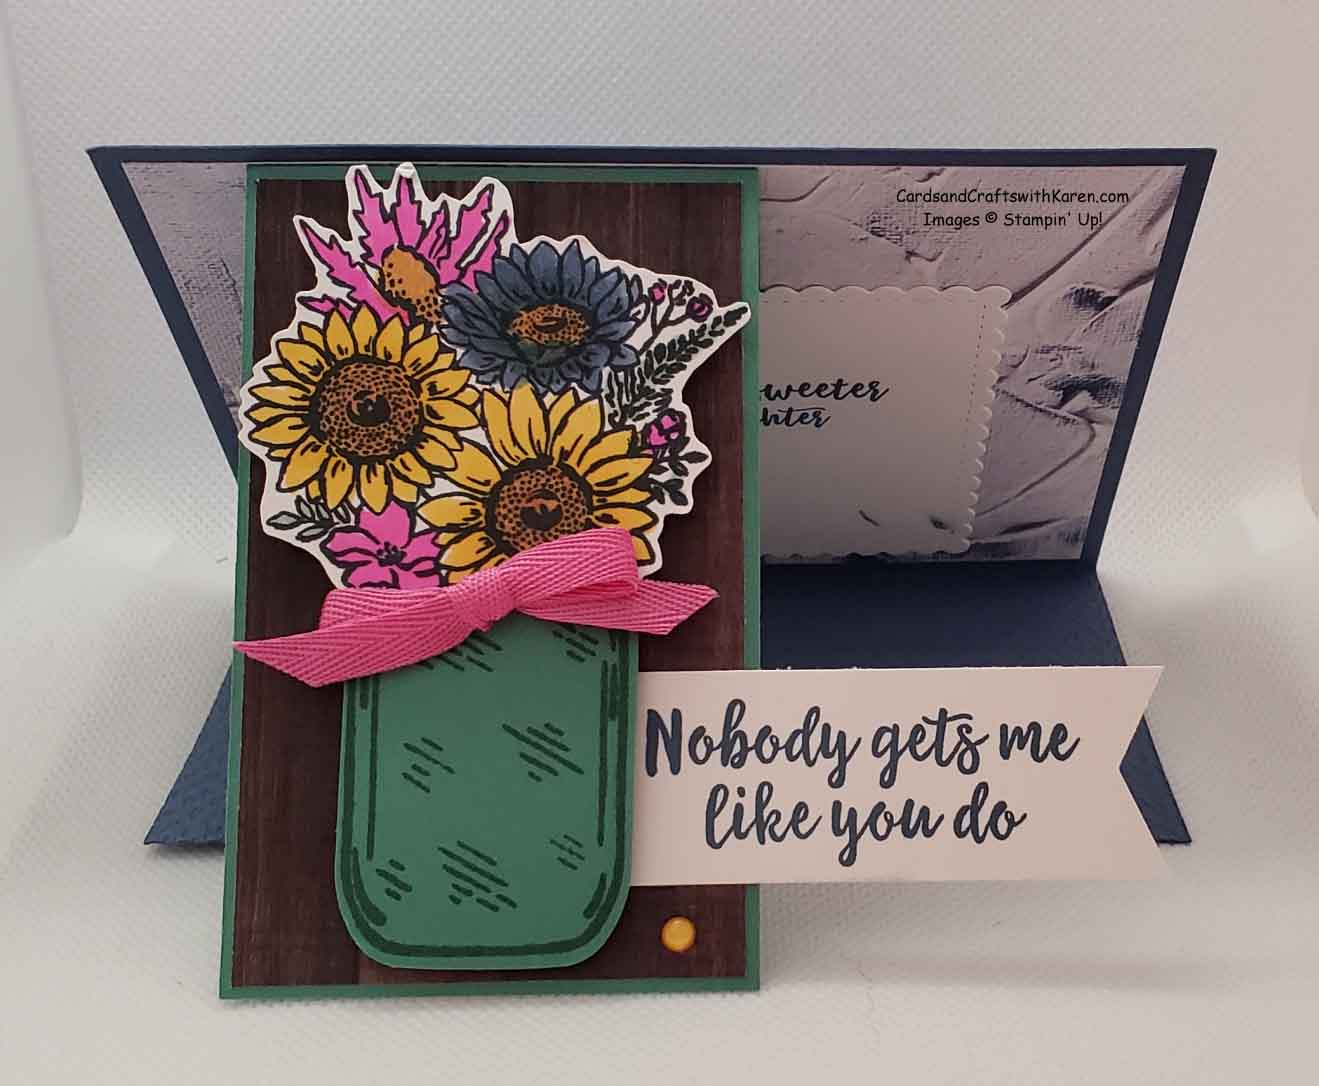
This view has the front embossed section down so you can see the inside with the flap section.
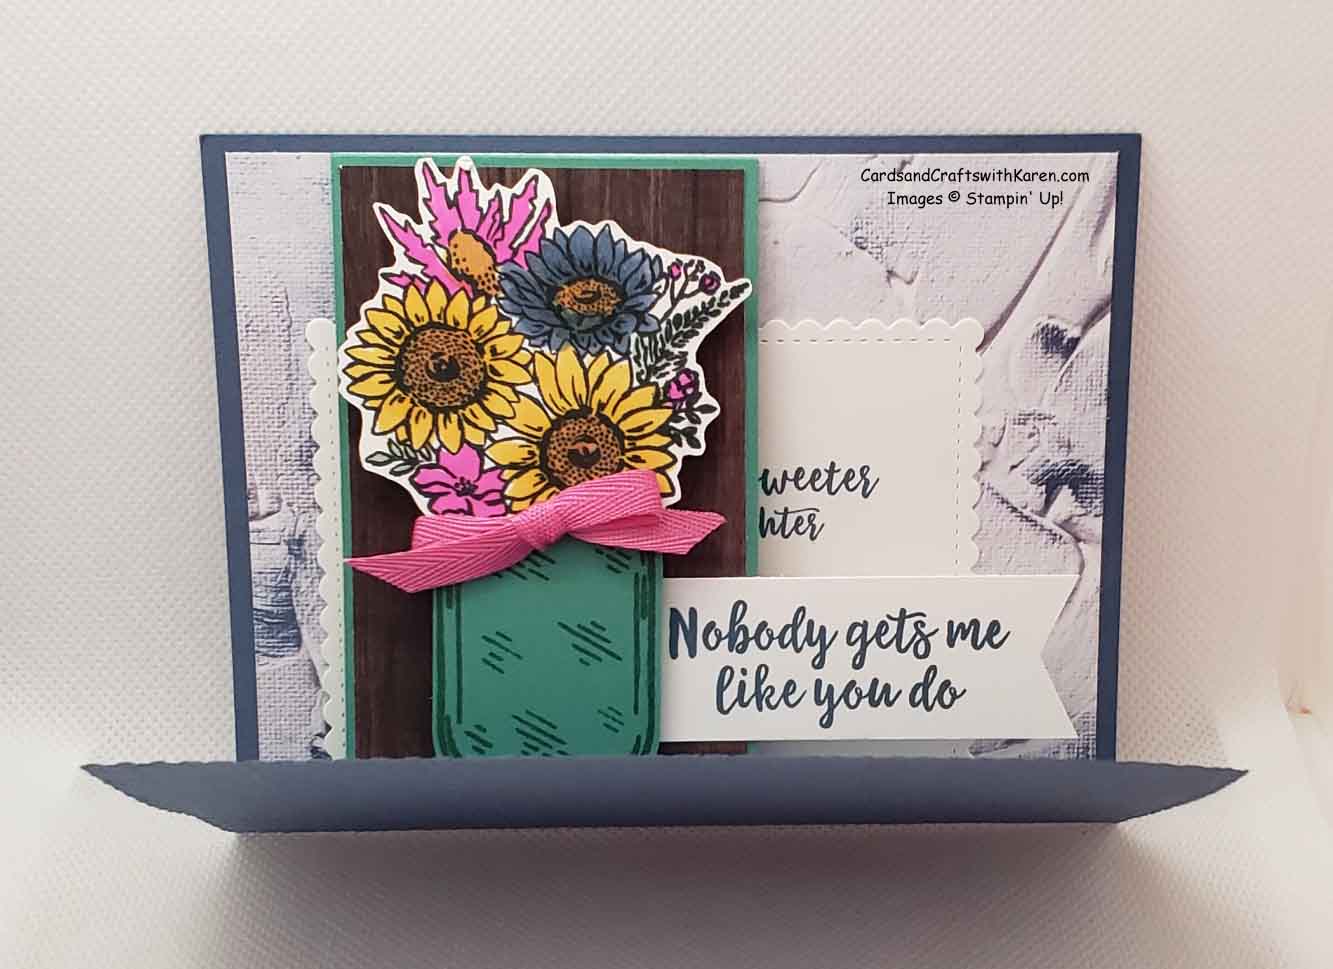
Here is a picture of the inside of the card, where the Scalloped Rectangle was stamped and adhered close to the bottom of the designer paper in the middle. Not to worry, all of the swap cards I sent in did not have ink smears on them, I kept that one for myself!
Thank you for taking the time to stop by today, hope this project has inspired you to try paper crafting. Have a great day – Craft On!
Follow me on Instagram @cqueen309 and on Facebook at “Cards and Crafts with Karen”.
Click on any of the images below for more product information and to order directly from my on-line store.
When shopping check demonstrator contact, then I can happily send you a re-useable thank you card. For orders is over $150, please use all of the Host Rewards you’ve earned.
Current shopping code: D3JDJHC3
Happy Shopping!
