
Happy Saturday, hope you are having a good weekend.
Today I thought I would share a card were I used the Gilding Leafing to create the border for the matting and to fill into the “empty” space on the focal image.
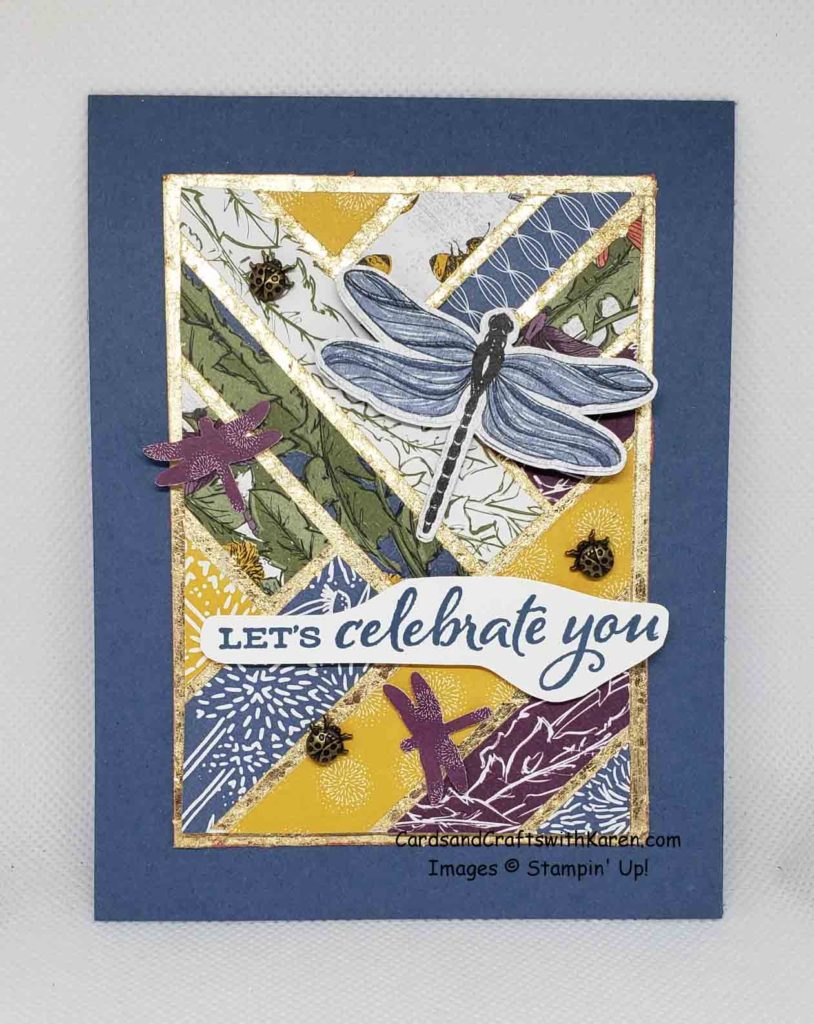
Here is how I created the focal image:
- Add card stock to an adhesive sheet cut to size
- Leaving a small space, about 1/8″ between the strips – added designer series paper cut in various widths to create a pattern
- Once all designer series paper is adhered, added Gilding Leafing to the spaces just like grout with tile
- Burnish with your finger to make Gilded Leafing stick to the exposed adhesive sheet
- For the mat I added Tear & Tape to the edge and applied the Gilded Leafing
- Focal image section is adhered with Stampin’ Dimensionals
Card is decorated with dragonflies and Ladybug trinkets adhered with glue dots. Sentiment was stamped in Misty Moonlight ink on Basic White card stock and hand cut out with paper snips.
Thank you for taking the time to stop by today, hope this project has inspired you to try paper crafting. I would love to have your business.
Follow me on Instagram @cqueen309 and on Facebook at “Cards and Crafts with Karen”.
Click on any of the images below for more product information and to order directly from my on-line store.
Current Host code: NKF94S67
When shopping my online store, check demonstrator contact, then I can happily send you a re-useable card and the rewards you qualify for, check out the rewards tab for more information.
For orders is over $150, please use all of the Host Rewards you’ve earned, and I’ll send you your rewards as long as you check demonstrator contact.
Have a great day – Craft On! Happy Shopping!
