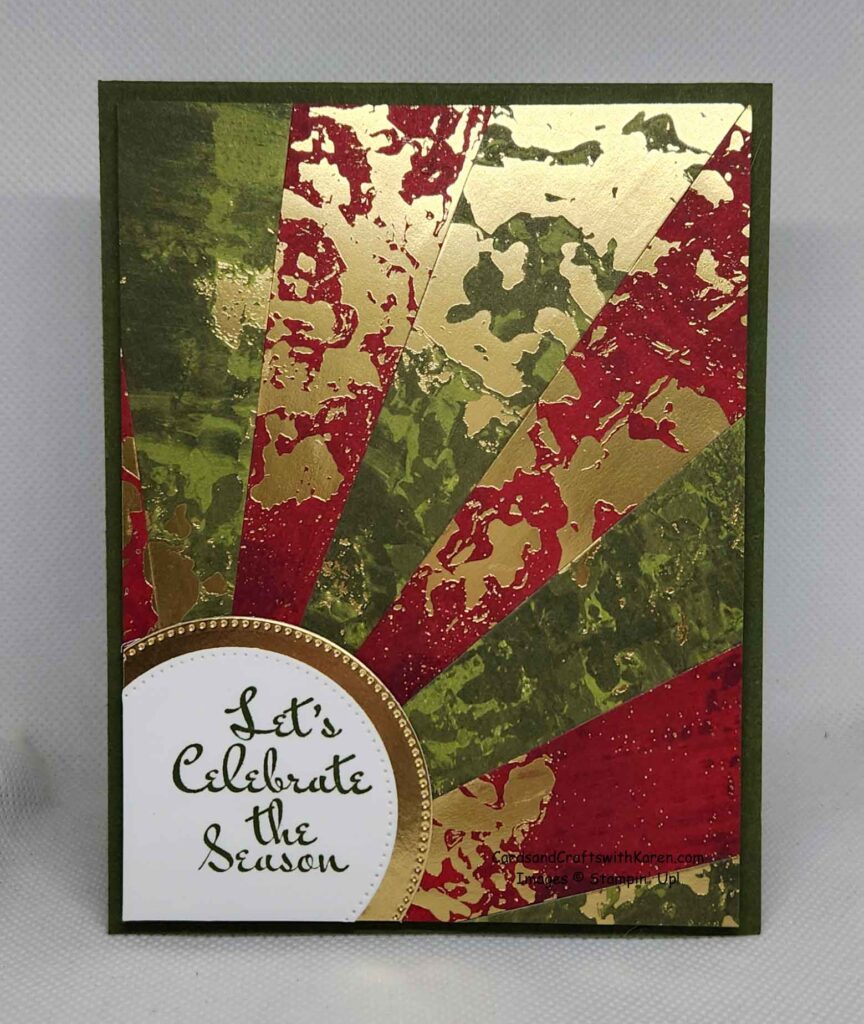
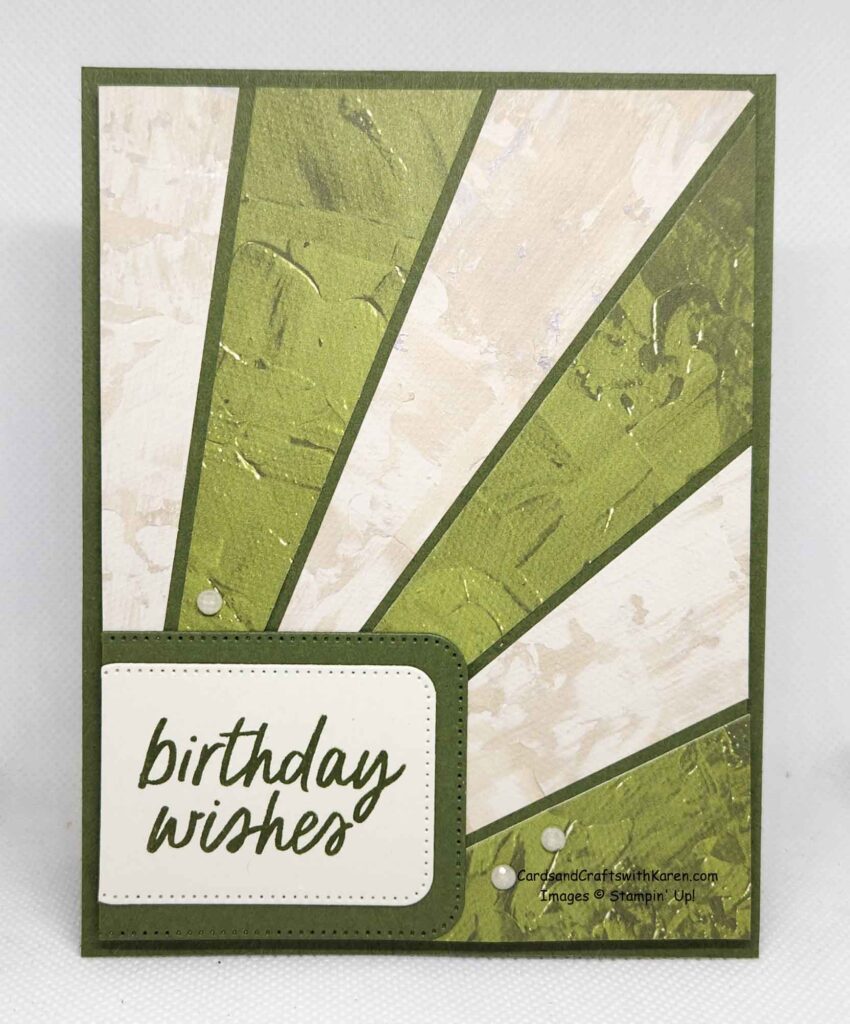
Have you made a Starburst card lately, if not, today’s post is for you.
Measurements & Instructions:
- 4 strips each of two designs 1½” x 6″
- Cut in strip from top left corner to bottom right using your paper trimmer
- Card stock mat 4″ x 5¼” to layer strips on
- First strip to add in the one with the tip at the top right corner of the mat
- Keep in mind as you add strips the bottom right will look funny, don’t worry the greeting piece will cover the ends
- Stamp greeting, mat and add to card stock mat with strips adhered, cut off excess paper from strips and greeting layer
- Adhere final unit piece to card base
Next, the first card where all the strips are butted together when adhering to the mat.
Finally, a second option with the card. When adhering the strips to the card stock mat, leave a small space between each. Mix and match patterns and colors of your designer series paper.
Thank you for taking the time to stop by today, hopefully these projects have inspired you to try paper crafting. When you place an order for Stampin’ Up! products, I would appreciate your business.
Follow me on Instagram @thomas_karen_309 and on Facebook at “CardsandCraftswithKaren”.
Shopping code – KG2AHSHF
Place a $25 Stampin’ Up! order (before shipping & tax) with me and receive a card mailed to you along with emailed PDF with measurements and directions as a thank you.
Place a $50 Stampin’ Up! order (before shipping & tax) with me and receive a card pack to make the 3 Sunday Stamper cards my local group makes each month. This pack will be mailed to you along with emailed PDF with measurements and directions as a thank you.
Card Pack includes materials for the card(s). All materials are cut and ready to stamp & assemble (use your own adhesive, stamps & inks). Stamped images cannot be mailed per Stampin’ Up! policy.
Check out the Shop & Rewards tab for more information.
Have a great day – Craft On! Happy Shopping!


