Monthly Archives: March 2016

Last Day of Sale-a-Bration

Hope you are having a good week, I’ve been busy with my normal job during the day and working on card fronts for swaps I am participating in at Stampin’ Up On Stage in Salt Lake City next month in the evening. Next up is cards for the April meeting on my Sunday Stampers, we are meeting early this month due to everyone’s schedule.

Today is the final day of Sale-A-Bration, great day to stock up on supplies you will need in the coming months and retiring 2014-2016 In-Colors before they are gone and get a free exclusive item for every $50 spent before tax/shipping.

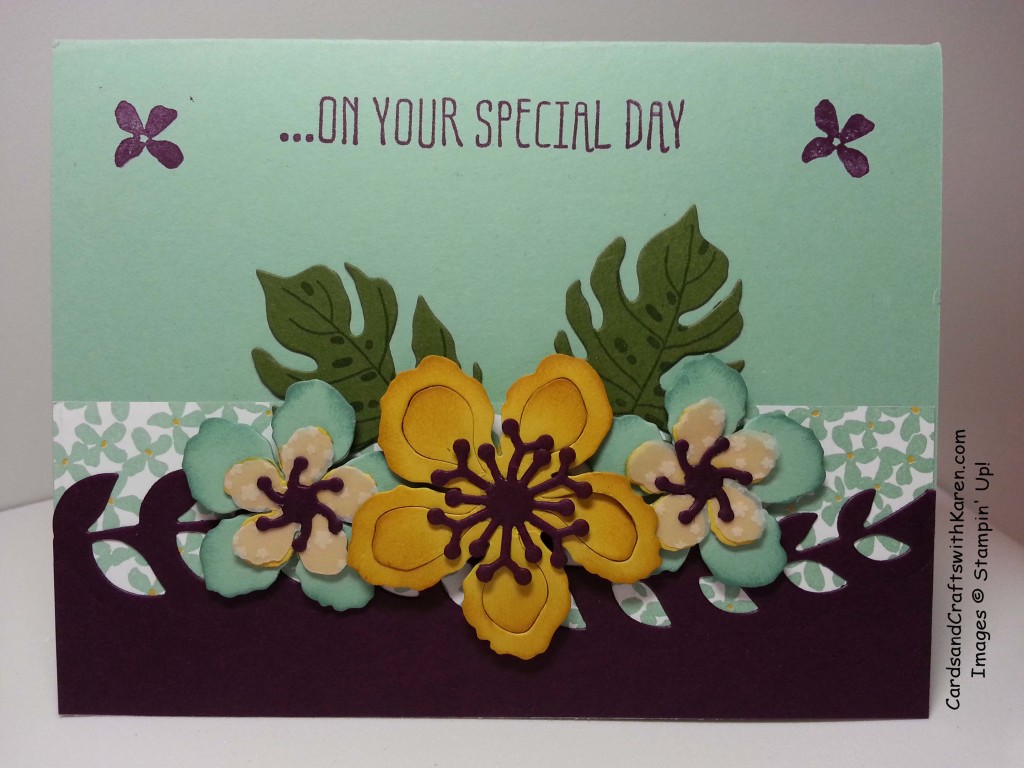
My card features one of the sentiments from the Botanicals for You, a Sale-a-Bration stamp set as well as the entire Botanical Gardens Suite of products including stamp set, framelits and designer series paper.

Botanical flowers Mint

Thank you for stopping by, have a great day – Craft On!

Supply list with direct link for easy ordering.

SAB almost over

Hope everyone had a nice Easter weekend, I sure did. Enjoyed having my brother and his family visiting and seeing my extended family on Sunday. We had lots of great food and the weather was nice, an added bonus. Sunday was warm enough to spend the afternoon outside chatting. After temperatures in the 70’s this past Sunday they say we may be lucky to hit 40 degrees this coming Sunday, what a wacky spring!

Just a friendly reminder there are only three days left in Sale-a-Bration 2016. It’s a great opportunity to get free merchandise for every $50 (before tax and shipping) you spend.

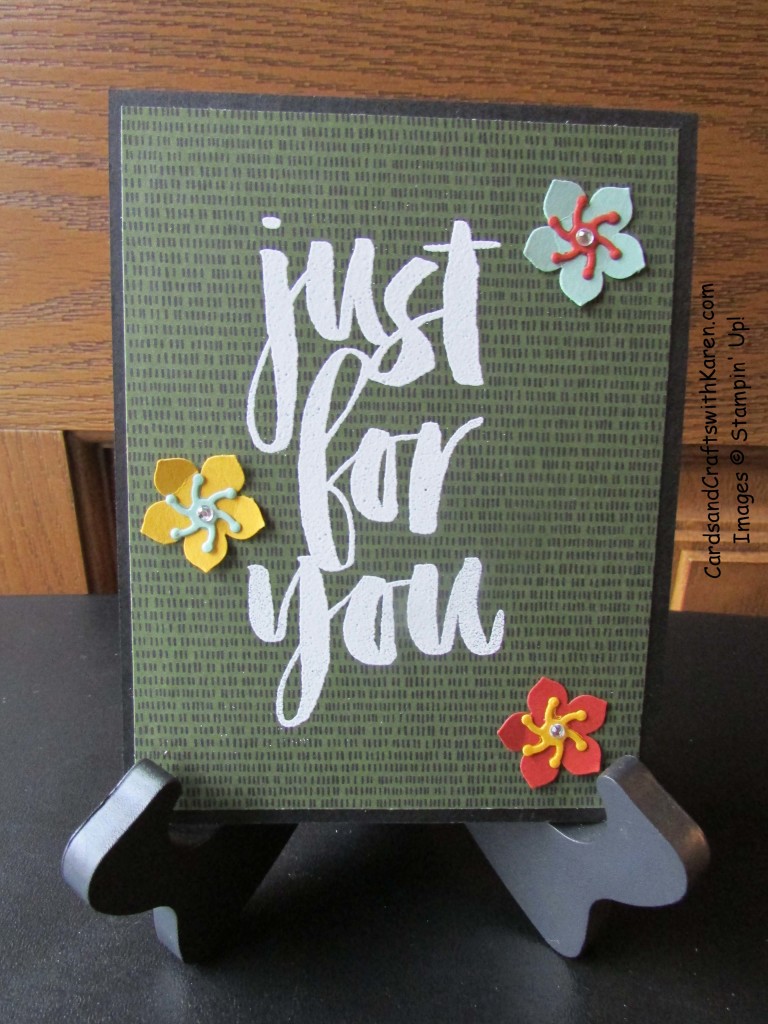
Today’s card features the Botanicals for You Stamp set, one of the many Sale-a-Bration items. The card base is Basic Black with a piece of Botanical Gardens Designer Series Paper with the ‘Just for You’ embossed in White in the center. The flowers are made using scraps of paper, the Petite Petals punch, a Botanical Builder framelit for the inside and finished with a rhinestone in the center. This is a quick and easy card to make with a definite wow factor!

Just for You Black card

Thank you for stopping by, click on any of the images below for easy ordering.

Have a great day, Craft On!

Wishing you all a Happy Easter!

Happy Easter, enjoying some chocolate or jelly beans today?  I’ll be spending time with my family and friends, hope you get to do the same.


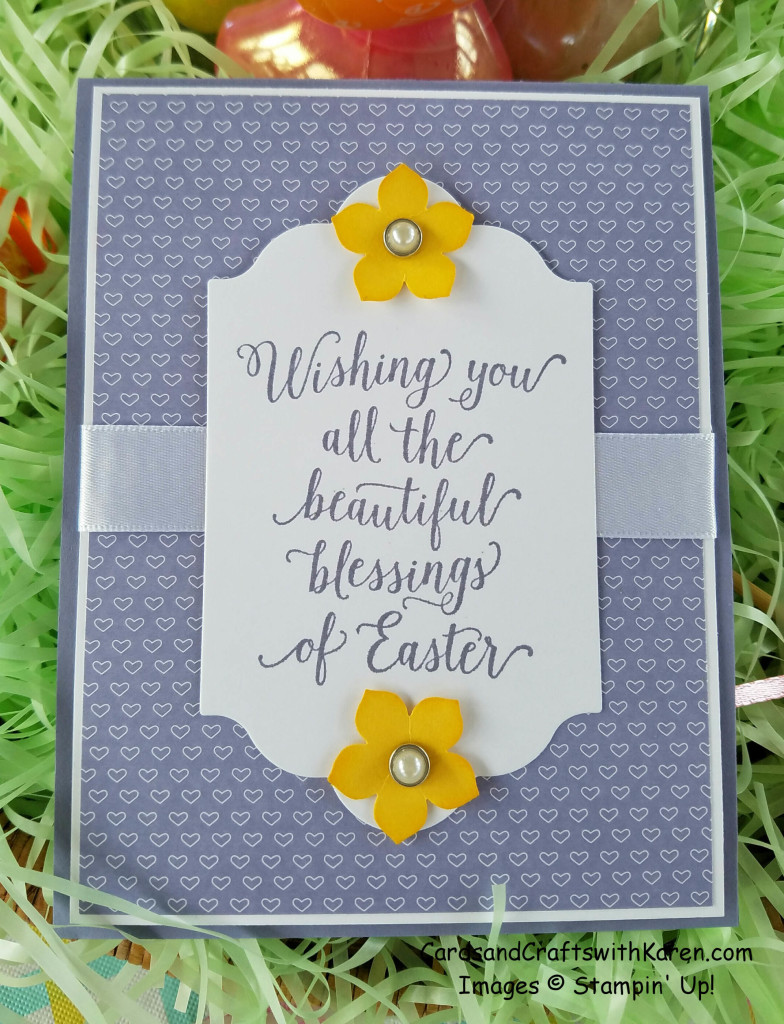
Easter Card edit

Thank you for stopping by today, have a great day – Craft On!

Supply List:

Simple Saturday – Watercolor Words

Welcome to Simple Saturday, a clean and simple card using one stamp set and minimal supplies. Today’s card features the Watercolor Words Photopolymer Stamp Set. I’ve decided to show you not only the “Simple” version, but a “Stepped Up” version using a few extra embellishment.

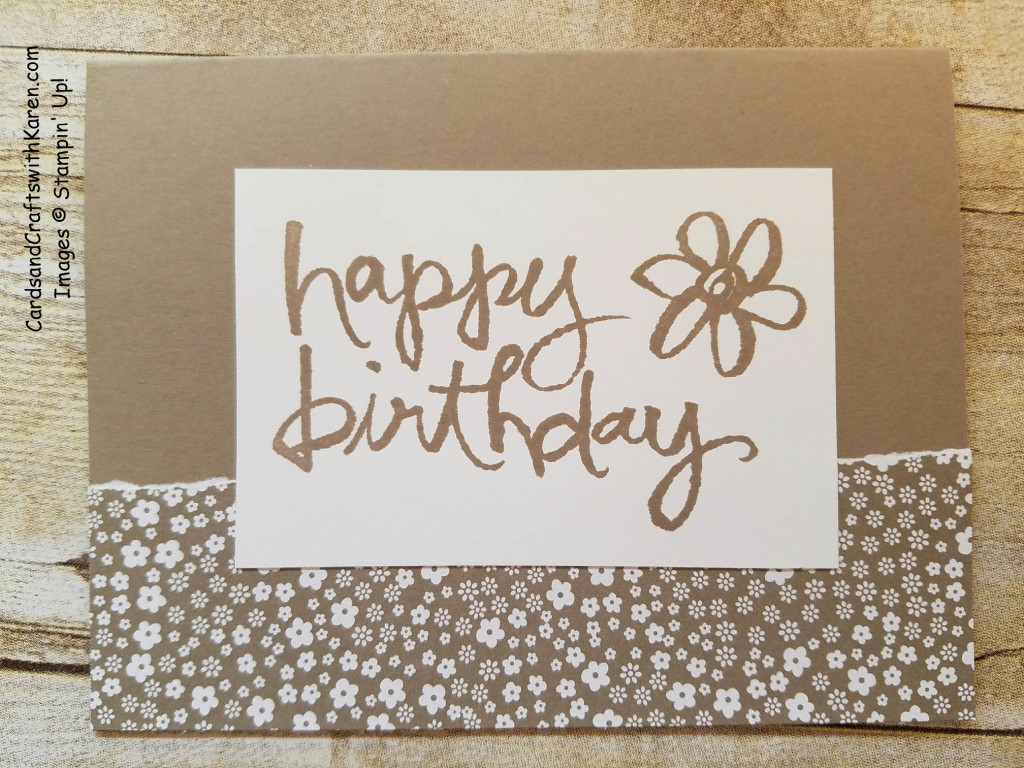
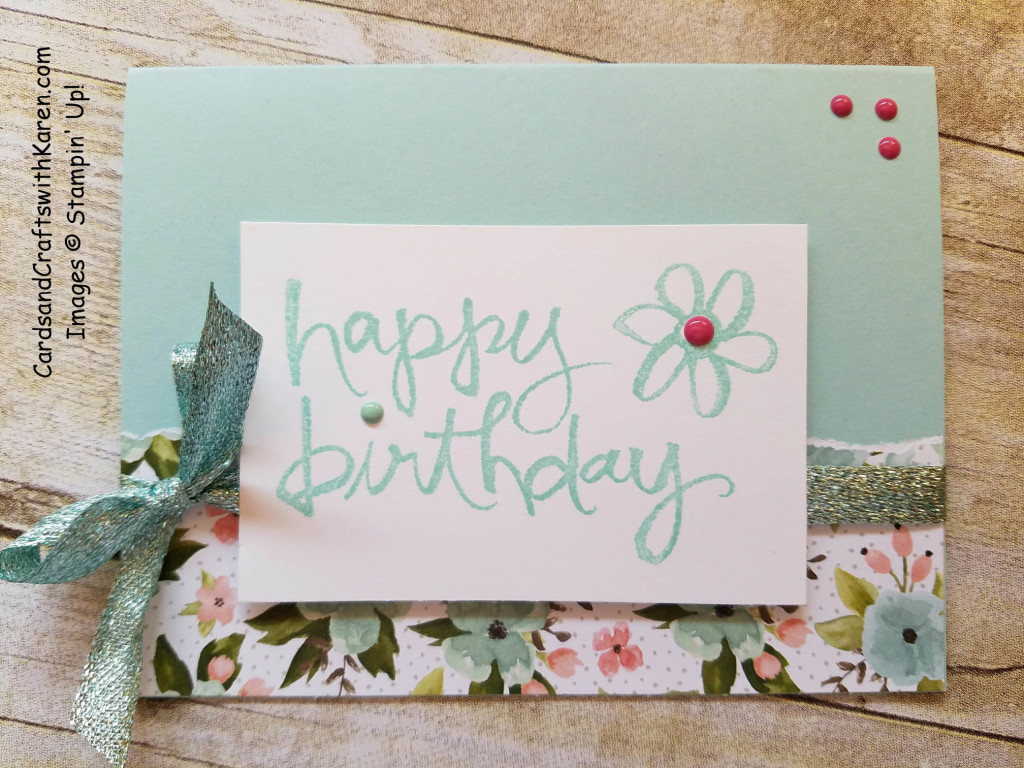
The card base starts with a piece of cardstock 8½” x 5½”, folded in half. There is a piece of designer series paper with a torn edge adhered to the bottom portion of the card front (about 1¾” tall). Whisper white piece is 3¾” x 2½” and stamped with a greeting and flower from the Watercolor Words stamp set. The paper can be adjusted based on stamped image if needed.

Here is the Simple version:

Simple Saturday Tip Top Taupe

Here is the Stepped Up version, were the stamped images is backed with Stampin’ dimensionals and has the additional ribbon and enamel dots for a little bling.  All other items of the card as the same:

Simple Saturday Birthday Plus

Thank you for stopping by, have a great day, Craft On!

Supply list with direct link for easy product ordering.

Lettuce Celebrate

Happy Thursday. It’s a big day around here, my brother and his family will be coming in late tonight/early morning to spend the Easter weekend with us. After work I will be doing some last minute cleaning and cooking, can’t wait to see Mike, Diane, Jake & Maya. Have a feeling they will be looking forward to see the new puppy as much as us!

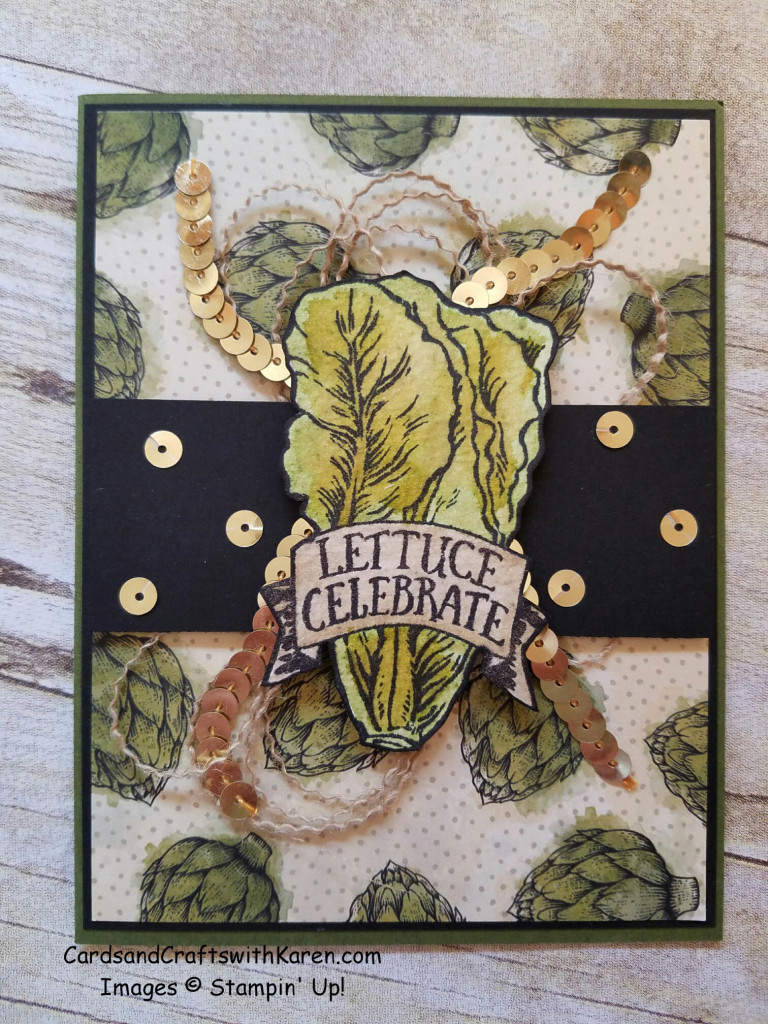
Today’s card features the stamp set Market Fresh along with the matching Farmers Market Designer Series Paper Stack, both from the annual catalog.

To get started I first stamped in the image on Watercolor color paper and used my Aqua Painter to color in the lettuce and banner. Once it was dry I carefully used my Paper Snips to cut it out and ran a Black Sharpie around the edge for a cleaner black line. The card base is Mossy Meadow, with a mat of Basic Black and Farmers Market Designer Series paper all adhered with liquid glue. Next I cut a piece of burlap ribbon and separated some of the strings and using glue dots attached them to the card along with two strips of gold sequin trim. On top of those is a strip of Basic Black across the center backed with Stampin Dimensionals, then the ‘lettuce’ is adhered with Stampin Dimensionals and black strip is decorated with a few extra sequins. Now I have the perfect birthday card for a friend who loves to plant a vegetable garden.  For a more masculine card you may not want to include the sequins, your choice!


Lettuce Celebrate card

Thank you for stopping by today, hope you enjoyed the card. Have a great day, Craft On!

Supply list with direct link for easy ordering below.

New Weekly Deals

Have you been checking out that new Curvy Corner Trio punch? Pearls – what girl doesn’t like pearls?

Silver Satin Ribbon, the Celebrate card my Sunday Stampers made used that.

If these items interest you then this is your lucky week. Make sure to check out the new weekly deals for March 22 – 28, 2016. Click on any of the images for a link to place your order today.

Thanks for stopping by, have a great day, Craft On!

Welcome Nitro and the Sunday Stamper Cards

So how was your weekend, ours sure was busy, we forgot just how much energy a new puppy has. On Friday we picked up our new puppy Nitro and he is a ball of energy. Just in case you realize, he is a German Shepard, funny how they look so different as puppies compared to when full grown.  His parents look like Rin Tin Tin, which is what we expect him to look like. Here is a picture of him Sunday relaxing by one of my shoes, for some reason he really likes my shoe and carries it around to lay his head on.
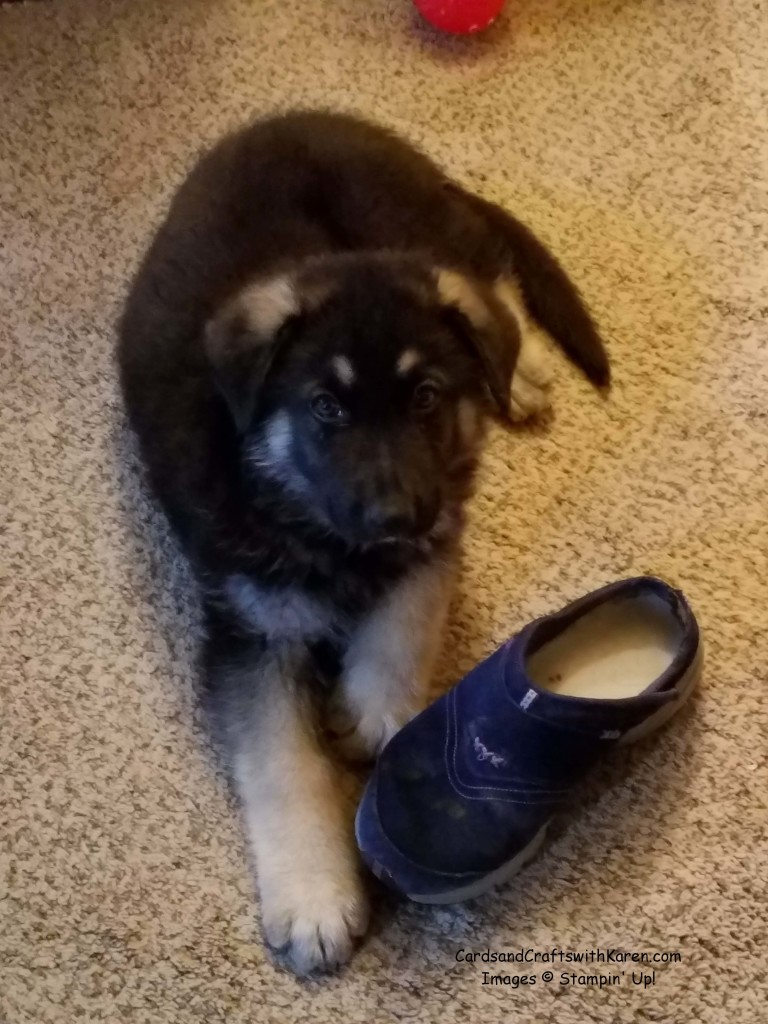
Nitro 2


Today’s blog features the cards that my Sunday Stampers made yesterday, Birthday was the theme. We had fun using some of the new items in the Occasions catalog as well as the Wildflower Fields Designer Series paper and Flowering Fields stamp set from the Sale-a-Brations catalog.
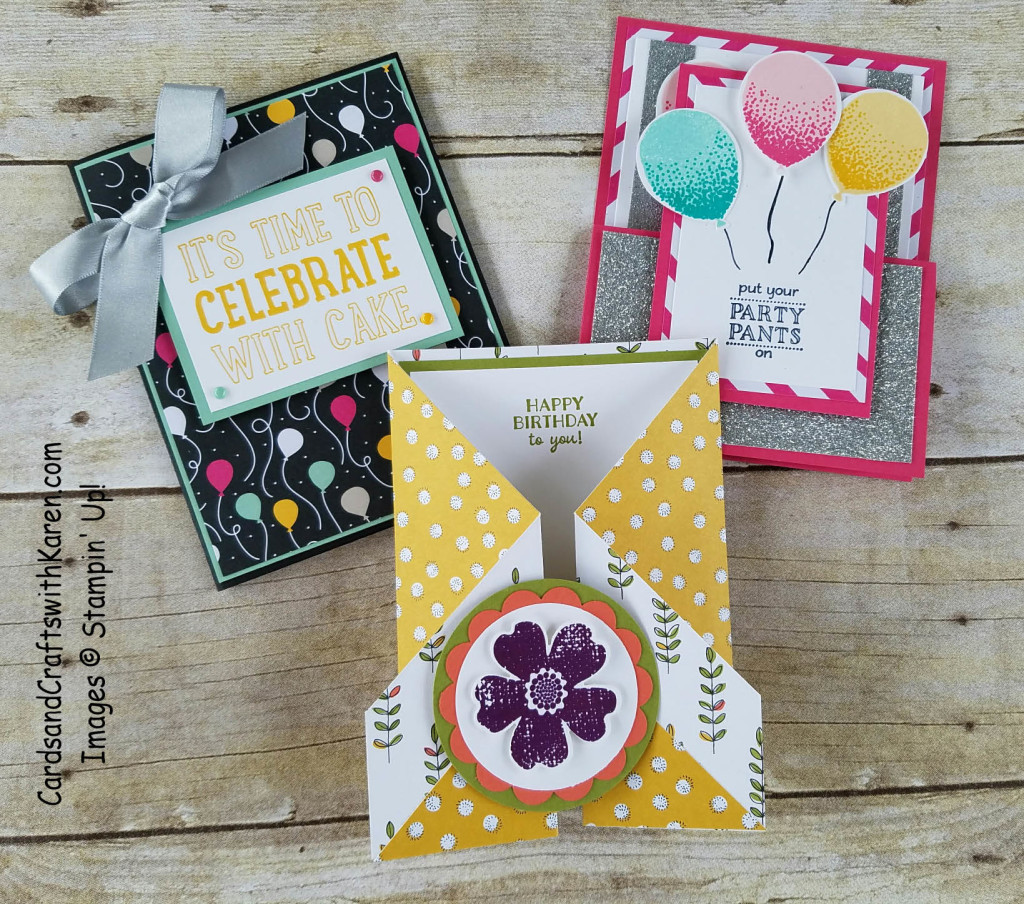
Sunday Stamper Cards March16


Celebrate Card:

Party with Cake Bundle (which includes Party with Cake Stamp Set and Party Pop-Up Thinlits)

It’s My Party Designer Series Paper and It’s My Party Enamel Dots

Silver Foil Paper, Banner Punch, and Silver Satin Ribbon

Card base: Basic Black – 5 ½” x 8 ½”, scored at 4 ¼” and Inside: Sahara Sand 5 ¼” x 8”, scored at 4”

Outside: Mat Mint Macaron – 4 1/8” x 5 3/8” and Designer Series Paper: 4” x 5 ¼”

Mat: Mint Macaron – 2 ½” x 3 ¼” and Whisper White – 2 ¼” x 3”

Inside Designer Series Paper: 1” x 5 ¼” (need 2)

Inks: Crushed Curry, Melon Mambo and Basic Black

For the inside, fold the Sahara Sand in half and match the arrows on the pop up die with the fold before running through the big shot


Balloon Card :

Balloon Bundle (Balloon Celebration Photopolymer Stamp Set and Balloon Bouquet Punch)

Party Pants Stamp Set and Glitter Tape, both from the Sale-A-Bration catalog

Card base: Melon Mambo 4 ¼” x 11”, scored at 2 ¾” and 5 ½” on 11” side

For front mat need Melon Mambo 2 ¾” x 4 ¼” (DSP and Whisper White go on top)

Designer Series Paper (It’s My Party Designer Series Paper)

1 – 4” x 5 ¼”; 2 – 4” x 2 ½”

Silver Glitter Paper – 4” x 2 ½”

Whisper White: 3 ¾” x 5” and 3 ¾” x 2 ¼”

Whisper White for Balloons

1 ¾” Circle punch, use to punch half circle to insert/pull out gift card

Ink pads: So Saffron & Crushed Curry; Blushing Bride & Melon Mambo; Pool Party & Bermuda Bay and Memento Black and a Black Stampin Write Marker


Double Gate Fold Wildflower Fields Card:

Wildflower Fields Designer Series Paper and Flowering Fields Stamp Set, both from the Sale-A-Bration catalog

Flower Shop Stamp Set and Matching Pansy Punch; Iced Rhinestones

2 ½” Circle Punch;  2 3/8” Scallop Circle Punch and 2” Circle Punch

Old Olive – 5 1/4” x 3 ¾” and Whisper White: 5” x 3 1/2”

Old Olive and Blackberry Bliss ink pads

Card Base: Designer Series Paper 5 ½” x 12” – score at 2” – 4” – 8” – 10”

On the 5 ½” side measure 1 ½” from the bottom and make a mark with a pencil, use your paper cutter and cut from the mark to the 4” fold and cut away the triangle, do the same on the other side. You will end up gluing the cut off piece into the inside of the card so that when it’s folded you see that design as well.

Layer the 2 ½” circle, Scallop circle, 2” circle and flower, adhere with dimensionals to one side of the front of the card.

Here is the inside of the Celebrate Card:
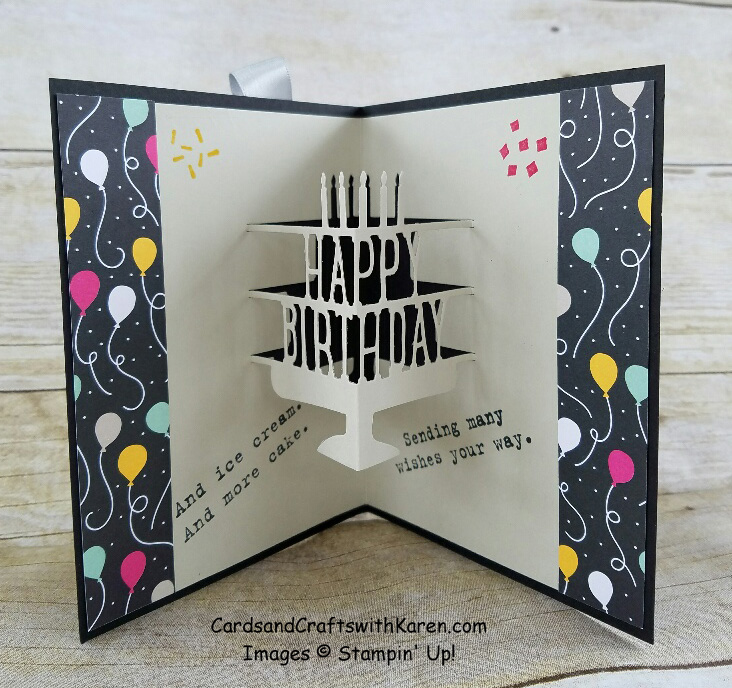
Inside Birthday Card

Thank you so much for stopping by today, hope you liked the cards. Below is a supply list for easy ordering so that you to can make these cool cards. Have a great day, Craft On!
Simple Saturday Interrupted

Normally on Saturday’s I post a Simple Saturday card using one stamp set to make a quite, easy, simple card, but . .

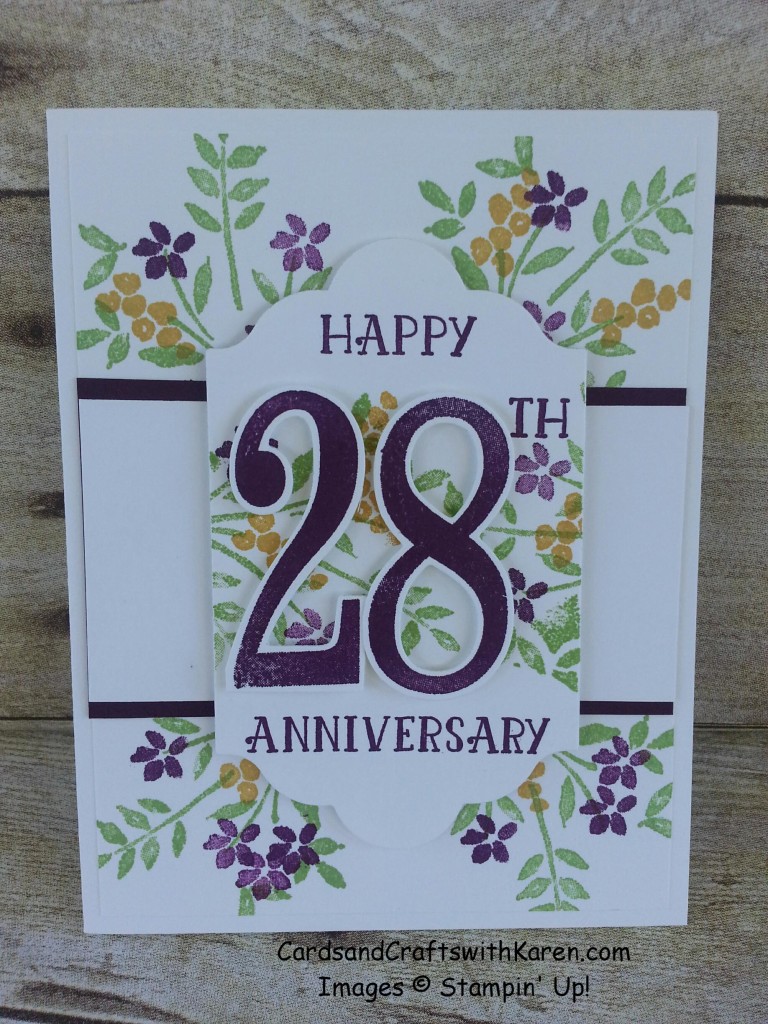
Today is our 28th Wedding Anniversary and I’m taking the opportunity to post the card I made for my husband featuring the Number of Years bundle. I have to admit the card is using one stamp set, but includes multiple stamping and using the Big Shot to die cut the numbers and label. One thing you should know about this stamp set is that the images, including the numbers, are meant to look distressed causing the images to vary in depth of color.

To get started a stamped the leaves on the top and bottom of a piece of Whisper White 4″ x 5¼” and across the middle of the label (created with a die from Lots of Labels). Next I stamped Blackberry Bliss and Hello Honey flowers, some using the stamp off then stamp on card technique. In the center is a piece of Blackberry Bliss and Whisper White defining the middle of the card. On the label I stamped Happy th Anniversary. Numbers are stamped in Blackberry Bliss and die cut with a matching die. Both the numbers and label are adhered with dimensionals.

Happy 28 Anniv card

Today we will be enjoying watching the Penguins play the Flyers, the same teams that played on our wedding day!

Thank you for stopping by today, have a great day, Craft On!

Click on any of the images below for easy online ordering or more product information.

Happy St. Paddy’s Day!

Happy St. Patrick’s Day, are you have corned beef and cabbage today, maybe some Irish stew?

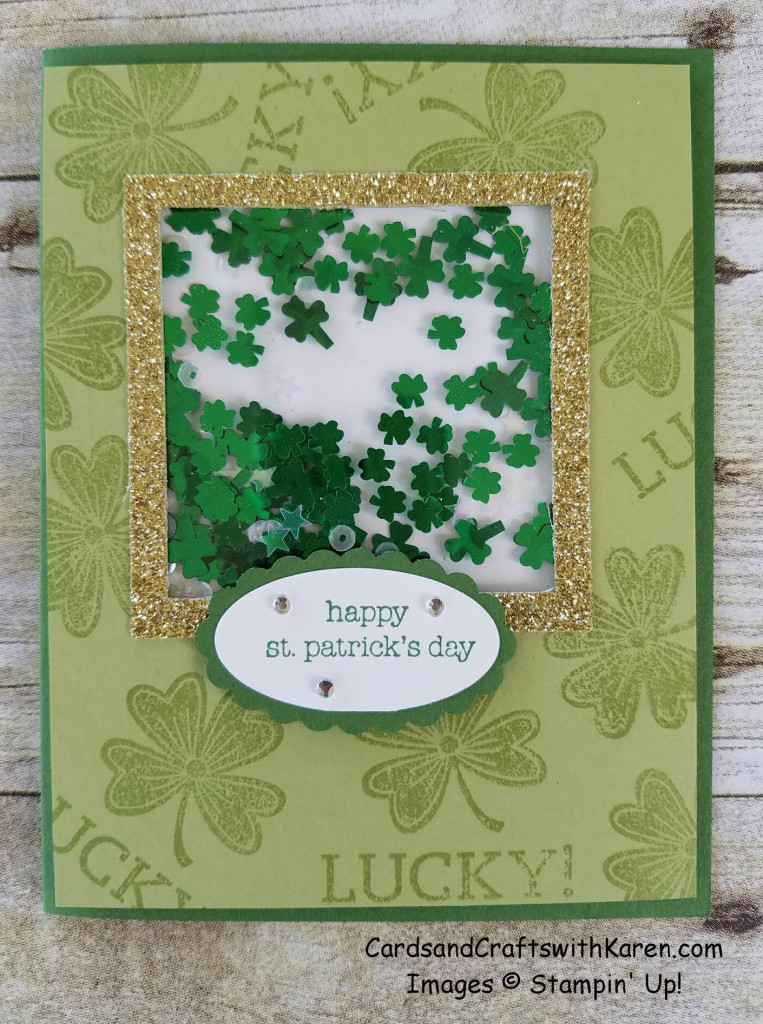
Each year we are invited to a party on this day and each year I take the hostess a card. Today I am sharing my card with you. I made four this year, one for the hostess and each of her grandchildren, who doesn’t like a shaker card.

My card is made with a retired Stampin Up stamp with a Shamrock and the word lucky I have from a few years back. To get started I stamped in image in Pear Pizzazz on Pear Pizzazz first, then die cut a window using the Squares Collection Framelits. I also die cut a frame using Gold Glimmer paper and two framelits, one the size of the window and the next size up, this was adhered with liquid glue A piece of Window Sheet covers the window and foam tape gives me the depth for the “shamrock sequins I purchased from Etsy”. The card base as well as the Scallops Oval is Garden Green, with the sentiment from the versatile stamp set Teeny Tiny Wishes, stamped in Garden Green and punched out with the large oval punch. A few rhinestones add a little bling!

ST Patricks Day Card v2

On a side note, ?? years ago today my husband and I where having our rehearsal dinner for our wedding. Stop back Saturday to see how many years.

Thank you for stopping by today, hope everyone likes the card, have a great day – Craft On!

Supply list to make your own shaker card below:

Gold Congratulations!

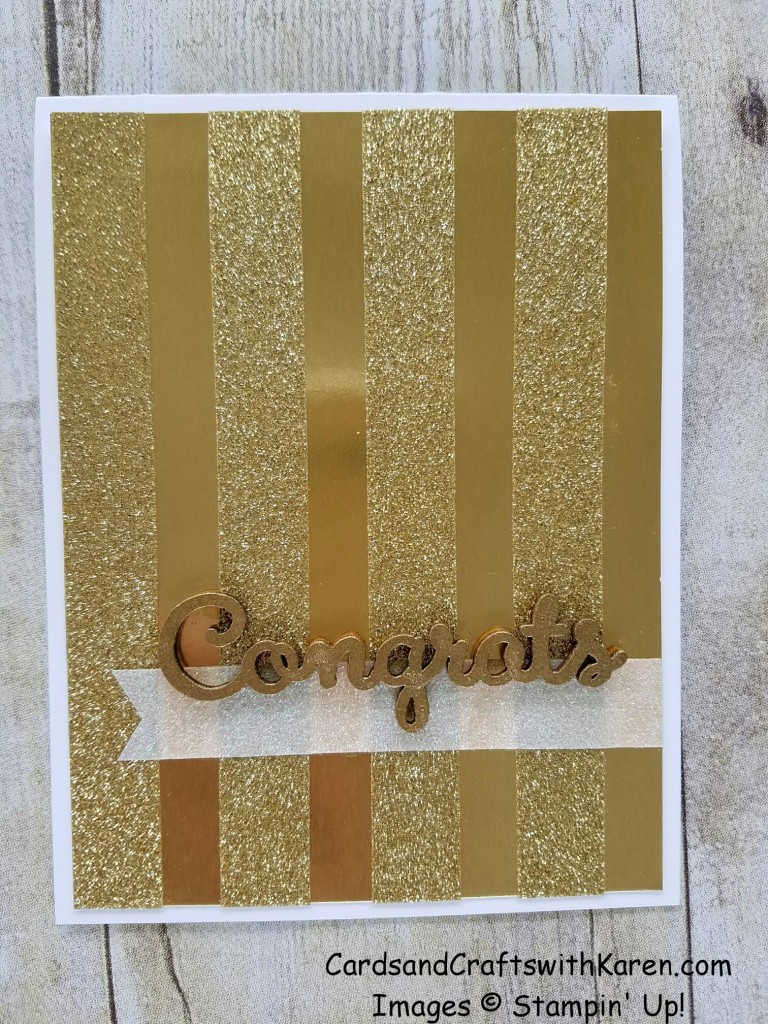
Pictures some time are so misleading. I tried about ten times to photograph today’s card and the gold foil paper sure makes it hard to get a clear non shadowy image. While the card appears wavy in the middle, it’s a reflection, nothing more.

Today’s card features the new Metallics Glitter Tape, one of the new Sale-A-Bration product choices, which are free with a $50 purchase before tax/shipping. To get started on this card I made sure to have a piece of grid paper on my stamping surface to use a guide.  Next, I used a piece of gold foil paper cut to 4″ x 5¼” and applied gold glitter tape every half inch, cutting off at the ends and using the grid paper to keep the lines straight, this piece was then added to a card base of Thick Whisper White card stock. For the embellishment I used a Expressions Natural Elements that I tapped into the Versamark ink pad, sprinkled with Gold Embossing poweder and heat set. To finish off the card I added a banner made from the clear glitter tape and adhered the natural element with Crystal Effects.  This would be great for a anniversary, birthday or special occasion.

Gold Glitter tape card

Thank you for your stopping, hope you liked the card. Have a great day, Craft On!

Click on any photo below for easy online ordering.

Simple Saturday, What I Love

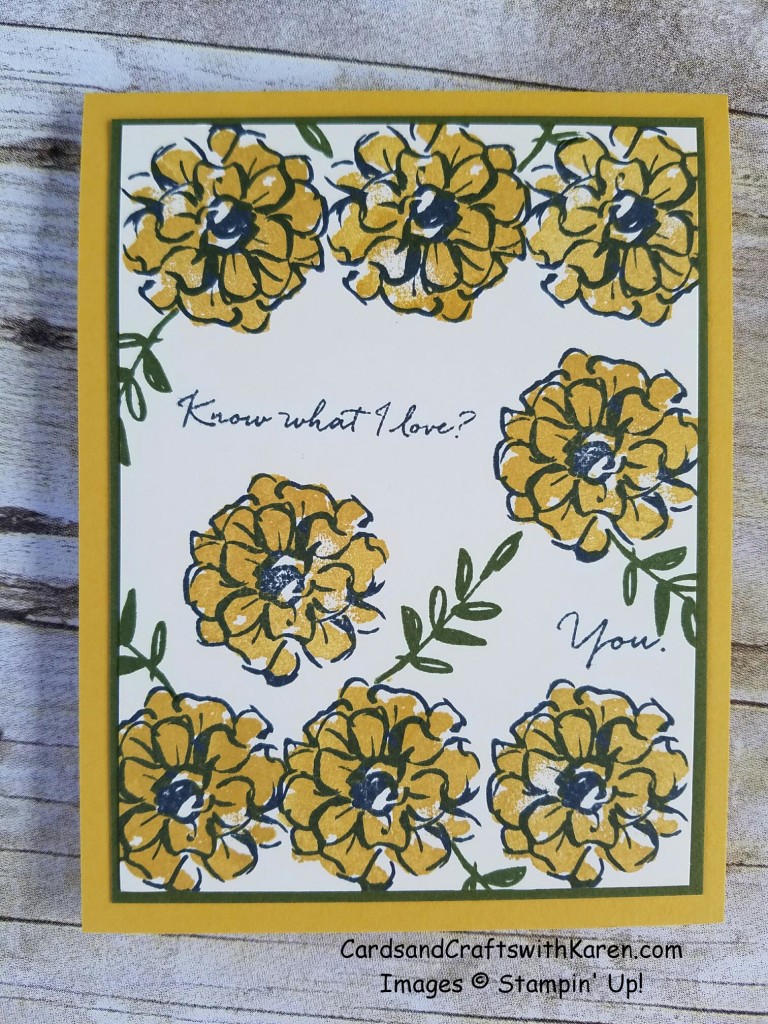
Today’s Simple Saturday card features one of the 2016 Sale-A-Bration stamp sets, What I Love and features two step stamping. For this set, two step stamping is outline stamp first, then another stamp to “color” in the image

While I used Basic Black and Hello Honey for my card, you could always using the same color family, stamp the outline first, then large solid piece followed by the solid smaller piece. The possibilities just seem endless with this set.

To make my card I started with a piece of Very Vanilla, 3 ¾” x 5″ stamping the outline of the flowers first, making sure to leave enough space for the greeting. Next I stamped the Hello Honey for the flowers and used Mossy Meadow for some leaves, finally stamping the greeting.  This piece is adhered to a Mossy Meadow mat and the entire piece is on a card base on Hello Honey.

Simple Saturday 3.12

This would make a great Birthday, Anniversary or simply “I Love You” card – – – Happy Stamping!

Thank you for stopping by, have a great day, Craft On!

Click on any of the images below for easy on-line ordering.

Flowers for You

Happy Friday! Boy has the weather been nice here the last few days, actually in the low 70’s, it started to rain yesterday but still nice temperatures. In the morning I saw twelve deer walking through the woods behind our house, I always think that so cool! Did you know they like to lay on the ground and sleep or rest? I’ve seen that as well, looks so cool. There are signs of green peaking out in the woods, hopefully that means spring is around the corner.

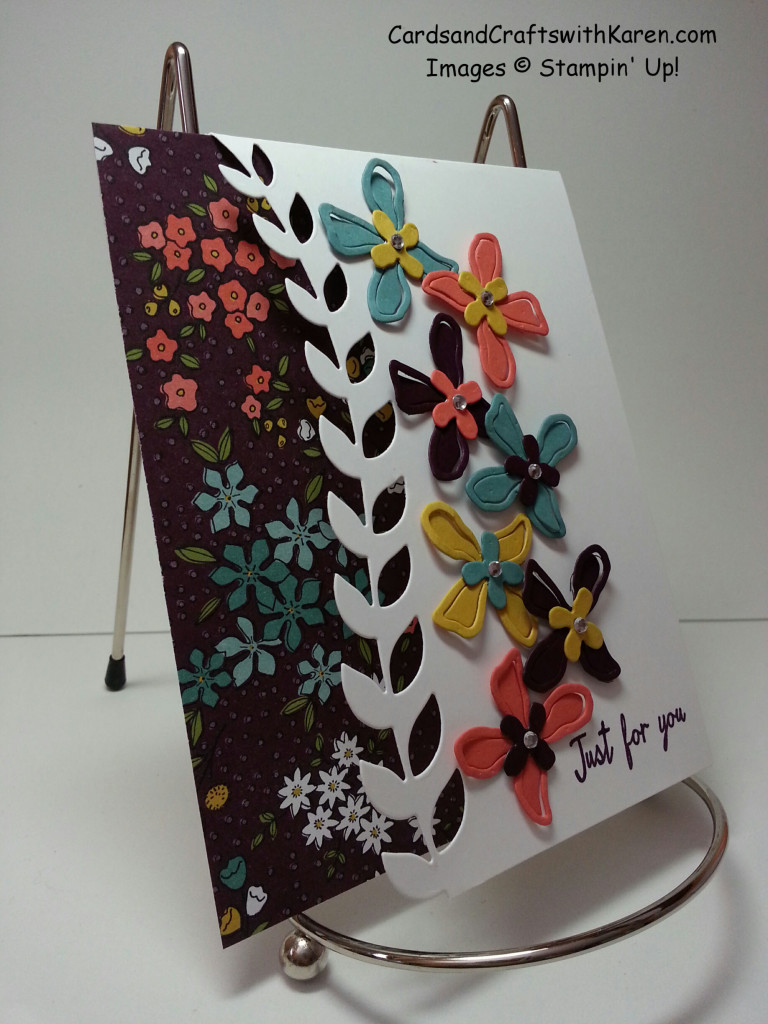
Today’s card features the Botanical Builder Framelits, Wildflower Fields Designer Series Paper (Sale-A-Bration) and sentiment from Butterfly Basics stamp set. The card starts with a base of Thick Whisper White cut to 4¼” x 11″, scored at 5½” for a top folding card. The vine looking Botanical Builder Framelit was used to die cut away a portion of the left side of the card front and a piece of designer series paper was added to the inside of the card on the left side.  Coordinating cardstock was used to die cut flowers and randomly attached them to the card with glue dots and dimensionals, rhinestones add that little extra bling.  Sentiment was stamped in Blackberry Bliss.

Wildflower DSP Side View

Thank you for stopping by, have a great day – Craft On!

Click on any of the images below of easy product ordering today.

Always time for Tea !

Happy Wednesday, I’m sitting here this morning have a nice cup of Earl Grey Tea as I write this post. Half way through the week and closer to the weekend!  Yesterday I received my new smart phone and once it was up and operational I went to the Verizon store and had my husband’s cell phone number switched to my old smart phone. We are now a two smart phone family, for someone who does not like chance, this will be interesting to see how he likes it.  Now on to some stamping.

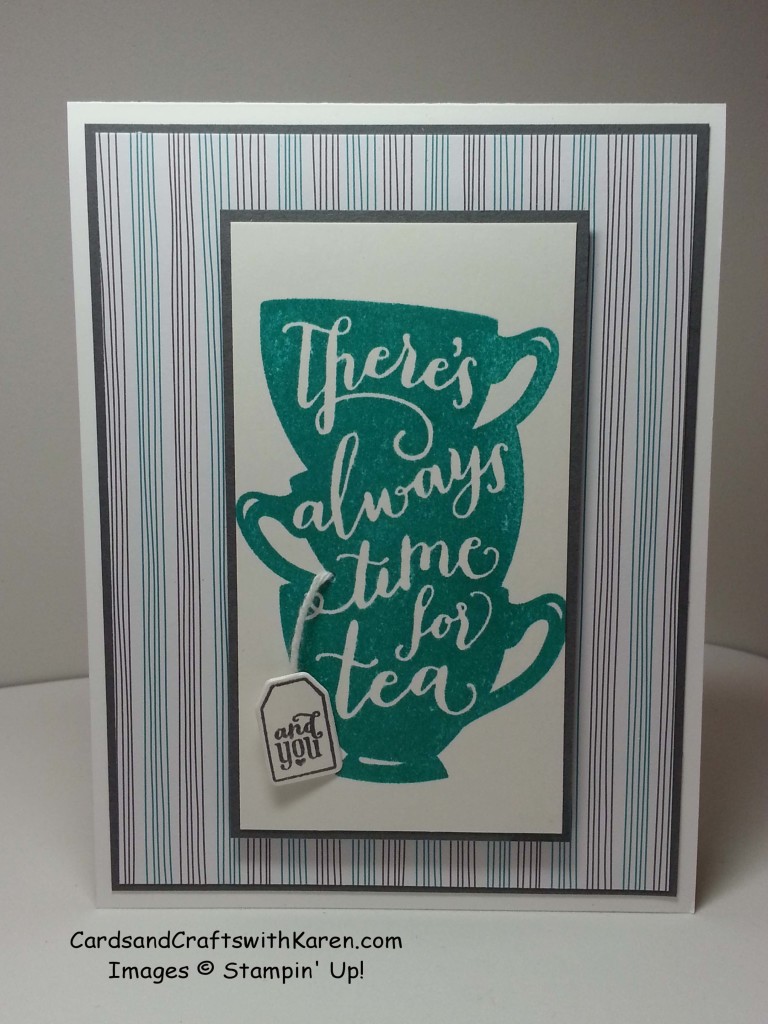
Today’s card features a stamp set I have not used much since receiving, A Nice Cuppa.  This is a fun set with matching Framelits great for all your tea and coffee drinking friends!  To make my card I started with the image which is stamped on Whisper White with Bermuda Bay ink. Next I used the 1/16″ handheld punch to create the opening for a piece of Bakers Twine with a little “tea bag” attached with a glue dot. The little tea bag come in the stamp set and has a matching framelit for ease of die cutting. This piece of paper is adhered to a mat of Basic Gray and adhered to the card with dimensionals.  The card base is Thick Whisper White cardstock, with the next layer paper from the Have a Cuppa Designer Series Paper Stack and Basic Gray.


There is always time for tea


Thank you for stopping by today, hope you liked the card. Click on any of the images below for easy product ordering or more information.  Have a great day, Craft On!
 

Stacked Rose Birthday

Happy Monday, hope everyone had a nice weekend, I sure did. Yesterday my brother called to see if we wanted some company for Easter, him and his family, of course I do! I can’t remember the last Easter with my brother, this surely will be special this year! Now we really need to do some cleaning the next few weeks!

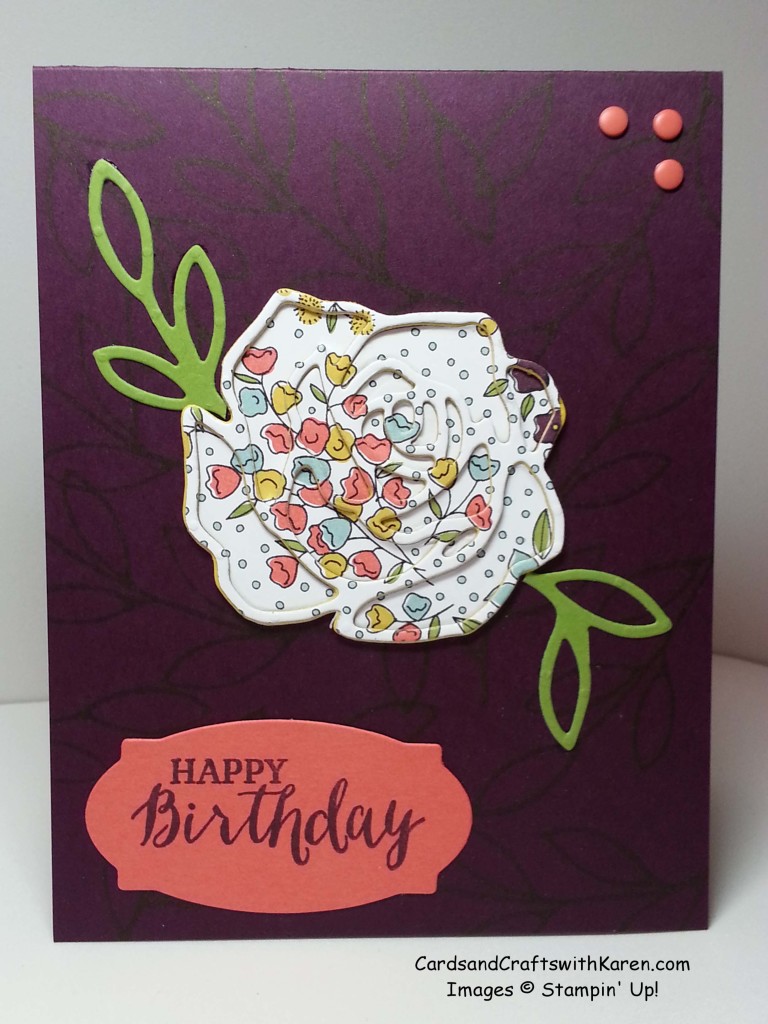
Today’s card features the Rose Garden Thinlits and uses layers of die cuts to add depth to the card. Simply what I did was die cut the single rose using a piece of the Wildflower Fields Designer Series Paper (free with a $50 before tax/shipping order) and I was careful to keep all the pieces together. Next I die cut 4 roses using card stock that matched the printed paper. Carefully I glued the die cut cardstock roses together, with the Wildflower Fields Rose on top, end result is a “Stacked Rose”.

The card base is Blackberry Bliss and using one of the stamps from the matching Rose Wonder stamp set stamped the leaves image all over the card. Next I glued the “Stacked Rose” in the center and glued the leaves to the side. Next, using the cut out pieces of the rose I filled in it, gluing the pieces to the card base.  Greeting was stamped in Blackberry Bliss on Calypso Coral and die from the Rose Garden Thinlits used to cut it out.  To balance the card I added three Calypso Coral Candy Dots to the top right corner.  What a fun card !

Rose Layers Card

Thank you for stopping by today, hope you liked the card. Click on any of the pictures below for easy ordering.

Have a great day, Craft On!
Simple Saturday with Tin of Cards

Welcome to the weekend and your Simple Saturday Card!

Today’s card features the Tin of Cards Photopolymer Stamp set which goes with the Tin of Cards Project Kit (Metal tin with all items needed to make 16  cards). Items are sold separately and the Project Kit is one of the weekly deals this week.

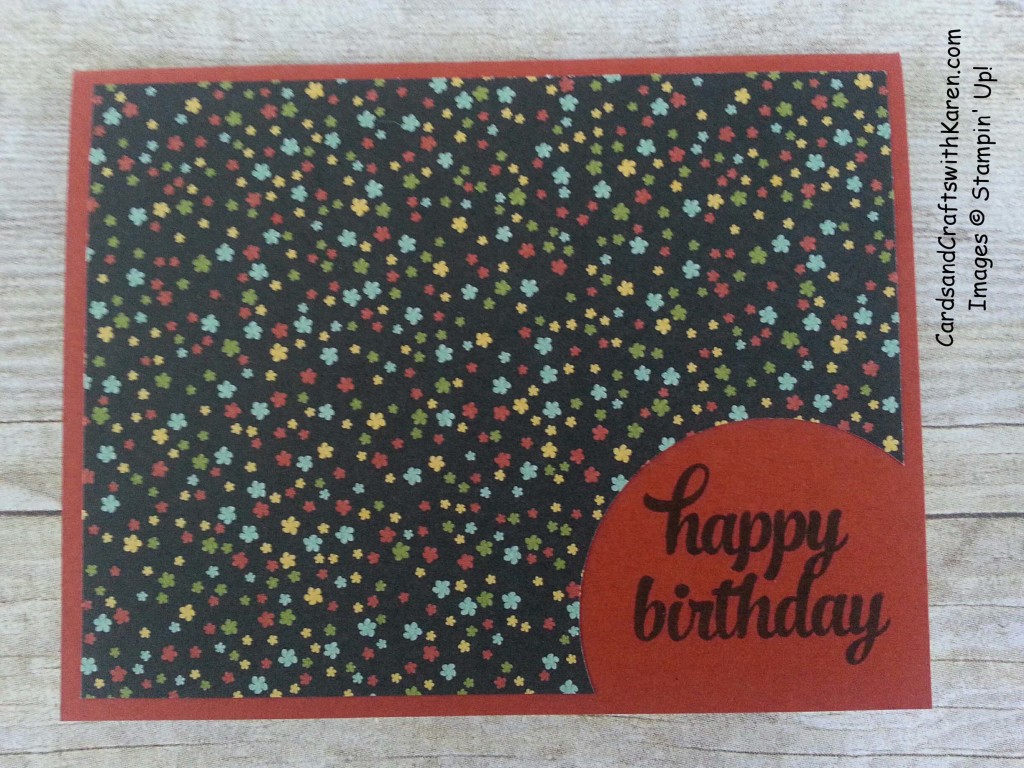
This card was fun and easy to make, there are four parts: Card base, mat, circle punch and stamp set. Tin of Cards stamp set is a nice set as there are nice basic greetings. To know exactly where to punch, I wanted the greeting in the mat size of 4″ x 5¼”, so I turned the mat over and stamped the greeting where I wanted it and using the backside made my punch.  Once the mat was adhered to the card base I stamped the Happy Birthday. Cute, simple and easy to make. For a stepped up version of the card add some punched out flowers and rhinestones!

Simple Saturday Tin of Cards

Here are three of the four cards that are made using the Tin of Cards Project Kit (weekly deal expiring March 7th). Stamp set is sold separately.

Tin of Cards cards

Thank you for stopping by today, hope you liked the card. Click on any of the images below to place an on-line order or for more product information. Have a great day, Craft On!
Balloon Birthday

Happy Friday, it’s a little snowy here today, my husky sure is loving it! Bandit may be 14 years old, but he is like a puppy again when the snow falls. Any specials plans for the weekend? I’ll be working on my March Sunday Stamper cards and some swaps for the Stampin Up On Stage event in April.

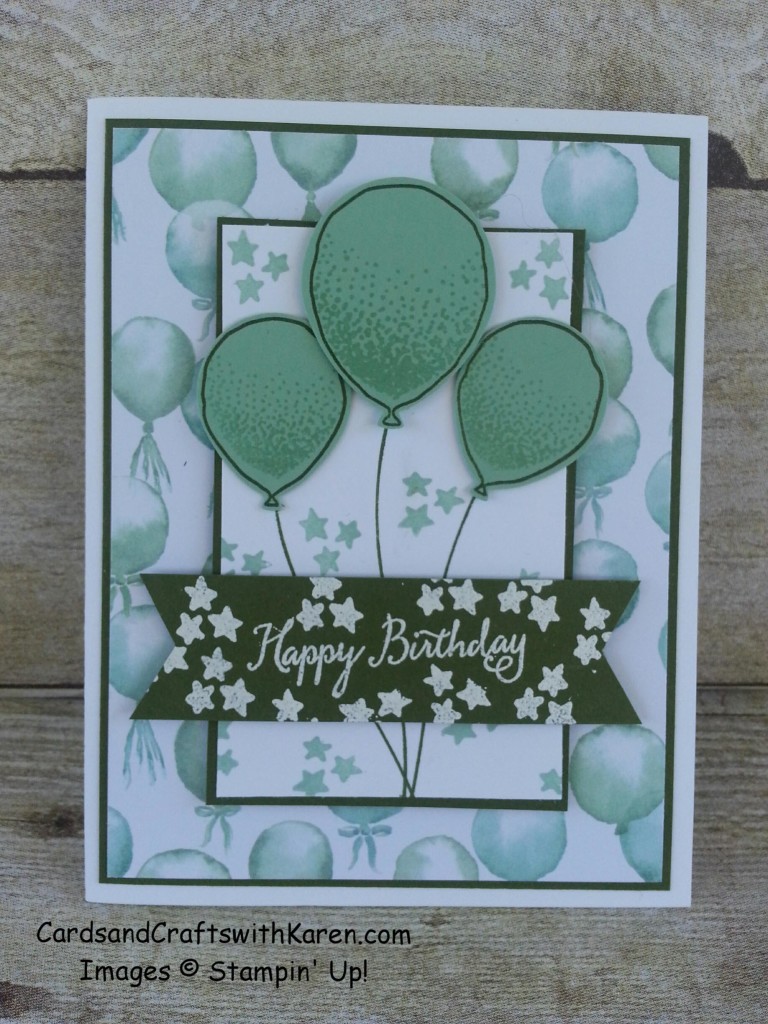
Today I am featuring the Balloons Celebration Bundle, Mint Macaron and Mossy Meadow.

To make todays card I started with a card base of Thick Whisper White cardstock cut to 4¼” x 11″ and scored at 5½” for a top folding card to match the balloons which go top to bottom. The printed paper used for the mat is from the Birthday Bouquet Designer Series Paper and sits on Mossy Meadow. The center piece is Whisper White on Mossy Meadow and the stars are stamped in Mint Macaron from the Balloon Celebrations Photopolymer stamp set. Balloons are first stamped with Mossy Meadow (outline) and Mint Macaron (little dots) and punched out with the matching Balloon Bouquet punch. Small balloons are glued to the card and larger balloon is backed with dimensionals, string is another stamp from the set. Greeting is from the same stamp set was stamped with Versamark along with some stars  and White Stampin’ Embossing powder was sprinkled over, and heat set on Mossy Meadow. Hexagon punch used to create the banner ends and piece was adhered with dimensionals.

Mint Balloons Card

Thanks for stopping by today, hope you like the card. Click on any of the images below for more product information and to place your on-line order. Have a great day, Craft On!
Need a stamp set with multiple greetings? look no further . . .

How’s your week so far? We are working on some chores in the evening.  I’m in a cleaning out mood and it’s best to jump on that when I feel like it, if I could only get in the mood to better organize my craft space, somehow I like the mess!

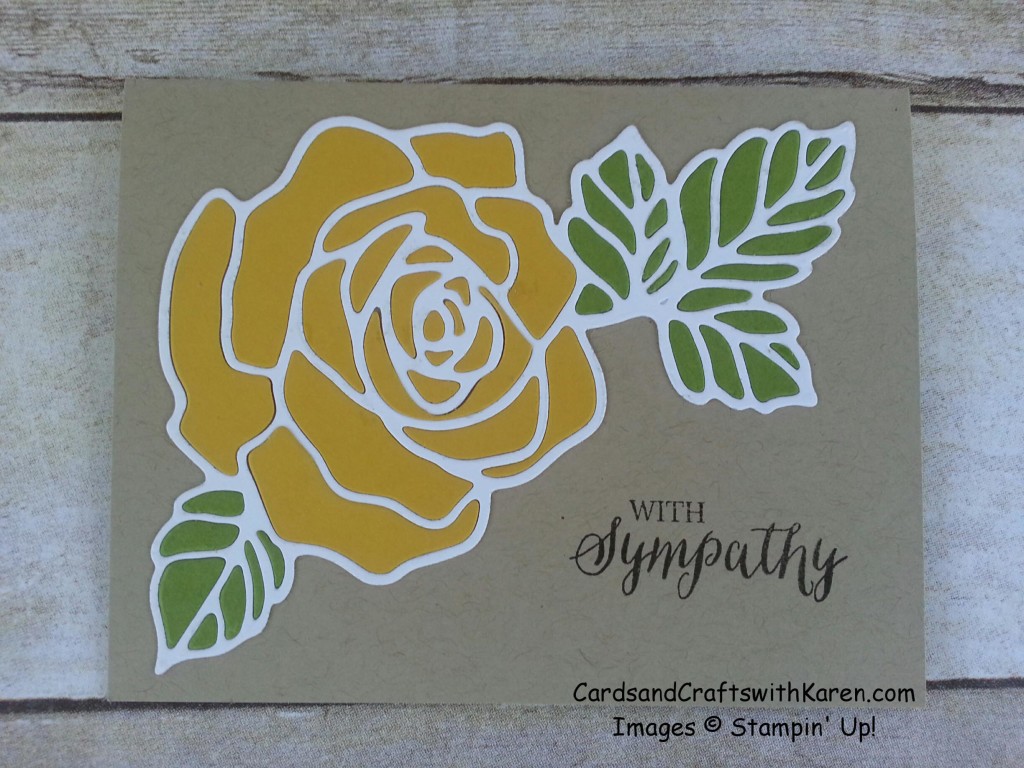
Today’s card features the Rose Garden Thinlits Dies and matching stamp set Rose Wonder. The stamp set is rather versatile in that there is a Birthday, Thank You, Wedding and Sympathy sentiment, so it’s perfect for a variety of occasions. I’ve chosen the sympathy sentiment for this card, I like to have a few just in case. It’s easier to have them ready than make one when you need it. In the case of this card, you could make a few without the sentiment and stamp as needed.

This card does take a little patience, as you need to die cut the flower three times using Whisper White, Daffodil Delight and Old Olive. Once you have the Whisper White piece you poke out all the pieces and fill in with the Daffodil Delight & Old Olive pieces. I was able to gently move the flower from the platform to a scratch piece of paper with little movement making it rather easy to “pop out & place” the pieces. I used liquid glue to adhere all the pieces on the Crumb Cake card base, adhere the Whisper White “frame” first then fill it.  You can use different shades of color for both the flower and leaves if you like. The final look is beautiful and shows someone you really care!

Rose Garden Sympathy

Thank you for stopping by today, hope you liked my card. Have a great day, Craft On!
Supply list for more product information and to place your order today.