


Each month I have a group of ladies who meet to stamp the 3rd Sunday of the month, they are called my Sunday Stampers, today was our November date. Thought I would share with you the cards we made.
First is the Festive Flower Card:
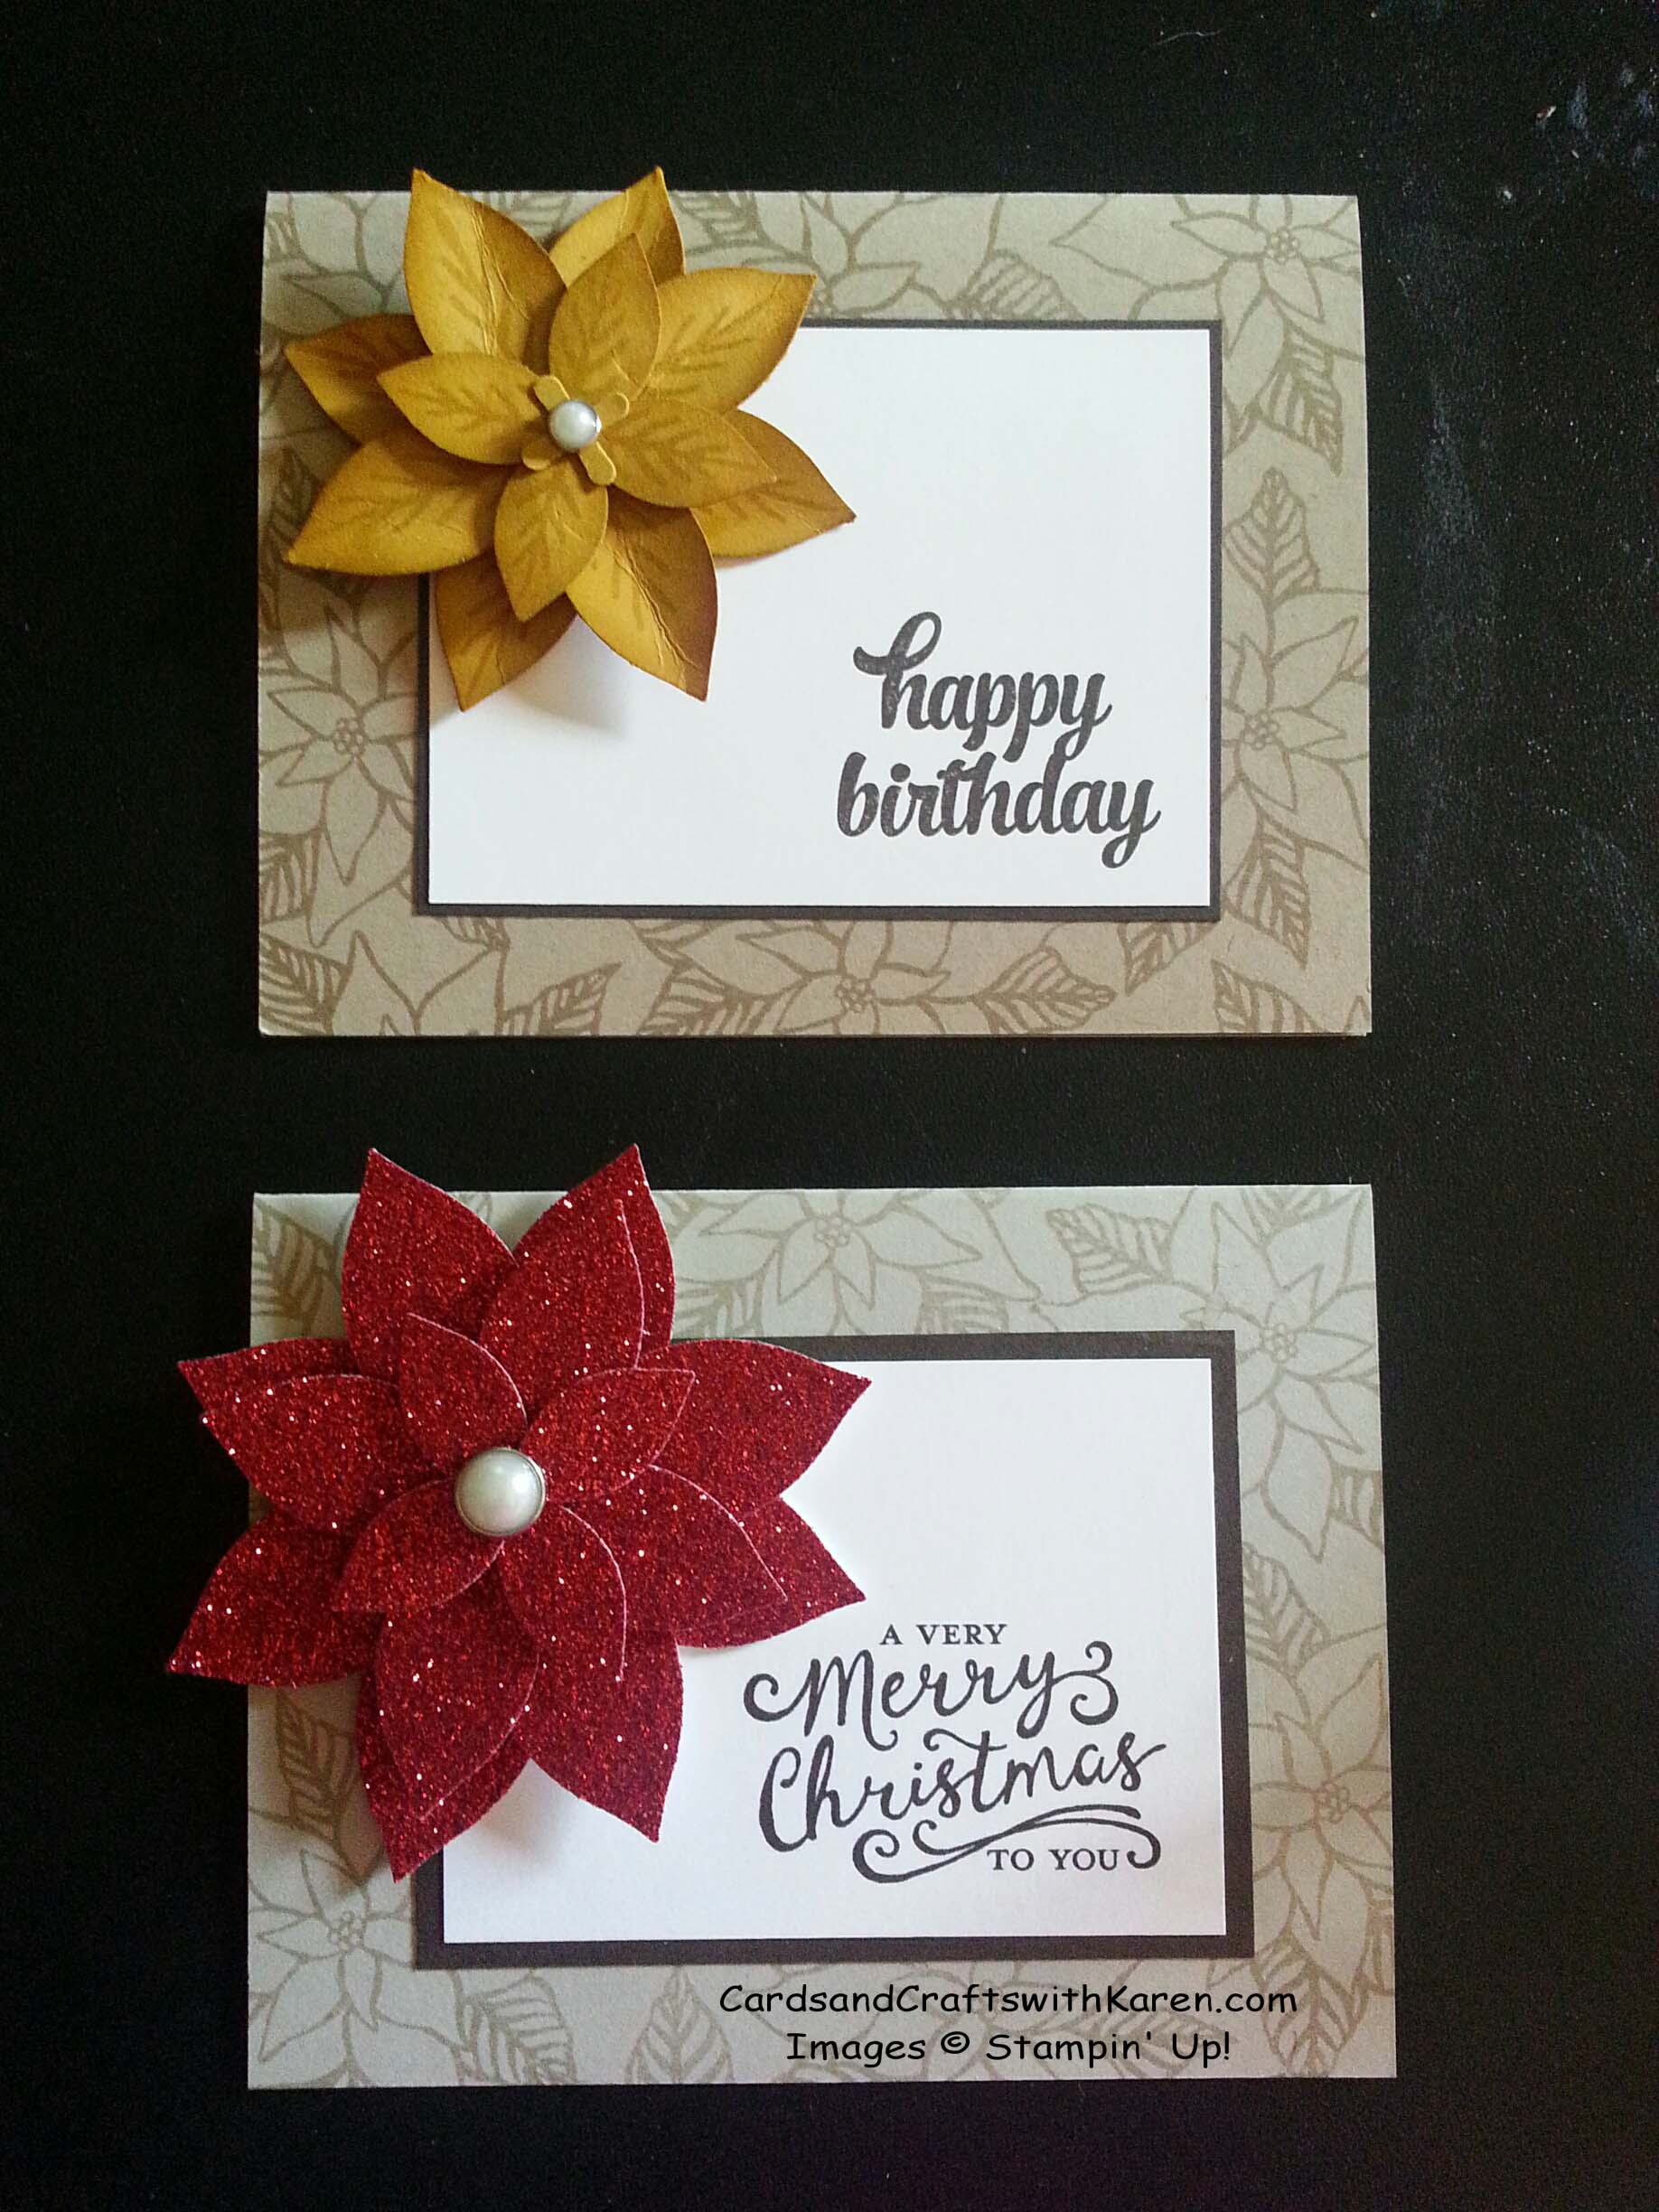
- Card base is Sahara Sand, stamped with Sahara Sand ink using the flower from Reason for the Season stamp set
- Mat of Early Espresso cardstock – 4” x 3”
- Whisper White cardstock 3 ¾” x 2 ¾” – stamped with greeting in the bottom right corner in Early Espresso ink
- Flower made with the Festive Flower Builder Punch
- For the large flower need: 3 1” circles, 8 large petals, 4 small petals and 2 double petals
- Using the Reason for the Season stamp set, stamp petals in the same ink color and sponge ends if desired. I have found it easier with less paper waste if I punch then stamp
- Adhere 4 petals to each circle and 2 double petals together in the center
- Layer with dimensional in between: large petals, large petals, small petals, double petals; in the end you will not see the 1” circles
- I used a Metal Rimmed Pearl in the center
- For a smaller flower use 2 layers of the small petals and 2 double petals
- When I made a flower from glimmer paper, I used glue dots to adhere petals and cardstock for the circles as they adhered much better
- Flower will be adhered to the upper left corner.
Next two cards are the Christmas Wishes (which uses Pacific Point as the main color) and a Snowman Shaker Card:
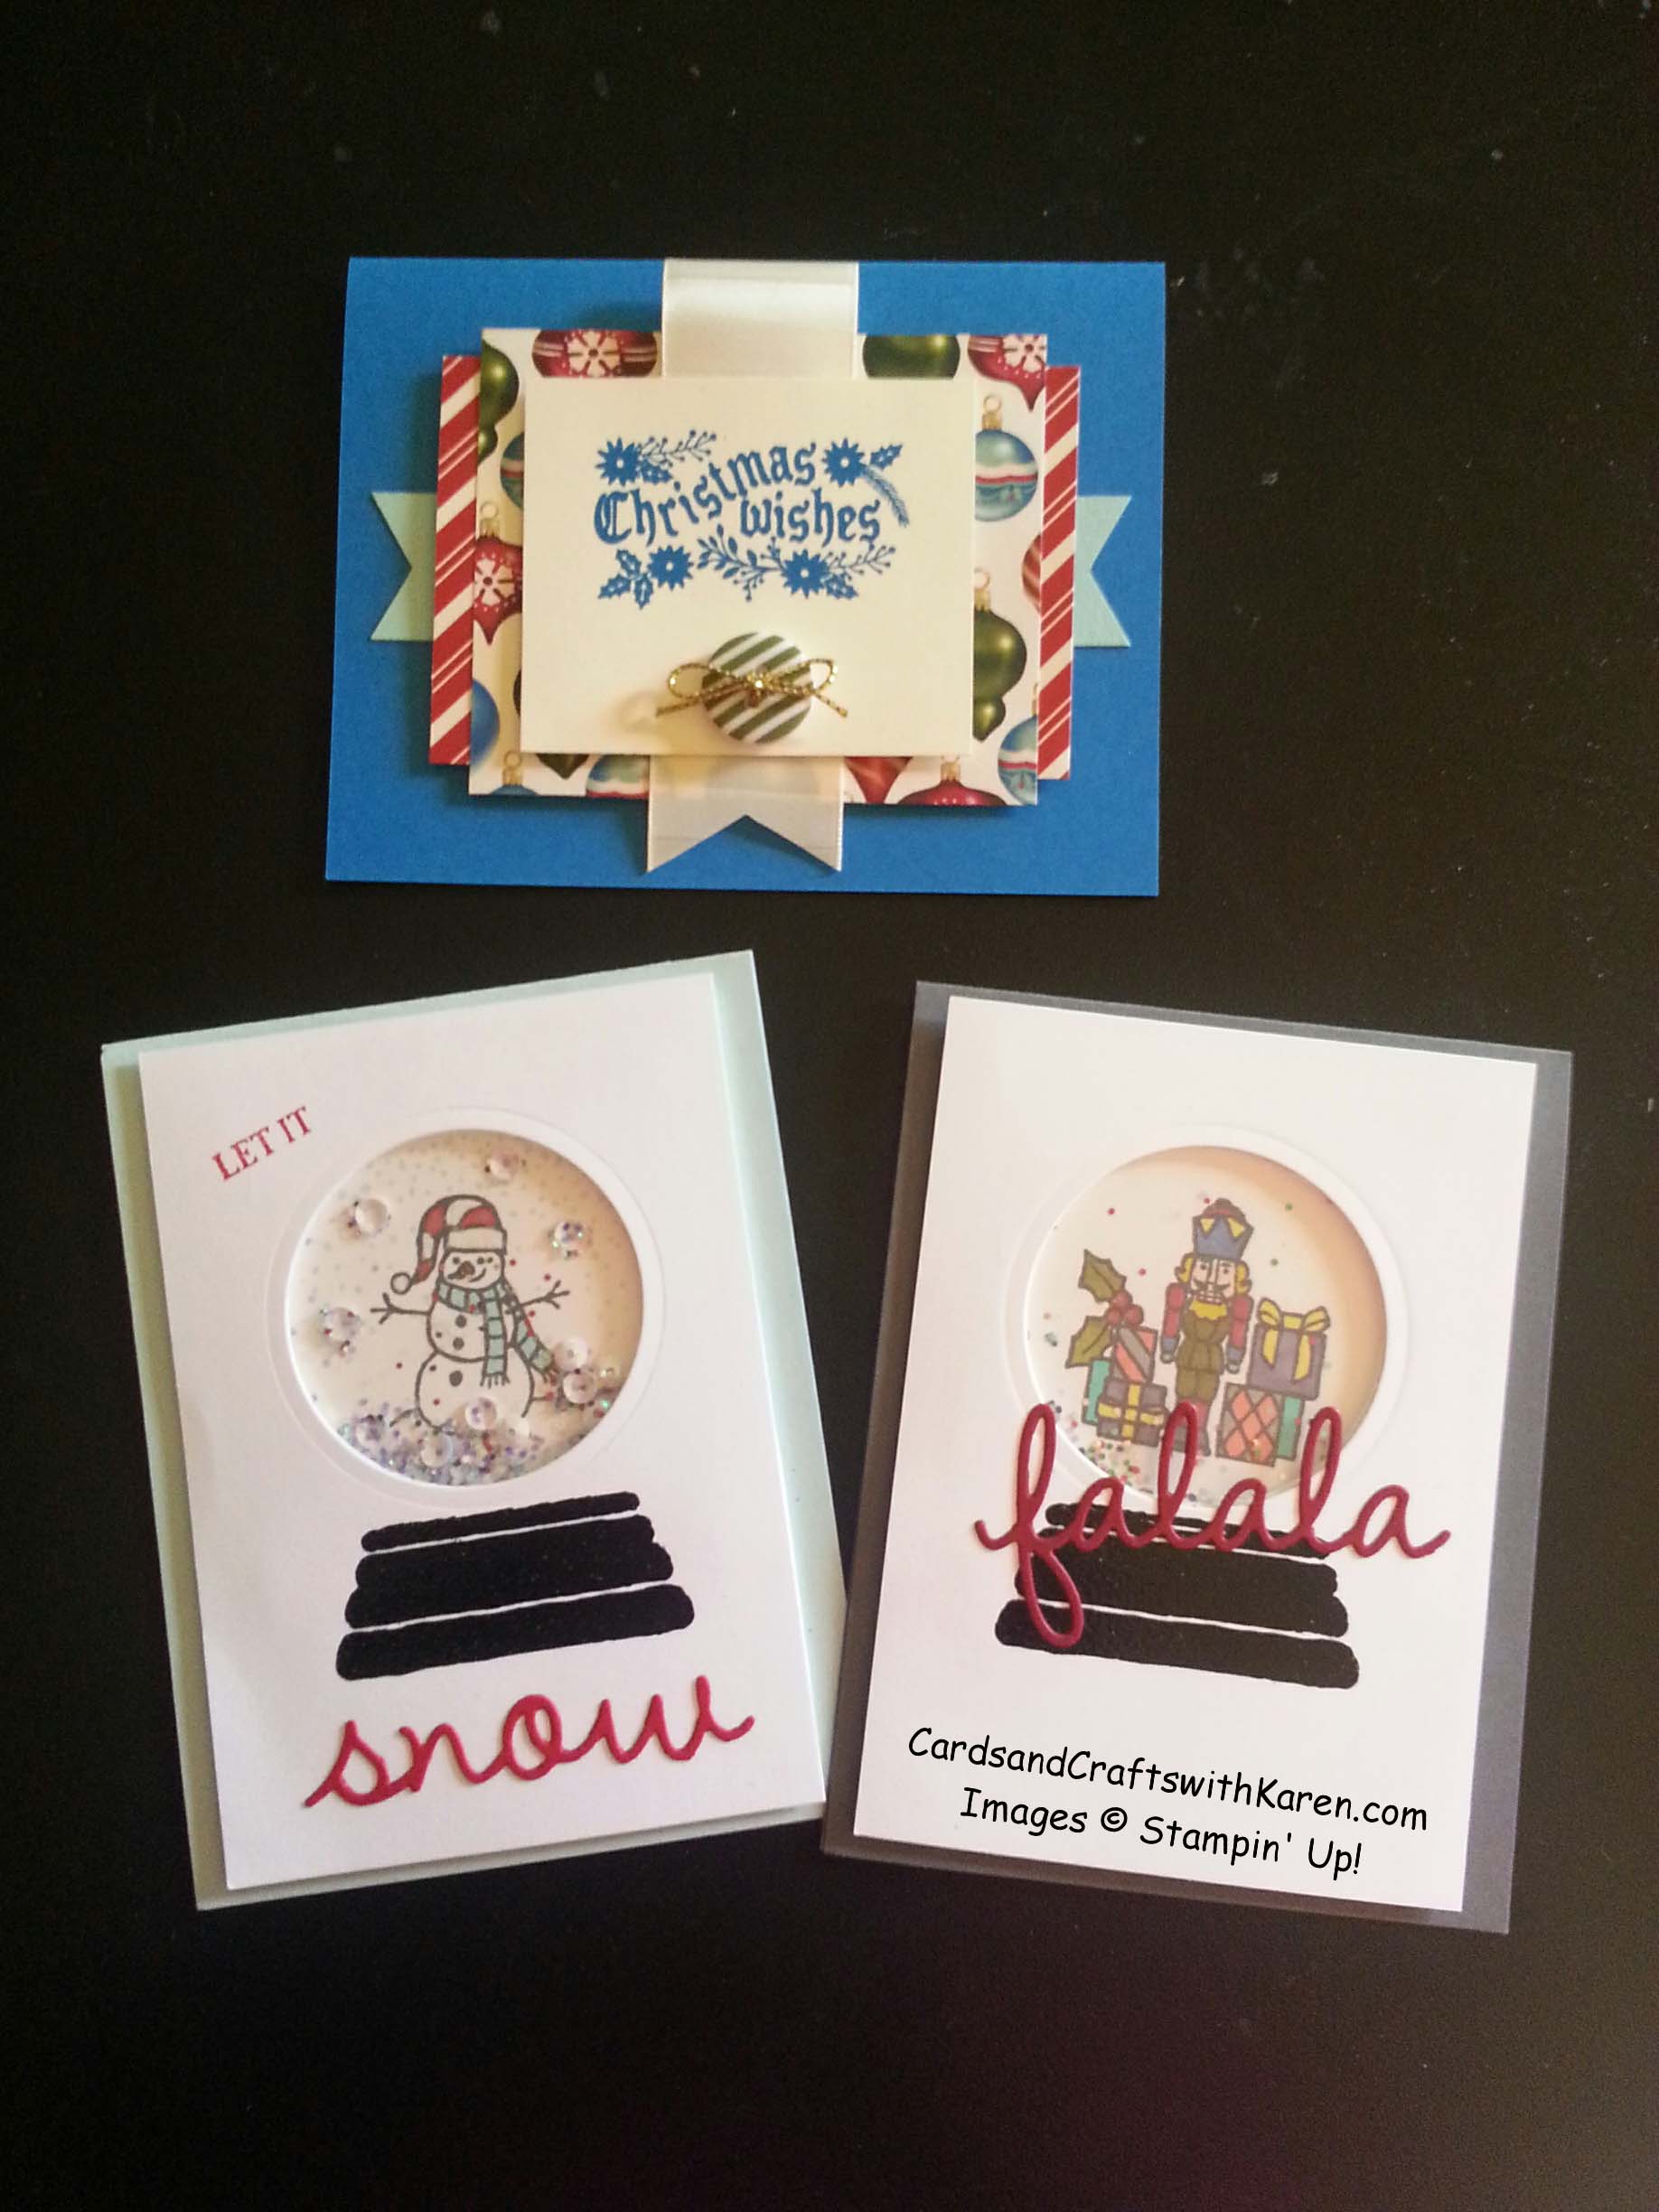
Christmas Wishes Card:
Layers in order:
- Card base – Pacific Point
- 1” x 5 ½” strip of Pool Party with banner ends, glued to card base
- Home for Christmas designer series paper – 4 ¼” x 2 ¾”, backed with Dimensional’s
- Home for Christmas designer series paper – 3 ¾” x 3 ¼”, glued
- Very Vanilla Subtle Stripped Ribbon, about 10” folded, stapled and adhered with glue dots and end(s) cut banner
- Very Vanilla 3” x 2 ½” stamped greeting from Cozy Christmas stamp set with same color as card base, adhered with Dimensional’s
- Home for Christmas Designer Button with Gold Cording, adhered with a glue dot
- Inside is Very Vanilla 4” x 5 ¼” stamped with greeting & other images from Cozy Christmas stamp set
Snowman Shaker Card (with fun foam layer):
- Card base is 4 ¼” x 11” scored at 5 ½” for top fold or 5 ½” x 8 ½” scored at 4 ¼” for side foldWhisper White outside layer is 3 ¾” x 5 ¼”
- Fun Foam layer is 3” x 5” (try to use fun foam close to the color of the outside layer)
- Center Fun Foam on the outside layer, turn over and mark a small “X” were you will die cut a circle
- Using the circle die, run through Big Shot cutting both (outside layer & cardstock) at the same time so the cut out shapes match
- Using a 3” square of Whisper White stamp image from Sparkly Seasons Stamp Set in the center of the square. Use various colored markers/pencils to color your image if desired (Sparkly Seasons bundle with matching Seasonal Frame Thinlit Dies
- Stamp Whisper White outside layer with snow globe base and greeting if desire at the top.
- In most cases greetings are 2 parts, one stamped and one die cut using the matching thinlit die
- Adhere window sheet (3” square) to the underside of the WW outside layer
- Adhere stamped image to the fun foam so the image is seen through the circle, add glitter & sequins in well, adhere front layer to seal in glitter/sequins.
- Adhere entire piece to card
Thanks for stopping by today, hope you liked the cards. Click on any of the images below for more product information and to place an on-line order. Have a great day, Craft On!
Built for Free Using: My Stampin Blog
